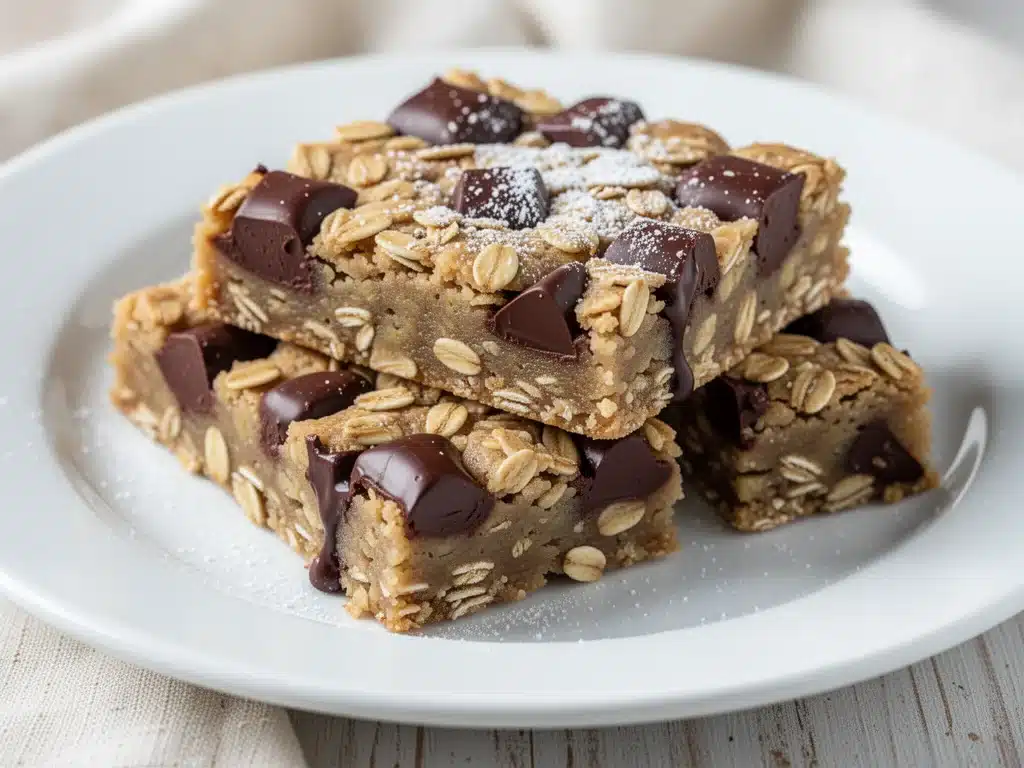
Last Tuesday, I was standing in my kitchen at 9 PM, staring into the open fridge like it held the secrets to the universe. I was tired. My kids were tired. And we were all hungry in that specific, desperate way that makes “salad” sound like a punishment rather than a meal. I had three overripe bananas that were essentially brown mush, a half-empty bag of oats, and a bar of dark chocolate that was begging to be eaten.
I didn’t want to bake a cake. I didn’t want to make cookies that required creaming butter and sugar for twenty minutes. I wanted something that felt indulgent but didn’t come with a side of guilt. So I threw those bananas, oats, and chocolate into a bowl, mixed it up, and threw it in the oven. I told myself, “If this tastes like wet cardboard, we’re ordering pizza.”
Twenty minutes later, the smell of warm banana and melting chocolate filled the house. My kids walked in, sniffed the air, and asked, “Did you make brownies?”
I didn’t correct them. Because honestly? These Healthy Banana Oat Bars with Dark Chocolate Chunks are closer to a gooey, chewy brownie than any granola bar I’ve ever made. They’re soft, they’re sweet, and they’re packed with fiber. I’ve now made this batch four times in the last month—sometimes for breakfast, sometimes for lunchbox snacks, and sometimes as a legitimate dessert when I need to stop myself from eating the entire bag of chocolate chips.
Here’s the thing about these bars: they’re ridiculously easy. You don’t need a mixer. You don’t need fancy ingredients. You just need to mash some bananas and wait. But they turn out perfectly chewy every single time, which is a miracle in my house where “perfectly chewy” is usually a myth I tell myself before the oven burns the edges.
I’ve tested this recipe with different types of oats, different levels of banana ripeness, and even different chocolate brands (because I believe in scientific rigor). And I can confidently say: this is the best way to use up those spotty bananas sitting on your counter. It’s better than banana bread because it’s less messy, easier to portion, and way more portable. Plus, they freeze beautifully, which is a lifesaver on busy mornings.
If you’re looking for a snack that satisfies your sweet tooth without derailing your healthy eating goals, stop scrolling. These bars are about to become your new best friend.
Why You’ll Love These Healthy Banana Oat Bars
There are a dozen reasons I keep making these, but let’s be real—we all have limited energy in the kitchen. Here’s why this recipe has earned a permanent spot in my weekly rotation.
- One-Bowl Wonder — Seriously. One bowl. One spoon. One baking pan. I don’t even bother washing the measuring cups if I’m being lazy (though I do wash them if my husband is watching). Cleanup takes about 30 seconds. Compare that to the mountain of dishes from my grandma’s bread pudding and you’ll see why I prefer this.
- Uses Overripe Bananas — We’ve all been there. You buy bananas for smoothies, they turn brown, and you feel guilty throwing them out. This recipe is the solution. The riper the banana, the sweeter the bars. Spotty is good. Black is perfect.
- Gluten-Free Friendly — If you use certified gluten-free oats, these are naturally gluten-free. No fancy flour blends needed. This makes them safe for my gluten-sensitive friends, who are always the first to ask for the recipe.
- No Added Sugar (Mostly) — The sweetness comes entirely from the bananas and a touch of maple syrup. The dark chocolate adds richness without being cloyingly sweet. It’s a balanced sweetness that doesn’t leave you crashing an hour later.
- Meal Prep Magic — I make a batch on Sunday, store them in the fridge, and grab one for breakfast or a mid-afternoon snack. They hold up well for up to 5 days in the fridge or 3 months in the freezer. They don’t get soggy or dry out. I’ve tested this by forgetting them in the fridge for a week (oops) and they were still fine.
- Kid-Approved — My picky eater, who usually refuses anything that “looks healthy,” devours these. The chocolate chunks are the hook, but the oat texture keeps them coming back for more.
This is my go-to when I need a snack that feels like a treat but fuels my body. No complicated techniques, no weird ingredients, just reliable, delicious food that makes everyone happy.
Ingredients You’ll Need
Here’s the best part: you probably have most of this already. This isn’t a recipe that requires a special trip to the store. It’s pantry-friendly and simple.
For the Base
Ripe bananas (3 large / about 1.5 cups mashed) — This is the foundation. They need to be very ripe. Brown spots are good. If they’re yellow, they won’t be sweet enough. I use a fork to mash them until there are no large chunks left. Measure out 1.5 cups after mashing.
Old-fashioned rolled oats (2 cups / 160g) — Don’t use instant oats; they’ll turn into mush. Don’t use steel-cut oats; they won’t cook right. Old-fashioned or “large flake” oats give that perfect chewy texture. If you need gluten-free, make sure your oats are certified GF.
Maple syrup (¼ cup / 60ml) — Pure maple syrup adds a subtle caramel flavor that pairs perfectly with banana. Honey works too, but it’s stronger. Agave nectar is neutral, but I prefer maple for the depth. Use real maple syrup, not the pancake syrup stuff.
Almond butter (⅓ cup / 85g) — This adds healthy fats and protein, and helps bind the bars together. Peanut butter works too, but it changes the flavor profile. I like almond butter because it’s milder and lets the banana shine. If you’re nut-free, use sunflower seed butter.
Vanilla extract (1 teaspoon) — Don’t skip this. It enhances the banana flavor and makes the bars taste more like a baked good than a raw oatmeal mix.
For the Flavor & Texture
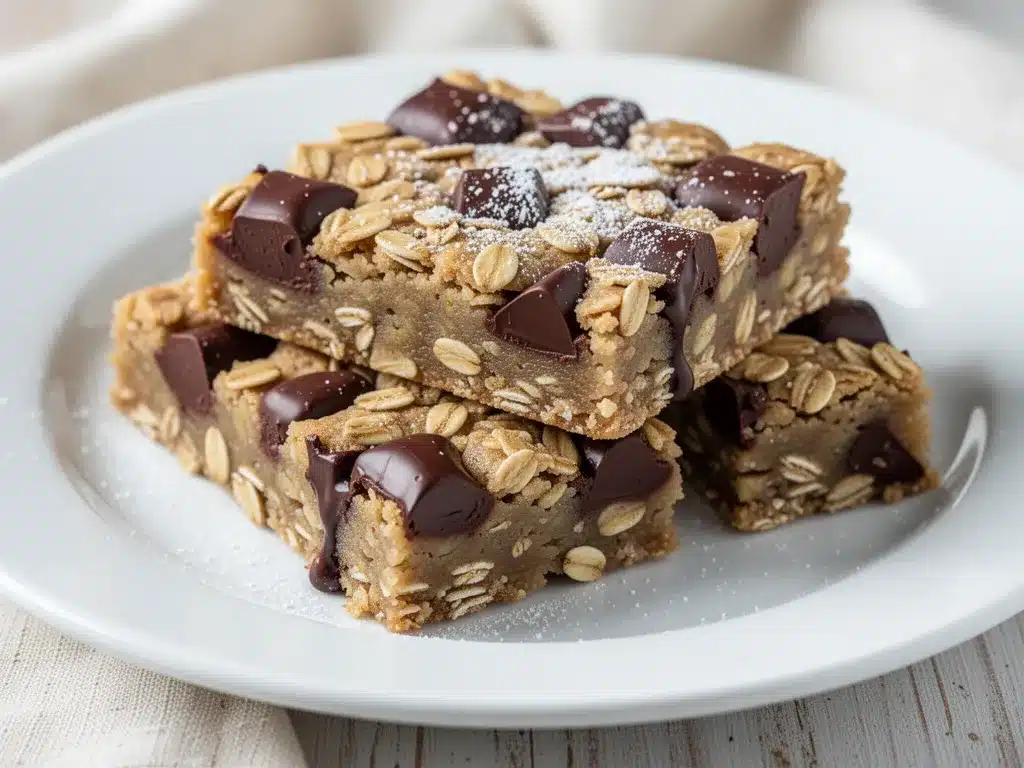
Dark chocolate chunks (½ cup / 85g) — I use 70% cocoa dark chocolate. It’s not too sweet and has a rich, intense flavor. Chocolate chips work too, but chunks melt into gooey pockets, which is what I want. If you can’t find chunks, chop a bar yourself.
Cinnamon (½ teaspoon) — Just a pinch. It adds warmth and makes the bars taste cozier. It’s subtle, so don’t overdo it.
Salt (¼ teaspoon) — Essential. Salt balances the sweetness and brings out the flavor of the bananas. Never skip salt in baking.
Optional Add-ins
Chopped walnuts or pecans (¼ cup) — Adds crunch and nuttiness. I love the contrast of soft oats and crunchy nuts. If you’re allergic to nuts, skip this or use pumpkin seeds.
Chia seeds (1 tablespoon) — I add these for extra fiber and omega-3s. They don’t change the taste, just the nutrition. You won’t notice them, which is good.
Mini chocolate chips (¼ cup) — If you want more chocolate, add these along with the chunks. My kids prefer mini chips because they’re easier to eat on the go.
Quick tip: I always buy dark chocolate in bar form and chop it myself. It melts better and tastes fresher than pre-packaged chips. It takes 2 minutes and is worth the effort.
Equipment Needed
You don’t need fancy equipment for this. Here’s what I actually use.
Large mixing bowl — Any bowl that can hold 3 cups of ingredients comfortably. I use a ceramic bowl because it’s sturdy. Glass or plastic work fine too.
Fork or potato masher — For mashing the bananas. A fork is fine for 3 bananas, but a masher is faster if you have lots to mash.
8×8 inch baking pan — This is the standard size. You can use a 9×9 pan for thinner bars, but they’ll cook faster and might dry out. I prefer 8×8 for that perfect chewy thickness.
Parchment paper — I line the pan with parchment, leaving an overhang on the sides. This is non-negotiable for me. It makes lifting the bars out of the pan so much easier. No more scraping sticky bars out of a greased pan.
Measuring cups and spoons — Standard stuff. I use metal measuring cups for dry ingredients and a liquid measuring cup for the syrup.
Spatula — A silicone spatula is best for scraping the bowl and spreading the mixture evenly in the pan.
Knife — For chopping the chocolate if you’re using a bar. A serrated knife works well for chocolate.
Cooling rack — Optional but nice. Letting the bars cool on a rack prevents them from getting soggy from trapped steam.
Tool Tip: If you don’t have parchment paper, you can grease the pan well with coconut oil or butter, but the bars might stick a little. Parchment is just easier.
How to Make It: Step-by-Step
Alright, let’s make this! I’m walking you through exactly how I do it, including the little tricks I’ve picked up.
Step 1: Prep Your Pan and Oven (5 minutes)
Preheat your oven to 350°F (175°C). Line your 8×8 inch baking pan with parchment paper, leaving a slight overhang on the long sides. This makes it easy to lift the bars out once they’re baked. Lightly grease the parchment with cooking spray or butter if you want extra insurance against sticking.
Step 2: Mash the Bananas (3 minutes)
Peel your ripe bananas and put them in a large mixing bowl. Use a fork to mash them until they’re mostly smooth with a few small lumps. You want about 1.5 cups of mashed banana. If your bananas aren’t ripe enough, they won’t be sweet enough, and the bars will taste bland. Don’t skip the ripeness check.
Step 3: Mix the Wet Ingredients (2 minutes)
To the mashed bananas, add the maple syrup, almond butter, vanilla extract, cinnamon, and salt. Whisk or stir vigorously until everything is well combined. The almond butter might be stiff, so warm it up in the microwave for 10 seconds if it’s hard to mix. The mixture should look smooth and glossy.
Step 4: Add the Oats (2 minutes)
Stir in the rolled oats until they are fully coated in the banana mixture. The oats should look wet and sticky. If it looks too dry, add a tablespoon more maple syrup. If it looks too wet, add a handful more oats. You want a thick, sticky dough, not a runny batter.
Step 5: Fold in the Chocolate (1 minute)
Gently fold in the dark chocolate chunks (and nuts if using). Be gentle so you don’t crush the oats. You want to distribute the chocolate evenly throughout the mixture.
Step 6: Press into the Pan (2 minutes)
Transfer the mixture to your prepared baking pan. Use a spatula or your hands (greased with a little oil) to press the mixture down firmly and evenly. Pack it down tight! This is crucial for bars that hold together. If it’s loose, the bars will crumble when you cut them. Aim for an even layer about ¾ inch thick.
Step 7: Bake (25-30 minutes)
Place the pan in the preheated oven and bake for 25-30 minutes. The edges should be golden brown, and the center should be set but still slightly soft. If you insert a toothpick, it should come out clean or with a few moist crumbs (not wet batter). Don’t overbake them, or they’ll be dry. They firm up as they cool.
Step 8: Cool and Cut (30 minutes)
Remove the pan from the oven and let the bars cool completely in the pan on a wire rack. This is the hardest part, but it’s necessary. If you try to cut them warm, they’ll fall apart. Once cool, use the parchment overhang to lift the bars out of the pan. Cut into 12 squares or 9 larger bars, depending on your appetite.
Total Time: About 45 minutes (10 minutes active, 35 minutes mostly hands-off)
Built-in Troubleshooting:
- Bars are too dry: You used under-ripe bananas or overbaked them. Next time, use riper bananas and check at 25 minutes.
- Bars are too wet: You didn’t press them down enough, or you added too much liquid. Pack them down tighter next time.
- Chocolate burned: Your oven runs hot. Check at 25 minutes. If the top is browning too fast, cover with foil for the last 5 minutes.
Expert Tips & Tricks
Here’s everything I’ve learned from making this dozens of times. These tips will save you from my mistakes.
Use Very Ripe Bananas
This is the #1 tip. The riper the banana, the sweeter the bars. Brown spots are good. Black is perfect. If your bananas are yellow, let them sit on the counter for a few days until they’re spotted. I even freeze ripe bananas for this recipe so they’re always ready.
Press Down Firmly
Packing the mixture down tight is what makes these bars hold together. I use the bottom of a measuring cup to press them down evenly. If you skip this, you’ll get crumbly bars instead of chewy squares.
Don’t Skip the Cool Down
I know it’s tempting to cut into them warm, but they need to cool completely. The oats continue to absorb moisture as they cool, which helps them set. If you cut them warm, they’ll be mushy. Patience pays off.
Chop Your Own Chocolate
Pre-chopped chocolate chips are convenient, but they contain anti-caking agents that prevent them from melting smoothly. Chopping a bar of dark chocolate gives you those gooey, melty pockets that make these bars special. It takes 2 minutes and makes a huge difference.
Storage is Key
Store the bars in an airtight container. They last up to 5 days in the fridge or 3 months in the freezer. I keep a batch in the fridge for quick snacks and freeze the rest for later. They thaw quickly at room temperature, so no need to microwave.
Common Mistakes (and how to avoid them):
- Mistake: Bars are crumbly Fix: Press down harder, use riper bananas, or add a bit more almond butter.
- Mistake: Bars are too sweet Fix: Use less maple syrup or choose 85% dark chocolate. Bananas vary in sweetness, so adjust to taste.
- Mistake: Bars are too dry Fix: Use riper bananas, don’t overbake, or add a splash more almond butter.
Pro Tricks I’ve Learned:
- For Extra Chewiness Add 1 tablespoon of flaxseed meal to the mixture. It binds better and adds a nutty flavor.
- For Better Texture Let the mixed dough sit for 10 minutes before pressing into the pan. This lets the oats soften slightly, resulting in a more uniform texture.
- For Party Serving Cut into smaller bite-sized squares and arrange on a platter. They’re perfect for potlucks because they’re easy to grab and eat.
Variations & Substitutions
Once you’ve nailed the basic version, here’s how you can mix it up. I’ve tried all of these.
Classic Cookie Dough Version
Add ½ cup mini chocolate chips and ½ cup chopped walnuts. Use peanut butter instead of almond butter for a more cookie-like flavor. This is my husband’s favorite variation—he says it tastes like a raw cookie dough bar.
Chai Spice Version
Add 1 teaspoon chai spice blend (or a mix of cinnamon, ginger, cardamom, and cloves) along with the cinnamon. It adds a warm, aromatic flavor that’s perfect for fall. Great with a cup of tea.
Coconut Version
Replace the almond butter with coconut oil (melted) and add ½ cup shredded coconut. Use dark chocolate chips and a pinch of salt. This is dairy-free and nut-free, making it safe for more allergies. It tastes tropical and delicious.
Protein-Packed Version
Add 1 scoop of vanilla protein powder. You might need to add 1-2 tablespoons more almond butter or milk to compensate for the dryness. This makes them more filling and great for post-workout snacks. I use whey or plant-based protein, both work.
Dietary Modifications:
- Gluten-Free Use certified gluten-free oats. Everything else is naturally gluten-free.
- Dairy-Free Use maple syrup and dark chocolate that’s labeled dairy-free. Most dark chocolate is dairy-free, but check the label.
- Nut-Free Use sunflower seed butter or soy butter instead of almond butter. Use sunflower seeds instead of nuts.
- Sugar-Free Use stevia or monk fruit sweetener instead of maple syrup. You’ll need to adjust the amount based on the sweetener’s potency. The chocolate should also be sugar-free.
Serving & Storage
How to Serve
I usually serve these straight from the fridge—they’re firm and satisfying. But here are other ways I’ve enjoyed them:
- Warm Microwave a bar for 20 seconds. The chocolate melts and it feels like a warm brownie.
- With Coffee Perfect companion for morning coffee or afternoon tea.
- With Milk My kids dip them in cold milk like cookies. It’s a game-changer.
- With Yogurt Crumble a bar over Greek yogurt for a breakfast bowl. Adds crunch and sweetness.
Toppings Bar
When I have guests, I put out: extra dark chocolate chunks, crushed nuts, a drizzle of peanut butter, and a sprinkle of sea salt. Everyone customizes their bar.
Storage Instructions
Refrigerator: Store in an airtight container for up to 5 days. They get firmer in the fridge, which I like. If you prefer chewier bars, let them sit at room temperature for 10 minutes before eating.
Freezer: Store in a freezer-safe bag or container for up to 3 months. They thaw quickly at room temperature. I freeze them in individual portions for easy grab-and-go snacks.
Room Temperature: Store in an airtight container for up to 3 days. If it’s hot outside, keep them in the fridge to prevent the chocolate from melting.
Pro tip: If the bars seem dry after storing, add a damp paper towel to the container for 10 minutes. The steam will rehydrate them slightly.
Nutrition Information
I’m not a nutritionist, but here’s the breakdown if you’re tracking.
Per Bar (based on 12 bars):
- Calories: 180
- Protein: 4g
- Carbs: 28g
- Fiber: 3g
- Sugar: 14g
- Fat: 7g
- Saturated Fat: 3g
- Cholesterol: 0mg
- Sodium: 50mg
What’s Good:
- Decent fiber from oats and bananas
- Healthy fats from almond butter and dark chocolate
- No refined sugar (mostly)
- Portion-controlled (1 bar is a reasonable snack)
What to Know:
- Higher in carbs from bananas and oats
- Contains nuts (unless substituted)
- Moderate calories (good for a snack, not a meal)
My Take:
Look, this is a snack with chocolate and bananas. It’s not a diet food. But it’s way better than a granola bar from the store, costs less, and I know exactly what’s in it. When I want to make it lighter, I reduce the chocolate and increase the oats. But usually? I just eat a reasonable portion and enjoy it.
Final Thoughts
So that’s my go-to Healthy Banana Oat Bars with Dark Chocolate Chunks! I’ve probably talked your ear off at this point, but when you make a recipe this often, you have a lot to say about it.
This has saved my snack game more times than I can count. It’s my answer to “what’s for a snack” when I’m tired, don’t want to cook, and still want something that tastes really good. My kids are happy, my husband’s happy, and I’m happy because I’m not stressed about making something healthy.
Make it yours! Try different add-ins, swap in your favorite nut butter, adjust the chocolate. The best recipes are the ones you adapt to your family’s tastes. If you make these, drop a comment and let me know what you think! I love hearing how recipes turn out in your kitchen. And if something doesn’t work, tell me that too—I’m here to help troubleshoot.
Happy baking! And I hope your kitchen smells half as good as mine does right now.
Frequently Asked Questions
Can I use instant oats instead of rolled oats?
You can, but the texture will be different. Instant oats are thinner and will result in a softer, more cake-like bar. Old-fashioned rolled oats give that perfect chewy texture I love. If you use instant oats, reduce the baking time by 5 minutes to prevent drying out.
Why did my bars fall apart when I cut them?
This usually happens if you didn’t press them down firmly enough, or if you cut them while they were still warm. Pack the mixture down tight in the pan, and let them cool completely in the pan before cutting. The oats need time to set and absorb the moisture.
Can I make these ahead for a party?
Absolutely! I make them 2 days ahead and store them in the fridge. They actually taste better after a day or two as the flavors meld together. Just keep them in an airtight container until you’re ready to serve. They travel well too, making them perfect for potlucks.
Can I use peanut butter instead of almond butter?
Yes! Peanut butter works great and adds a richer, more intense flavor. It’s also cheaper if that’s a concern. Just make sure it’s smooth peanut butter, not crunchy, unless you want chunks of peanut in your bars.
How do I store leftovers?
Store in an airtight container in the fridge for up to 5 days. For longer storage, freeze them in a freezer-safe bag for up to 3 months. They thaw quickly at room temperature, so no need to microwave.
Can I freeze the batter?
It’s better to bake them first and then freeze the bars. Freezing the batter can change the texture of the oats, making them mushy when thawed. Baking first ensures the best texture.
Are these bars vegan?
If you use maple syrup, dark chocolate that’s dairy-free, and almond butter, they are vegan. Just check the labels on your chocolate and nut butter to ensure they don’t contain hidden dairy or honey.
Pin This Recipe!
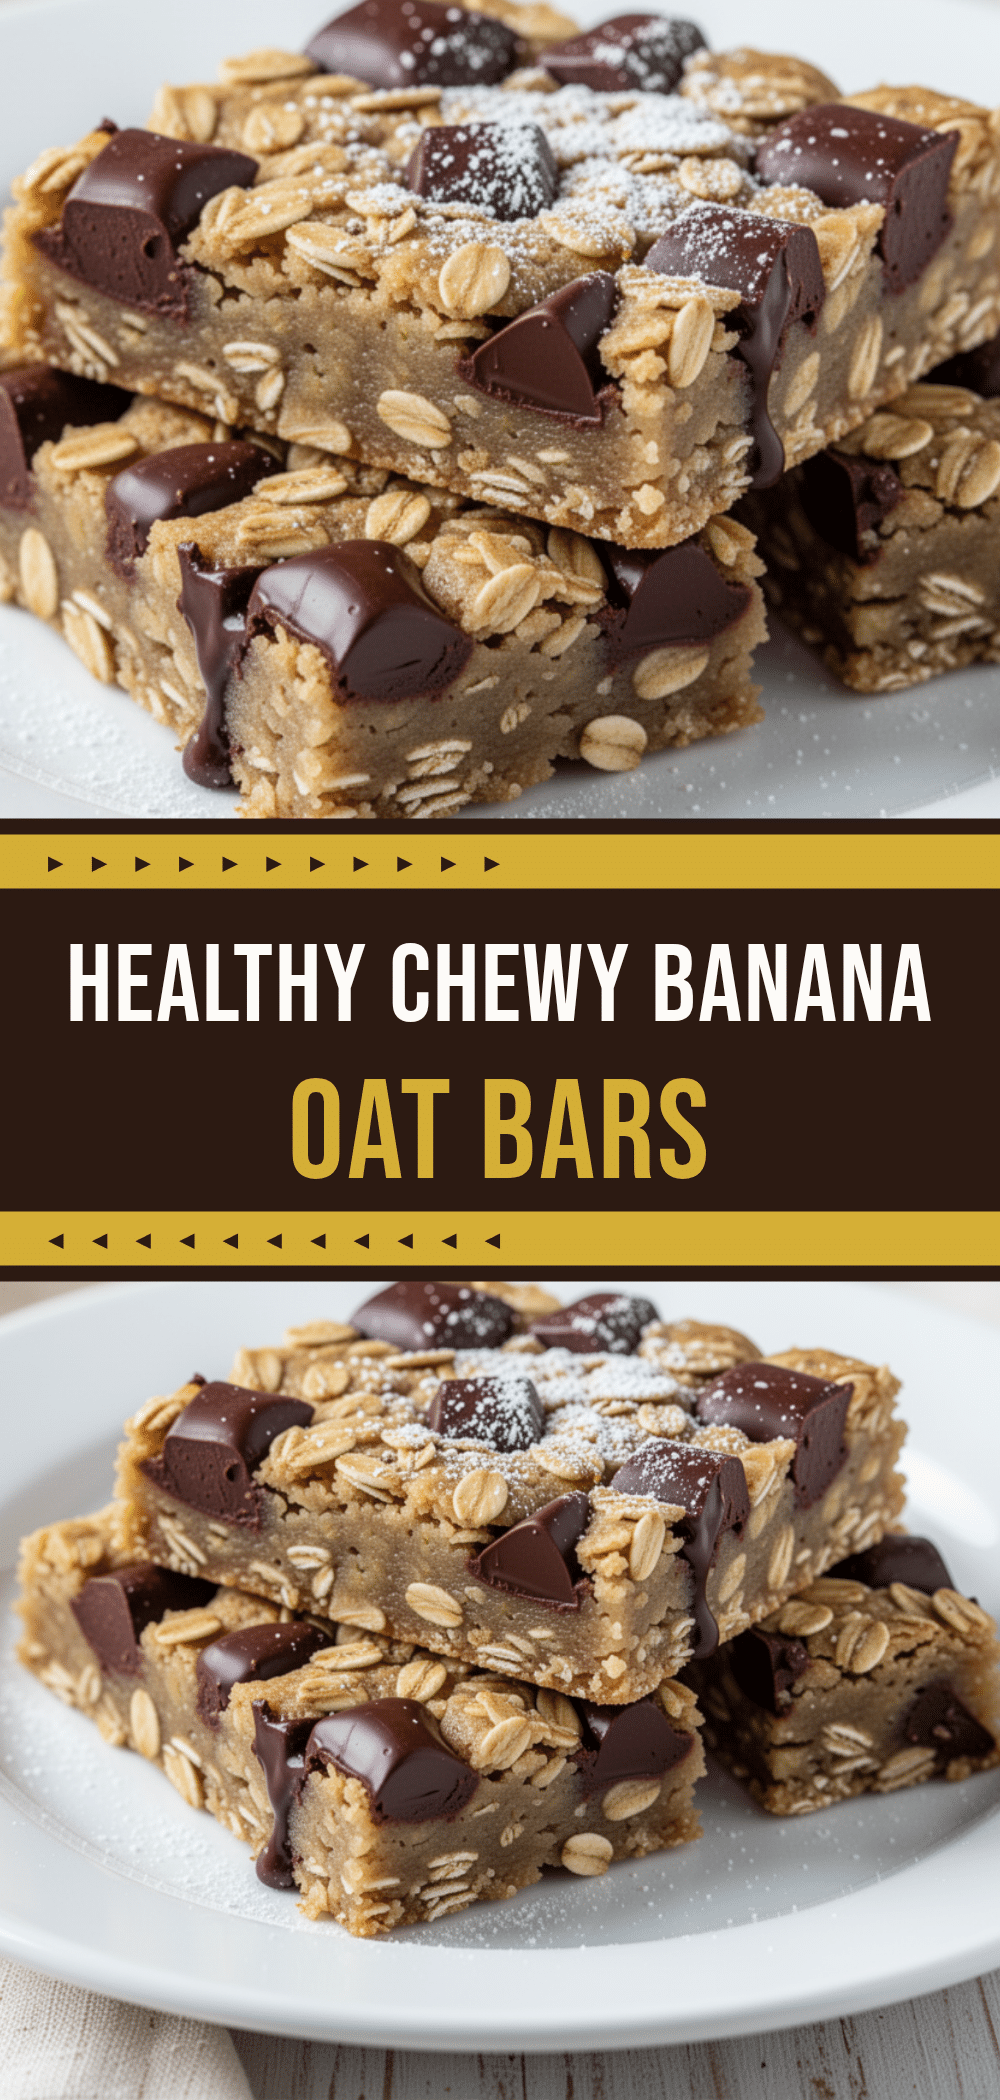
Healthy Banana Oat Bars with Dark Chocolate Chunks
- Total Time: 45 minutes
- Yield: 12 servings 1x
Description
These easy, one-bowl banana oat bars are chewy, sweet, and packed with fiber. Made with ripe bananas, rolled oats, and dark chocolate, they are a healthy, gluten-free friendly snack that tastes like a brownie.
Ingredients
- 3 large ripe bananas (about 1.5 cups mashed)
- 2 cups old-fashioned rolled oats (160g)
- ¼ cup pure maple syrup (60ml)
- ⅓ cup almond butter (85g)
- 1 teaspoon vanilla extract
- ½ teaspoon cinnamon
- ¼ teaspoon salt
- ½ cup dark chocolate chunks (85g)
- Optional: ¼ cup chopped walnuts or pecans
- Optional: 1 tablespoon chia seeds
- Optional: ¼ cup mini chocolate chips
Instructions
- Preheat oven to 350°F (175°C). Line an 8×8 inch baking pan with parchment paper, leaving an overhang on the sides, and lightly grease.
- In a large mixing bowl, mash the ripe bananas with a fork until mostly smooth.
- Add maple syrup, almond butter, vanilla extract, cinnamon, and salt to the bananas. Stir vigorously until well combined and smooth.
- Stir in the rolled oats until fully coated in the wet mixture. The mixture should be thick and sticky.
- Gently fold in the dark chocolate chunks (and nuts if using).
- Transfer the mixture to the prepared pan. Press down firmly and evenly with a spatula or greased hands to pack it tight.
- Bake for 25-30 minutes, until edges are golden brown and the center is set but slightly soft.
- Remove from oven and let cool completely in the pan on a wire rack (about 30 minutes) to allow bars to set.
- Lift bars out using parchment overhang and cut into 12 squares or 9 larger bars.
Notes
Use very ripe bananas for maximum sweetness. Press the mixture down firmly to ensure bars hold together. Do not cut while warm, or they will crumble. For extra chewiness, let the mixed dough sit for 10 minutes before pressing into the pan. Store in an airtight container for up to 5 days in the fridge or 3 months in the freezer.
- Prep Time: 10 minutes
- Cook Time: 25-30 minutes
- Category: Snack
- Cuisine: American
Nutrition
- Serving Size: 1 bar
- Calories: 180
- Sugar: 14
- Sodium: 50
- Fat: 7
- Saturated Fat: 3
- Carbohydrates: 28
- Fiber: 3
- Protein: 4
Keywords: healthy banana oat bars, gluten-free snacks, one-bowl recipe, kid-friendly snacks, oatmeal bars, dark chocolate banana bars, meal prep snacks


