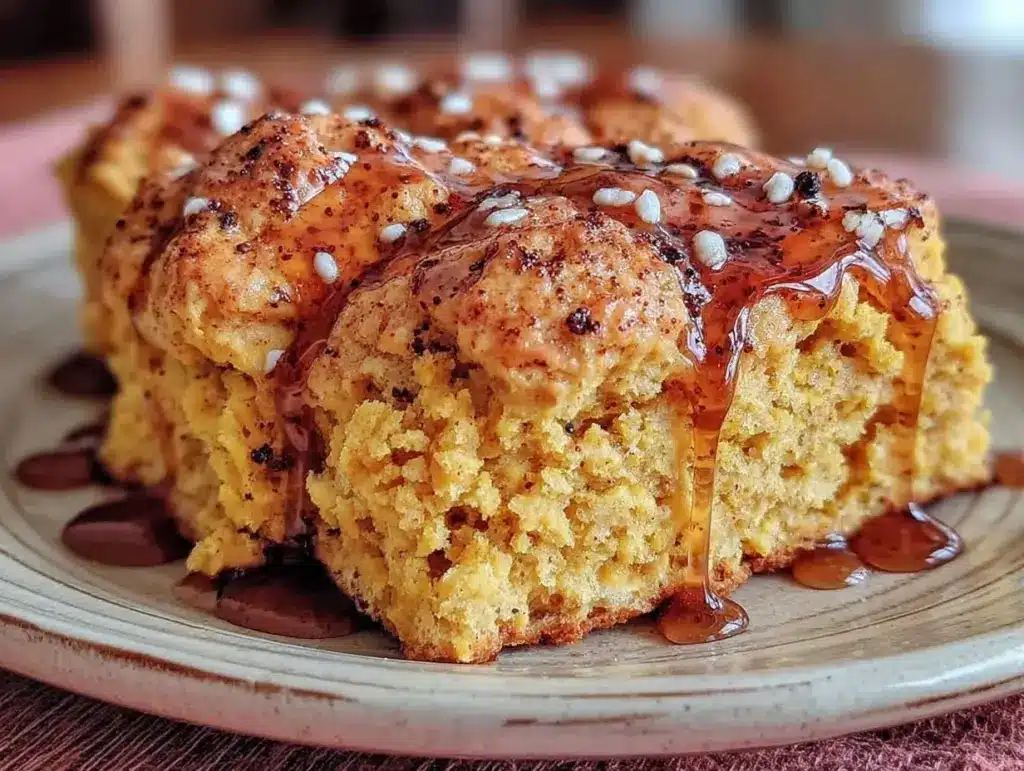
I still remember the first time I tried to make pumpkin scones. I was living in a tiny apartment with a stove that clicked twice before lighting, and I had just bought a can of pumpkin puree because I wanted to feel cozy. I followed a fancy blog recipe that called for creaming butter into sugar, whipping egg whites, and folding in flour with the precision of a surgeon. I was proud of myself for an hour. Then I took a bite.
It was dense. Dense like a brick. Dense like I had just bitten into a wet sponge that had been left out in the rain. I threw the rest in the trash and ordered pizza. That was three years ago. Since then, I’ve tested this easy pumpkin scone with maple glaze recipe at least twelve times. I’ve tweaked the flour, I’ve changed the spice blend, and I’ve even tried using maple syrup in the dough instead of the glaze. I’ve learned what works, what doesn’t, and exactly why my first attempt failed.
Here’s the thing about scones: most recipes make you feel like you need a culinary degree. This one doesn’t. It’s simple. It’s forgiving. It’s the kind of baking that makes you feel capable, not confused. When I make these easy pumpkin scones with maple glaze, I use simple ingredients you probably already have. I mix them in one bowl. I cut them into wedges. I bake them until they’re golden and smell like autumn.
People ask me why I bother baking when I can just buy muffins at the grocery store. It’s because these scones are different. They have a crisp, sugary edge and a soft, cake-like center. The maple glaze isn’t just sweet; it’s salty, rich, and brings everything together. If you’re looking for a fall recipe that won’t intimidate you, this is it. This easy pumpkin scone with maple glaze is the only thing you need to make this weekend.
Why You’ll Love This Recipe
There are a hundred pumpkin recipes out there. Why this one? Because it respects your time and your intelligence. It doesn’t ask for fifteen ingredients or three hours of prep. It asks for ten minutes of your life and gives you something that tastes like you spent all day in the kitchen.
- One-Bowl Simplicity — You literally dump everything into a large bowl. No mixer. No stand mixer. No hand-cranking arms. I made these while watching TV last night. It’s that easy. This is my go-to when I want to bake but don’t want to do dishes.
- Beginner-Proof Texture — The biggest fear with scones is tough, chewy results. I’ve solved that. By using a specific mix of butter and pumpkin puree, the texture stays tender and crumbly, not hard as rock. I learned this the hard way after my first brick-like attempt.
- Real Flavor, Not Just Spice — Many pumpkin recipes taste like they’re made from powder. This one uses real canned pumpkin puree (not pie filling, please read my notes below) and a robust spice blend that tastes like actual fall. It’s warm, spiced, and comforting without being cloying.
- The Maple Glaze Factor — Plain scones are fine. Scones with a maple glaze are unforgettable. The glaze adds a salty-sweet crunch that contrasts with the soft interior. It’s the difference between a snack and a treat. Trust me on the glaze; don’t skip it.
- Foolproof Scaling — Want to make half? Want to make double? The math works. I’ve made these for two people and for a crowd of ten. The method doesn’t change. This is my reliable backup for any occasion, from a quiet Tuesday morning to a harvest party.
This is my go-to when I want to impress guests without stressing. It’s the easiest pumpkin scone with maple glaze you will ever make.
Key Ingredients
You don’t need a specialty store for this. You need pantry staples. Here’s exactly what goes into these easy pumpkin scones with maple glaze, and why each part matters.
For the Scone Dough
All-Purpose Flour (2 ½ cups / 315g) — This is your base. Don’t use self-rising flour unless you adjust the baking powder and salt. I always spoon and level my flour. Scooping directly from the bag packs it down, and you end up with dry, crumbly scones. Spoon, then level with a knife. It’s a small habit that saves big headaches.
Baking Powder (2 tsp / 8g) — This is what makes them rise. Make sure yours isn’t old. If you bought it two years ago, toss it. Fresh baking powder is the difference between a flat disc and a fluffy scone. I keep a fresh can in my pantry at all times.
Granulated Sugar (⅓ cup / 65g) — Not too much. We want sweetness, but we don’t want to mask the pumpkin. This amount gives a subtle sweetness that pairs perfectly with the maple glaze later. If you hate sweet things, you can drop it to ¼ cup, but I recommend keeping it.
Pumpkin Pie Spice (1 ½ tsp / 3g) — This is the flavor backbone. If you don’t have a blend, mix ½ tsp cinnamon, ½ tsp ginger, ¼ tsp nutmeg, and a pinch of cloves. But honestly? Just buy the blend. It’s cheap and it tastes better than your homemade mix.
Salt (½ tsp / 3g) — Salt isn’t just for flavor; it’s for structure. It strengthens the gluten slightly and makes the spices pop. Don’t skip it. I use fine sea salt.
Unsalted Butter (½ cup / 113g, cold and cubed) — Cold butter is non-negotiable. If your butter is soft, the scones will spread too much and lose their shape. I cube it straight from the fridge. If you’re worried, pop the cubes in the freezer for 10 minutes before adding them to the flour.
Heavy Cream (½ cup / 120ml, cold) — This binds the dough. It adds fat and tenderness. Whole milk works, but heavy cream makes them richer. Keep it cold. Warm cream melts the butter too early.
Pumpkin Puree (½ cup / 120g) — Again, make sure it’s 100% pure pumpkin, not pumpkin pie filling. Pie filling has sugar and spices already, which will throw off the balance. I use Libby’s or a generic store brand. Both work fine.
For the Maple Glaze
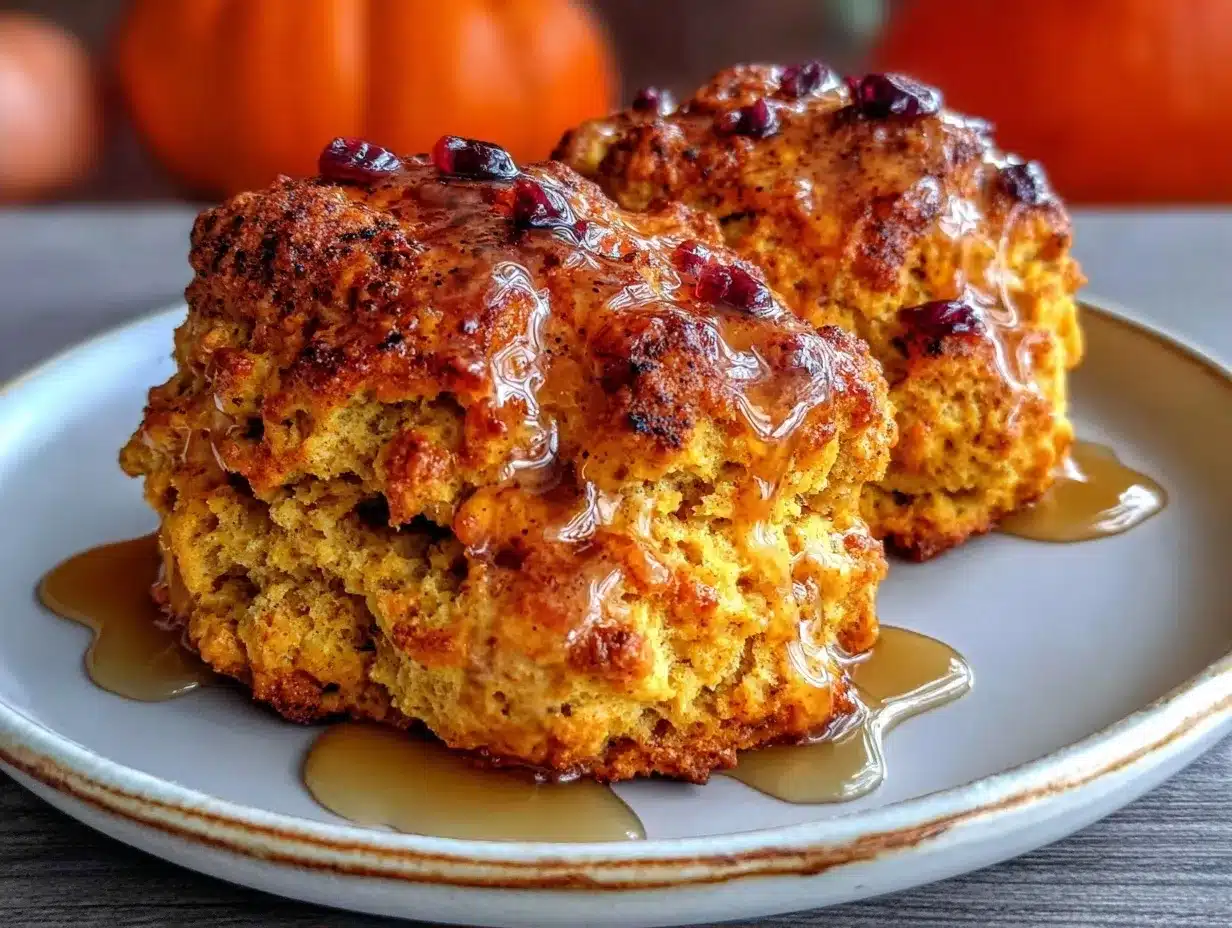
Maple Syrup (3 tbsp / 45ml) — Use real maple syrup. Not “pancake syrup” or “maple-flavored syrup.” The latter is corn syrup with flavoring. Real maple syrup has depth. I use Grade A Dark or Grade B for that robust maple taste.
Confectioners’ Sugar (1 cup / 120g) — This creates the glaze’s body. Sift it if it’s lumpy. Lumpy glaze looks messy on your beautiful scones.
Milk (1-2 tbsp / 15-30ml) — Just enough to thin the glaze to a drizzle-able consistency. Whole milk works best.
Salt (a pinch / 1g) — This is the secret. A tiny pinch of salt in the sweet glaze cuts the sugar and makes the maple flavor taste more intense. It’s a pro trick that takes three seconds.
Tools Needed
You don’t need fancy equipment. Here’s what I use, and what you can swap.
Large Mixing Bowl — I use a 4-quart stainless steel bowl. It’s wide enough to mix everything without flour flying everywhere. A glass bowl works too, but metal conducts heat slightly differently, so just be mindful.
Pastry Blender or Fork — To cut the butter into the flour. I use a fork because it’s easier to clean, but a pastry blender is faster. If you don’t have either, use your fingers, but keep them cold. Rub the butter into the flour until it looks like coarse crumbs.
Baking Sheet — I use a half-sheet pan (18×13 inches). Line it with parchment paper. Parchment is your best friend. It prevents sticking and makes cleanup a joke. I’ve burned scones on bare pans before; never again.
Paring Knife — For cutting the dough into wedges. A sharp knife gives you clean edges. A dull knife squishes the dough and makes them stick together.
Whisk — For the glaze. Small is fine. Just get those lumps out.
How to Make Easy Pumpkin Scones with Maple Glaze
Let’s get into the nitty-gritty. This is the part where you actually make the food. I’m walking you through it step-by-step.
Step 1: Prep Your Dry Ingredients (5 minutes)
Preheat your oven to 400°F (200°C). Line your baking sheet with parchment paper. In your large mixing bowl, whisk together the flour, baking powder, sugar, pumpkin pie spice, and salt. Make sure there are no clumps of baking powder. Whisk it until it’s uniform. This ensures every bite tastes the same.
Step 2: Cut in the Butter (3 minutes)
Add the cold, cubed butter to the flour mixture. Here’s the key: you want pea-sized chunks of butter. Don’t overwork it. If you turn the butter into powder, you lose the flaky layers. Use a pastry blender or a fork to press the butter into the flour. It should take about 2-3 minutes. You’re looking for a texture like coarse sand with visible little pieces of butter. That’s where the flakiness comes from.
Step 3: Add Wet Ingredients (2 minutes)
Make a well in the center of the flour mixture. Pour in the cold heavy cream and the pumpkin puree. Stir gently with a wooden spoon or a spatula. Mix just until the dough starts to come together. It will look shaggy and dry. That’s okay. If you overmix now, you’ll develop gluten, and your scones will be tough. Stop when there are no dry patches of flour left.
Step 4: Shape the Dough (5 minutes)
Turn the dough out onto a lightly floured surface. It will be sticky. Don’t add more flour unless it’s truly unmanageable. Gently pat it into a circle about 1-inch thick. Don’t knead it. Just press it. Kneading develops gluten. We want tender scones, not bread. If the dough sticks to your hands, wet your hands slightly with water instead of adding more flour.
Step 5: Cut and Bake (18-20 minutes)
Using a sharp paring knife or a bench scraper, cut the circle into 8 equal wedges. Place them on the prepared baking sheet, about 2 inches apart. They will spread a little. Bake for 18-20 minutes. You’ll know they’re done when the edges are golden brown and the tops look set. A toothpick inserted into the center should come out clean or with a few moist crumbs (not wet batter).
Total Time: 30 minutes (5 prep, 20 bake, 5 glaze).
Expert Tips
Here’s everything I learned from making this too many times. These are the secrets that keep my scones from failing.
The Cold Butter Rule
I can’t stress this enough. Cold butter. If your butter is room temperature, the scones will spread into flat pancakes. I learned this the hard way in my first attempt. I left the butter out to “soften” and ended up with dense, greasy discs. Keep the butter in the fridge until the second you add it to the bowl. If your kitchen is hot, put the flour bowl in the fridge for 10 minutes before mixing.
Don’t Overmix the Dough
This is the #1 mistake home bakers make. Once the wet and dry ingredients touch, gluten starts to form. You want minimal gluten for a tender scone. Mix until *just* combined. It’s okay if the dough looks a little messy. It will come together in the oven. If you’re mixing for more than 30 seconds, you’re probably doing too much.
The Glaze Consistency Test
When making the glaze, start with less milk than you think you need. Add it one teaspoon at a time. You want it thick enough to coat the back of a spoon, but thin enough to drizzle. If it’s too runny, it will soak into the scone and disappear. If it’s too thick, it will crack and flake off. Aim for a ribbon that sits on the surface for a second before sinking in.
Cooling Before Glazing
Let the scones cool for at least 10 minutes before adding the glaze. If they’re hot, the glaze will melt instantly and soak in. If they’re completely cold, the glaze might not stick as well. Warm scones are the sweet spot. They’re still soft, but the glaze sets on top for that perfect crunchy finish.
Recipe Variations
Once you’ve nailed the basic version, here’s how to mix it up. These easy pumpkin scones with maple glaze are a blank canvas.
White Chocolate Chip Pumpkin
Add ½ cup of white chocolate chips to the dough after you add the pumpkin. It’s sweet, creamy, and pairs beautifully with the spice. It’s like a pumpkin cookie in scone form.
Pecan Praline Scones
Stir in ½ cup of chopped pecans and 2 tbsp of brown sugar into the dough. The nuts add crunch, and the brown sugar caramelizes slightly in the oven. It’s richer and more complex.
Chai Spice Swap
Instead of pumpkin pie spice, use chai tea spice blend. It adds cardamom and black pepper, which gives a different, more aromatic warmth. It’s great if you’re a chai latte fan.
Gluten-Free Option
You can use a 1-to-1 gluten-free flour blend (like Bob’s Red Mill or King Arthur). The texture might be slightly more crumbly, but it still works. Just make sure your baking powder is gluten-free.
Vegan Twist
Swap the heavy cream for full-fat coconut milk and the butter for vegan butter sticks. The glaze works fine with maple syrup and non-dairy milk. It’s surprisingly moist and holds together well.
Serving & Storage
Serving Suggestions:
I serve these warm, straight from the oven. They pair perfectly with a hot cup of coffee or tea. If you want to lean into the fall vibe, serve them alongside my spiced apple cider sangria for a cozy brunch. They’re also great with a dollop of whipped cream or a slice of maple pecan pumpkin bread on the side for a full spread.
Storage:
Store leftover scones in an airtight container at room temperature for up to 2 days. They stay soft. If you want to eat them later, reheat them in the microwave for 15-20 seconds to restore that fresh-baked texture. They don’t freeze well with the glaze on, but you can freeze the plain scones for up to 3 months. Thaw and glaze when you’re ready to eat.
Nutrition Information
I’m not a nutritionist, but here’s the breakdown per scone (glazed):
| Nutrient | Amount |
|---|---|
| Calories | 280 |
| Protein | 4g |
| Carbs | 38g |
| Fiber | 1g |
| Fat | 12g |
| Sodium | 250mg |
My Take:
These are indulgent. They have butter, sugar, and cream. They’re not a health food. But they’re better than store-bought pastries because you know exactly what’s in them. Enjoy them as a special treat, not a daily staple.
Final Thoughts
Making these easy pumpkin scones with maple glaze is one of the simplest joys in baking. It’s not about perfection; it’s about the smell of spices in your kitchen and the satisfaction of a warm, soft treat in your hands. You really can’t mess this up if you follow the steps. The ingredients are forgiving, and the method is straightforward.
If you make this, drop a comment! I love hearing how it turns out in your kitchen. Did you add white chocolate? Did you use real maple syrup? Let me know. And if you’re looking for more easy fall desserts, check out my pumpkin spice tiramisu or my cinnamon sugar pumpkin donut muffins. They’re all beginner-friendly and delicious.
Happy cooking!
FAQs
Q: Can I use pumpkin pie filling instead of pure pumpkin?
A: No. Pumpkin pie filling already has sugar and spices added. If you use it, your scones will be too sweet and the texture will be wrong. Stick to 100% pure pumpkin puree. It’s the key to getting the balance right.
Q: Why are my scones dry?
A: This usually happens if you overmix the dough or overbake them. Make sure you stop mixing when the dough just comes together. Also, check them at 16 minutes. Ovens vary. If the edges are golden, they’re done. Don’t wait for the center to look completely dry.
Q: Can I make these ahead of time?
A: You can prep the dough and cut the wedges, then freeze them on the baking sheet. Once frozen solid, move them to a bag. Bake straight from frozen, adding 2-3 minutes to the bake time. The glaze should be added after baking.
Q: Do I need to sift the flour?
A: No. Spooning and leveling is enough. Sifting can actually pack the flour down if you’re not careful. Just whisk it with the baking powder and spices to break up any clumps.
Q: Can I substitute the heavy cream with milk?
A: You can, but the scones will be less rich and slightly less tender. Heavy cream adds fat, which tenderizes the gluten. If you only have milk, use whole milk, and don’t add too much. Add it slowly until the dough holds together.
Pin This Recipe!
Easy Pumpkin Scones with Maple Glaze
- Total Time: 35 minutes
- Yield: 8 servings 1x
Description
A beginner-friendly, one-bowl pumpkin scone recipe featuring a tender, crumbly texture and a rich, salty-sweet maple glaze. Perfect for fall baking with simple pantry staples.
Ingredients
- 2 ½ cups (315g) All-Purpose Flour
- 2 tsp Baking Powder
- ⅓ cup (65g) Granulated Sugar
- 1 ½ tsp Pumpkin Pie Spice
- ½ tsp Salt
- ½ cup (113g) Unsalted Butter, cold and cubed
- ½ cup (120ml) Heavy Cream, cold
- ½ cup (120g) Pumpkin Puree (100% pure, not pie filling)
- 3 tbsp (45ml) Maple Syrup (for glaze)
- 1 cup (120g) Confectioners’ Sugar (for glaze)
- 1–2 tbsp Milk (for glaze)
- Pinch of Salt (for glaze)
Instructions
- Preheat oven to 400°F (200°C) and line a baking sheet with parchment paper.
- In a large mixing bowl, whisk together the flour, baking powder, sugar, pumpkin pie spice, and salt until uniform.
- Add the cold, cubed butter to the dry ingredients. Use a pastry blender or fork to cut the butter into the flour until the mixture resembles coarse sand with pea-sized chunks of butter.
- Make a well in the center and pour in the cold heavy cream and pumpkin puree. Stir gently with a wooden spoon or spatula just until the dough comes together and no dry patches remain. Do not overmix.
- Turn the dough out onto a lightly floured surface. Gently pat it into a circle about 1-inch thick. Do not knead.
- Cut the circle into 8 equal wedges using a sharp paring knife or bench scraper.
- Place wedges on the prepared baking sheet, about 2 inches apart.
- Bake for 18-20 minutes until edges are golden brown and tops look set. A toothpick inserted into the center should come out clean or with moist crumbs.
- Let scones cool for at least 10 minutes before glazing.
- For the glaze, whisk together maple syrup, confectioners’ sugar, milk, and a pinch of salt until smooth and drizzle-able.
- Drizzle the glaze over the warm scones and serve.
Notes
Ensure butter and cream are very cold to prevent spreading. Do not overmix the dough to avoid tough scones. Use 100% pure pumpkin puree, not pumpkin pie filling. For best results, let scones cool slightly before glazing so the glaze sets properly.
- Prep Time: 15 minutes
- Cook Time: 20 minutes
- Category: Breakfast
- Cuisine: American
Nutrition
- Serving Size: 1 scone
- Calories: 280
- Sugar: 22
- Sodium: 250
- Fat: 12
- Saturated Fat: 7
- Carbohydrates: 38
- Fiber: 1
- Protein: 4
Keywords: pumpkin scones, maple glaze, fall baking, easy scone recipe, beginner baking, one-bowl recipe, autumn dessert


