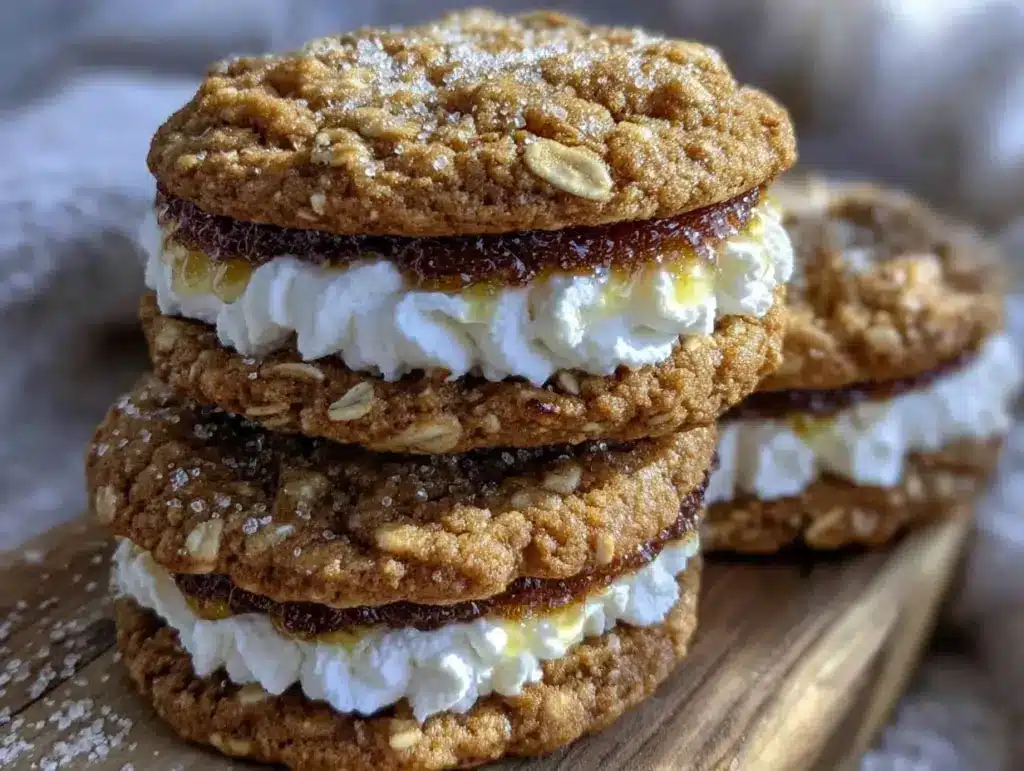
Last Sunday, my kitchen looked like a flour bomb had gone off. There was oat dust on the ceiling fan, brown sugar in the sink, and three baking sheets stacked like Jenga towers on the counter. My husband walked in, saw the chaos, and asked, “What are you making?” I told him I was making Chewy Brown Sugar Oatmeal Cream Pies. He looked at the massive pile of raw dough balls and said, “For four people?” I smiled and said, “No. For four people, for next week’s lunches, and for my emergency snack drawer.”
Here’s the thing about meal prepping desserts: most people treat them as an afterthought. They bake a few cookies on Saturday morning, eat them by Tuesday, and then feel deprived by Thursday. I’ve flipped that script. I realized that if I’m going to stand over a hot oven anyway, I might as well get paid for it in time saved later. These Chewy Brown Sugar Oatmeal Cream Pies Freeze Well because the filling stays soft and the cookies stay chewy, even after sitting in the freezer for three months. I’ve tested this method with vanilla, chocolate, and peanut butter fillings, and they all hold up perfectly.
I remember my first attempt at batch-baking these. I froze them too early while they were still warm, and the condensation turned my cookies into soggy discs. I learned that lesson the hard way. Now? I have a system. I bake, I cool, I fill, I flash-freeze, then I pack them away. It’s efficient. It’s methodical. And honestly, it’s the only reason I can survive a busy workweek without resorting to vending machine snacks. If you’ve ever stared into your fridge at 7 PM wondering what to do for a sweet treat, this recipe is your answer. It’s not just a dessert; it’s a strategy.
Why You’ll Love This Freezer-Friendly Treat
Let’s be real. Life is complicated. Dinner plans change. Kids get sick. You get tired. Having a stash of Chewy Brown Sugar Oatmeal Cream Pies Freeze Well in your freezer is like having a cheat code for your week. Here is why this specific approach to baking pays off:
- Zero Morning Stress — I pack two in my lunchbox on Sunday night. By Wednesday, when my energy is low, I pull them out. They thaw in about 15 minutes while I’m brushing my teeth. No microwave, no fuss. Just ready-to-eat comfort.
- Cost Effective — Making these at home costs about $0.40 per pie. Store-bought oatmeal cream pies are loaded with preservatives and cost nearly $1.50 each. Plus, you control the sugar. I use less brown sugar than the box versions, and they still taste indulgent.
- Texture Preservation — Most frozen cookies turn into rocks. Not these. The butter and brown sugar ratio creates a chew that survives the freeze-thaw cycle. The filling uses shortening and butter, which doesn’t crystallize like pure dairy does, keeping that creamy mouthfeel intact.
- Portion Control — When you bake them in uniform 2-inch circles, you know exactly what you’re eating. One or two? You’re in control. Eating from a giant tub of ice cream? That’s a different story. These are discrete units of joy.
- Versatile Pairing — These pair perfectly with black coffee or a strong cup of tea. I actually pair them with my budget-friendly fall chai latte for a cozy afternoon break. The spices in the tea complement the warm cinnamon in the cookies.
This isn’t just about saving money. It’s about reclaiming your evenings. When you know dinner is planned and dessert is prepped, the mental load drops significantly. This is my go-to when I need to feel organized but still want something sweet.
Key Ingredients for Perfect Freeze-Proof Cookies
You don’t need fancy ingredients to make these, but you do need the right balance. The science of freezing dairy and fats is tricky, so here’s what works in my test kitchen.
Old-Fashioned Rolled Oats (3 cups / 270g) — Do not use instant oats. They turn to mush. Do not use steel-cut oats; they’re too hard. You need the flat, chewy texture of old-fashioned oats. I buy the large canisters from Costco. They last forever in my pantry and give that classic oatmeal crunch.
Dark Brown Sugar (1.5 cups / 300g) — This is non-negotiable. Light brown sugar is too dry. Dark brown sugar has more molasses, which keeps the cookies moist and chewy even after freezing. The molasses also adds a deep, caramel-like flavor that pairs beautifully with the filling. I use Domino’s Dark Brown Sugar because it’s consistently moist.
Unsalted Butter (1 cup / 226g) — I use Kerrygold or Land O’Lakes. The higher butterfat content helps with flavor. Make sure it’s softened to room temperature. If you microwave it, it will melt into the flour and ruin the texture. I plan ahead and leave it on the counter for two hours.
Vegetable Shortening (1 cup / 227g for filling) — This is the secret weapon for freezing. Shortening has a higher melting point than butter and doesn’t crystallize in the freezer. If you use all butter for the filling, it might get grainy after thawing. The mix of butter and shortening keeps it smooth. I use Crisco, but any plain vegetable shortening works.
Vanilla Extract (2 tsp / 10ml) — Use pure vanilla extract, not imitation. The flavor needs to stand up to the strong cinnamon and oats. I use Nielsen-Massey because it has a thick, rich consistency.
Ground Cinnamon (1.5 tsp / 3g) — Freshness matters here. If your cinnamon is three years old, it won’t taste like anything. I buy mine in small jars and replace them every six months. The spice is what makes it an “oatmeal cookie” and not just a sugar cookie.
Confectioners’ Sugar (4 cups / 480g) — Sift this twice. Lumps in powdered sugar are the enemy of smooth filling. I use a fine-mesh sieve and tap it over the bowl. It takes an extra minute, but it’s worth it for that silky texture.
Tools Needed for Efficient Baking
You don’t need fancy equipment to get professional results. Here’s what I actually use in my kitchen to keep things moving fast.
Large Mixing Bowls — I use two 5-quart stainless steel bowls. One for dry ingredients, one for wet. Stainless steel is better than glass because it conducts temperature better and doesn’t get sticky.
Stand Mixer or Hand Mixer — I have a KitchenAid stand mixer, but a hand mixer works fine too. The key is creaming the butter and sugar properly. If you do this by hand, it will take 5-7 minutes. If you use a mixer, 3 minutes. Time is money, so use the machine if you have it.
Cookie Scoop (2-inch) — This is the most important tool for meal prepping. Uniform size means uniform baking time. If your cookies are different sizes, some will burn while others are raw. I use a 2-inch mechanical scoop. It’s cheap, it’s durable, and it saves me from weighing every single ball of dough.
Wire Cooling Racks — Get two large ones. You need to cool the cookies completely before filling them. If they’re even slightly warm, the filling will melt and slide off. I have two racks so I can bake one sheet while the other cools.
Airtight Freezer Containers — I use rigid plastic containers with locking lids. Ziploc bags work, but they get crushed in the freezer. Rigid containers protect the delicate filled pies. I stack them neatly in my freezer drawer.
How to Make Chewy Brown Sugar Oatmeal Cream Pies
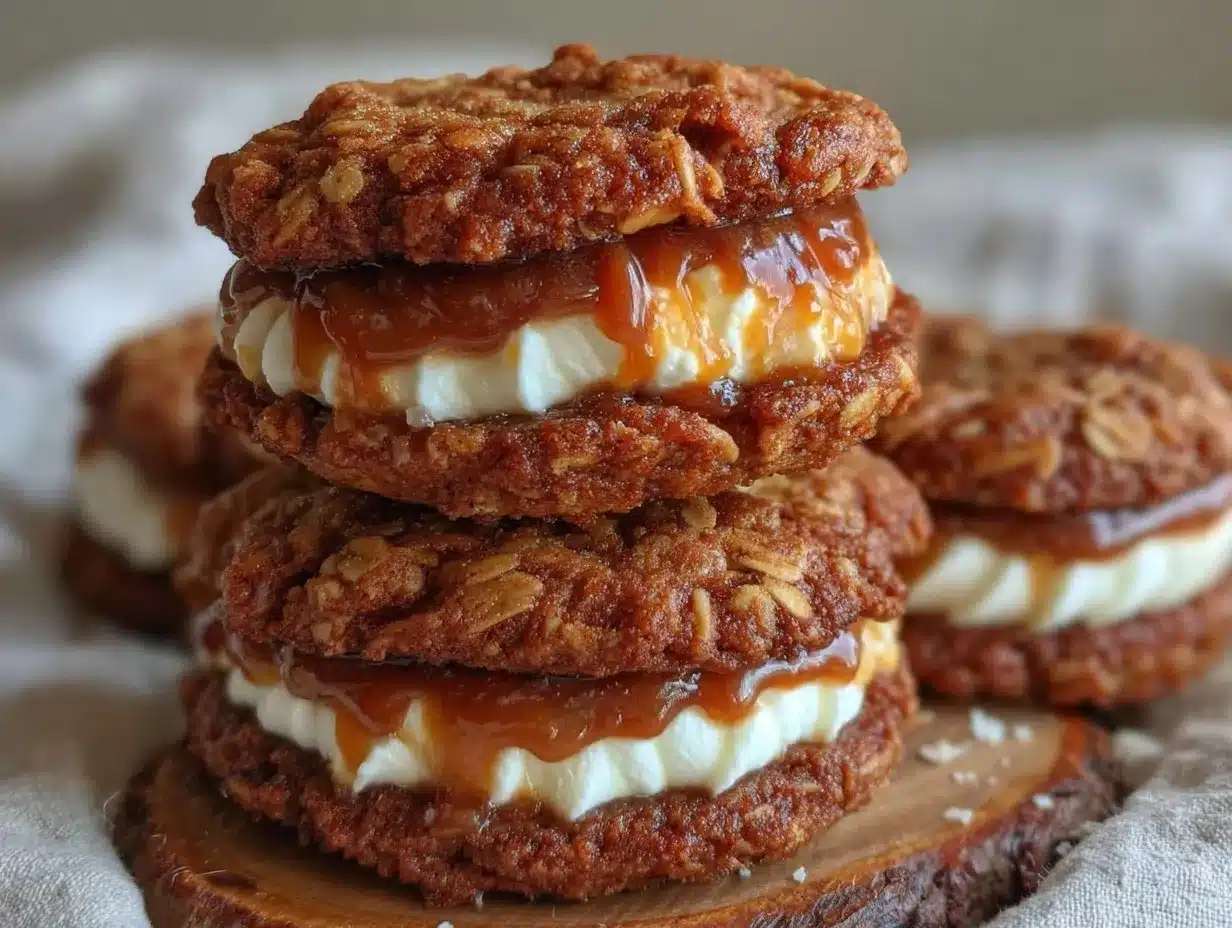
Let’s get into the nitty-gritty. This process is designed for efficiency. We are making a double batch of cookies and a big batch of filling. Here is exactly how I do it.
Step 1: Prep the Dry Ingredients (5 minutes)
In your large mixing bowl, whisk together the flour, baking soda, baking powder, salt, and ground cinnamon. Whisking aerates the flour and distributes the spices evenly. This prevents pockets of baking soda that can leave a soapy taste. Set this aside. While you whisk, preheat your oven to 350°F (175°C). Line two large baking sheets with parchment paper. I reuse the parchment paper for the second batch, but I always use fresh parchment for the first batch to ensure non-stick performance.
Step 2: Cream the Butter and Sugars (3 minutes)
In a separate large bowl, beat the softened unsalted butter and vegetable shortening together until smooth. Add the dark brown sugar and granulated sugar. Beat on medium-high speed for about 3-4 minutes. The mixture should look pale, fluffy, and almost white. This step incorporates air, which helps the cookies rise slightly and stay chewy rather than flat. Scrape down the sides of the bowl with a spatula to ensure everything is mixed. Add the eggs one at a time, beating well after each addition. Add the vanilla extract. The mixture should be glossy and smooth.
Step 3: Combine Wet and Dry (2 minutes)
Gradually add the dry ingredients to the wet ingredients on low speed. Mix just until the flour disappears. Do not overmix. Overmixing develops gluten, which makes cookies tough. We want tender and chewy. Once the flour is incorporated, add the rolled oats. Mix on low until the oats are evenly distributed. The dough will be thick and sticky. This is normal. If it seems too dry, add 1 tablespoon of milk. If too wet, add 1 tablespoon of flour.
Step 4: Scoop and Bake (15-18 minutes)
Use your 2-inch cookie scoop to drop dough balls onto the prepared baking sheets. Space them 2 inches apart. They will spread. Bake for 12-14 minutes. The edges should be golden brown, but the centers should still look slightly soft and underdone. They will firm up as they cool. If you bake them until they look firm in the oven, they will be dry and crumbly after cooling. Remove from the oven and let them cool on the pan for 5 minutes, then transfer to a wire rack to cool completely. This is crucial. Warm cookies + cold filling = messy filling.
Step 5: Make the Cream Filling (10 minutes)
While cookies cool, make the filling. In a clean bowl, beat the softened unsalted butter and vegetable shortening together until creamy. Add the confectioners’ sugar, one cup at a time, beating on low speed to avoid a sugar cloud. Once all sugar is added, beat on high for 2-3 minutes until fluffy. Add the vanilla extract and a pinch of salt. Beat for another minute. The filling should be thick enough to hold a peak but soft enough to spread. If it’s too stiff, add 1 teaspoon of milk. If too runny, add more powdered sugar.
Step 6: Assemble and Flash Freeze (20 minutes)
Take two cooled cookies of similar size. Spread about 1.5 tablespoons of filling on the flat side of one cookie. Press the other cookie on top to create a sandwich. Gently press the sides to seal. Place the assembled pies on a baking sheet lined with parchment paper. Do not touch them to each other. Put the sheet in the freezer for 30 minutes. This “flash freezing” step hardens the filling so it doesn’t squish when you pack them. This is the secret to why Chewy Brown Sugar Oatmeal Cream Pies Freeze Well without losing their shape.
Total Time Breakdown: Prep: 10 mins. Bake: 30 mins (two batches). Cool: 30 mins. Fill: 10 mins. Freeze: 30 mins. Total active time is under an hour, but you get 24-30 pies out of it.
Expert Tips for Freezer Success
Here’s everything I learned from making this too many times. I’ve made mistakes so you don’t have to.
The Game-Changers:
Don’t Skip the Flash Freeze
This is the #1 mistake. If you pack the pies directly into containers while the filling is soft, they will stick together. You will end up with a giant brick of cookie-and-filling. The 30-minute freezer step is non-negotiable. It sets the structure. I’ve tried skipping it once, and I regretted it when I tried to separate them at lunchtime.
Label Your Containers
It sounds obvious, but I once pulled out a container and forgot what was inside. Was it chocolate chip? Oatmeal cream? Lemon bars? Write the date and contents on the container with a sharpie. They look similar from the outside. Plus, you want to eat the oldest ones first to ensure freshness.
Common Problems & Solutions:
Filling is Grainy — This happens if you don’t sift the powdered sugar or if you don’t beat it long enough. Always sift. Always beat for at least 3 minutes on high speed. The friction melts the sugar crystals.
Cookies are Too Hard — You overbaked them. Remember, they should look slightly soft in the center when they come out of the oven. They continue to cook on the hot pan. Pull them when the edges are just turning gold.
Filling is Too Sweet — The filling is meant to be sweet, but if you find it cloying, add a pinch more salt or a teaspoon of lemon juice. The acid cuts the sweetness and brightens the flavor.
Pro Tricks:
Double the Batch — The dough freezes beautifully before baking. You can scoop the dough balls, flash freeze them on a tray, then bag them. Bake straight from frozen, adding 2-3 minutes to the bake time. This is great for unexpected guests or when you just need a quick fix.
Recipe Variations for Your Freezer
Once you’ve nailed the basic version, here’s how to mix it up. Variety keeps your freezer interesting.
Chocolate Chip Oatmeal Cream Pies
Add 1 cup of semi-sweet chocolate chips to the dough. The chocolate melts into the warm cookie, creating pockets of goo. This pairs amazingly with a dark chocolate filling (add cocoa powder to the buttercream). It’s like a gourmet version of a classic.
Peanut Butter Oatmeal Cream Pies
Swap 1/2 cup of the butter in the filling for creamy peanut butter. The saltiness of the peanut butter balances the sweet brown sugar cookies perfectly. This is a favorite in my house. It’s richer and more savory.
Spiced Apple Oatmeal Cream Pies
Add 1/2 cup of finely chopped, cooked apples (like Gala or Fuji) to the dough. Sauté them first with a little cinnamon to remove excess moisture. The filling gets a hint of apple cider vinegar. This tastes like autumn in a bite.
Dairy-Free Option
Use vegan butter and vegan shortening for both the cookies and the filling. Use coconut sugar instead of brown sugar. The texture is slightly different but still very good. I’ve tested this, and it holds up well in the freezer too.
Gluten-Free Option
Swap the all-purpose flour for a 1:1 gluten-free flour blend (like Bob’s Red Mill). Add 1/4 teaspoon of xanthan gum if your blend doesn’t have it. The cookies will be slightly more crumbly, but the flavor is identical.
Serving & Storage Guide
Serving:
I serve these chilled or at room temperature. Chilled, the filling is firmer and more like a truffle. Room temperature, the cookie is softer and the filling is creamier. I pair them with black coffee, tea, or a cold glass of milk. For a special occasion, I dust them with a little extra powdered sugar or drizzle them with melted chocolate. They also look beautiful arranged on a platter for holidays.
Storage:
Room Temperature: If you plan to eat them within 2 days, store them in an airtight container at room temperature. Place parchment paper between layers to prevent sticking. They stay fresh for 2 days max.
Refrigerator: Store in an airtight container for up to 1 week. The filling will firm up in the fridge. Let them sit on the counter for 15 minutes before eating to soften.
Freezer: This is where Chewy Brown Sugar Oatmeal Cream Pies Freeze Well truly shine. After flash freezing, pack them into rigid airtight containers. Separate layers with parchment paper. They will last for 3 months. Do not freeze for longer than that, or the oats may start to taste stale.
Thawing: Move the container from the freezer to the counter for 15-20 minutes. Do not microwave, as this will melt the filling unevenly. Let them thaw naturally for the best texture.
Nutrition Information
I’m not a nutritionist, but here’s the breakdown per pie (making 24 pies):
| Nutrient | Amount |
|---|---|
| Calories | 280 kcal |
| Protein | 3g |
| Carbohydrates | 38g |
| Fiber | 1g |
| Fat | 14g |
| Sodium | 120mg |
My Take: This is comfort food with cream and sugar. It’s not diet food. But it’s better than store-bought versions because you know exactly what’s in it. No weird preservatives. Just real butter, oats, and sugar. Enjoy it as a treat, not a staple.
Final Thoughts
Meal prepping doesn’t have to be boring. It can be delicious, organized, and actually fun if you approach it with a plan. These Chewy Brown Sugar Oatmeal Cream Pies Freeze Well because I’ve tested them, tweaked them, and perfected them. They are my secret weapon for busy weeks. Make them once, and you’ll have sweet treats for four times this week. If you make this, drop a comment! I love hearing how it turns out in your kitchen. Happy cooking!
FAQs
Can I freeze the cookie dough before baking?
Yes! Scoop the dough balls, flash freeze them on a baking sheet for 1 hour, then transfer to a freezer bag. Bake from frozen, adding 2-3 minutes to the bake time. This is great for having ready-to-bake cookies on hand.
Why did my filling separate in the freezer?
This usually happens if the butter and shortening weren’t fully incorporated before adding the sugar, or if the filling was too warm when assembled. Ensure you beat the filling until it’s smooth and pale. Also, make sure the cookies are completely cool before adding filling.
Can I use salted butter instead of unsalted?
You can, but you’ll need to reduce the added salt in the recipe by half. Salted butter varies in salt content, so it’s hard to adjust precisely. Unsalted gives you more control.
How do I prevent the cookies from sticking to the parchment paper?
Use high-quality parchment paper. If you’re having trouble, try silicone baking mats. They are reusable and provide excellent non-stick performance. Also, ensure the cookies have cooled completely before handling them.
Can I make these gluten-free?
Yes, use a 1:1 gluten-free flour blend. The texture will be slightly more crumbly, but the flavor remains the same. Add xanthan gum if your blend doesn’t include it.
Do these taste good after thawing?
Yes, absolutely. The texture remains chewy, and the filling stays creamy. They taste just as good as fresh-made, which is why I always make a double batch.
Pin This Recipe!
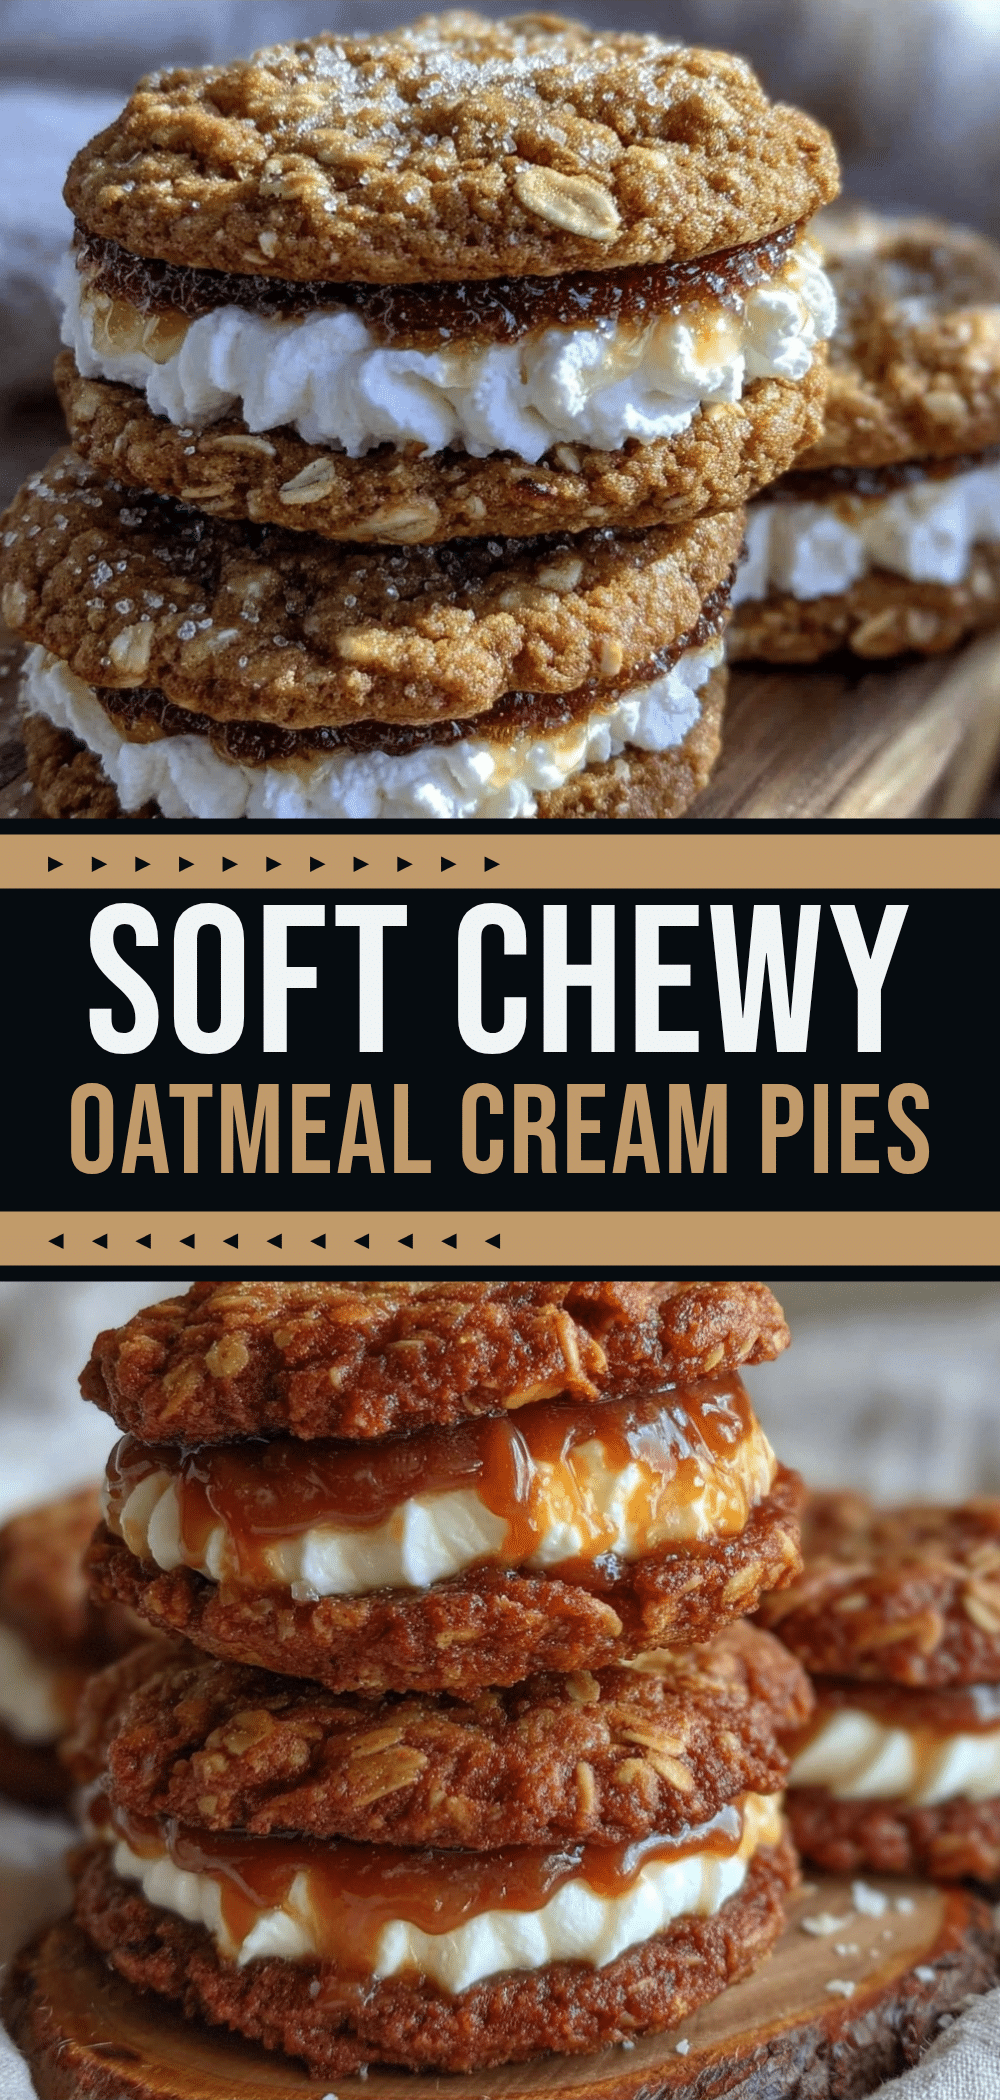
Chewy Brown Sugar Oatmeal Cream Pies
- Total Time: 1 hour 20 minutes
- Yield: 24 servings 1x
Description
Freezer-friendly oatmeal cream pies that stay chewy and soft after freezing. Perfect for meal prep, these homemade treats offer better texture and cost savings compared to store-bought versions.
Ingredients
- 3 cups old-fashioned rolled oats
- 1.5 cups dark brown sugar
- 1 cup unsalted butter, softened
- 1 cup vegetable shortening (for filling)
- 2 tsp vanilla extract
- 1.5 tsp ground cinnamon
- 4 cups confectioners’ sugar
- 2 cups all-purpose flour
- 1 tsp baking soda
- 1 tsp baking powder
- 1/2 tsp salt
- 2 large eggs
- 1/2 cup granulated sugar
Instructions
- Preheat oven to 350°F (175°C) and line two large baking sheets with parchment paper.
- In a large bowl, whisk together flour, baking soda, baking powder, salt, and ground cinnamon.
- In a separate large bowl, beat softened butter and vegetable shortening until smooth. Add dark brown sugar and granulated sugar, beating on medium-high speed for 3-4 minutes until pale and fluffy.
- Add eggs one at a time, beating well after each addition, then add vanilla extract.
- Gradually add dry ingredients to wet ingredients on low speed, mixing just until flour disappears. Do not overmix.
- Add rolled oats and mix on low until evenly distributed.
- Scoop dough into 2-inch balls and place on baking sheets, spacing them 2 inches apart.
- Bake for 12-14 minutes until edges are golden brown but centers look slightly soft. Cool on pan for 5 minutes, then transfer to wire racks to cool completely.
- While cookies cool, make filling by beating softened butter and vegetable shortening until creamy.
- Add confectioners’ sugar one cup at a time on low speed, then beat on high for 2-3 minutes until fluffy.
- Add vanilla extract and a pinch of salt, beating for another minute.
- Spread 1.5 tablespoons of filling on the flat side of one cookie and press another cookie on top to form a sandwich.
- Place assembled pies on a parchment-lined baking sheet and flash freeze for 30 minutes to harden the filling.
- Transfer to airtight freezer containers for storage.
Notes
Do not skip the flash freezing step, as it prevents the filling from squishing when packed. Ensure cookies are completely cool before filling to prevent melting. For gluten-free option, use a 1:1 gluten-free flour blend. For dairy-free, use vegan butter and shortening.
- Prep Time: 10 minutes
- Cook Time: 30 minutes
- Category: Dessert
- Cuisine: American
Nutrition
- Serving Size: 1 pie
- Calories: 280
- Sugar: 26
- Sodium: 120
- Fat: 14
- Saturated Fat: 6
- Carbohydrates: 38
- Fiber: 1
- Protein: 3
Keywords: oatmeal cream pies, freezer friendly dessert, meal prep cookies, brown sugar oatmeal cookies, homemade cream pies, batch baking


