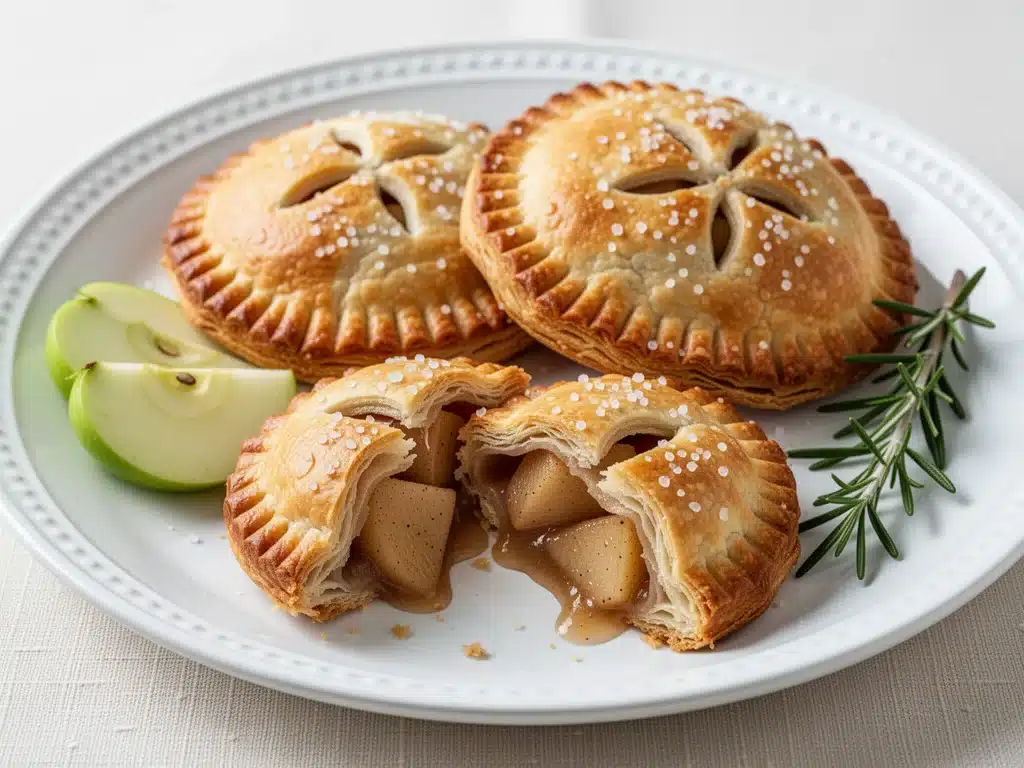
Last October, I stood in my kitchen at 11 PM, staring at a pile of apple peels and a half-empty bag of flour, feeling like a total failure. I had tried to make a traditional apple pie for my in-laws’ visit the next day, and it had collapsed. The crust was soggy, the filling was watery, and I was three hours behind schedule. I was ready to order takeout pizza and hide in the bedroom. But then I remembered my grandmother’s secret for when things went wrong: “If you can’t fix the pie, shrink it.” She didn’t mean shrinking the pie itself, but making it portable. She showed me how to turn leftover pie filling into little hand-held pockets of joy.
That night, I made Baked Apple Hand Pies. I didn’t have time for a proper lattice top or a fancy crimped edge. I just rolled out the dough, spooned in the spiced apples, folded it over, and baked them. The result? A flaky, buttery, buttermilk-crusted masterpiece that tasted better than the collapsed pie I was trying to make. My in-laws loved them. My kids devoured them. And I learned a lesson that changed how I approach baking forever: sometimes the most elegant dessert is the one that fits in your hand.
These hand pies have been a staple in our house ever since. They’re perfect for autumn gatherings, weekend breakfasts, or just when you need a hug in food form. The buttermilk crust is the real star here—it’s tender, flaky, and has a slight tang that cuts through the sweet cinnamon apples perfectly. I’ve made these dozens of times, tweaking the spice blend and the dough ratio, and I’m finally confident enough to share the version that works every single time. If you’ve ever been intimidated by pie crust, this is your gateway drug. Once you try this Baked Apple Hand Pies recipe with flaky buttermilk crust, you’ll never go back to store-bought refrigerated dough again.
Why You’ll Love This Recipe
There are a dozen reasons I keep making these hand pies, but here are the big ones that will change your dessert game.
Stupid Simple Crust — Seriously, the buttermilk method is foolproof. Buttermilk has just enough acidity to tenderize the gluten in the flour, which means you don’t have to worry about overworking the dough. It’s forgiving. I’ve made this crust while distracted by a screaming toddler, and it still came out flaky. If you can mix a bowl of flour and butter, you can make this.
Perfectly Portable — No forks required. These are the ultimate finger food. I take them to hiking trips, pack them in lunchboxes, and serve them at parties where people are standing around holding drinks. They don’t drip, they don’t crumble everywhere, and they taste amazing cold or warm. Unlike my failed pie attempt, these are sturdy enough to handle real life.
Uses Up Apples — I’m always looking for ways to use up the bushels of apples I buy in the fall. This recipe uses about four medium apples, which is a perfect amount. You can use any variety—Granny Smith for tartness, Honeycrisp for sweetness, or a mix of both. It’s a great way to reduce food waste and get that cozy apple cider smell filling your house.
Make-Ahead Magic — Here’s the best part: these freeze beautifully. I make a big batch on Sunday, freeze them raw, and bake them off during the week. Or I bake them fully and freeze them. Reheating in the oven brings back that fresh-baked crispness. It’s like having a mini bakery in your freezer. This is way more convenient than grandma’s bread pudding, which needs to be eaten fresh, though that is also delicious.
Crowd-Pleaser — I’ve served these to picky eaters and food snobs alike. The kids love the handheld aspect, and the adults appreciate the flaky texture and balanced sweetness. They’re not too heavy, so people can have two or three without feeling weighed down. They’re the perfect dessert for a casual dinner party or a family gathering.
This is my go-to when I want to impress without spending hours in the kitchen. No complicated techniques, no weird ingredients, just reliable, delicious food that makes everyone happy. And honestly, they’re just fun to make. There’s something satisfying about shaping them by hand and watching them turn golden brown in the oven.
Ingredients You’ll Need
Here’s the best part: you probably have most of this already. I’m particular about three ingredients here, and I’ll tell you exactly why. This isn’t just a list; it’s a guide to making sure your crust comes out perfect.
For the Flaky Buttermilk Crust
All-purpose flour (2 ½ cups / 315g) — This is your base. Don’t use cake flour or self-rising flour. All-purpose gives you the right structure. I measure it by spooning it into the cup and leveling it off, not scooping directly from the bag, which packs it down and leads to dry dough.
Unsalted butter (1 cup / 2 sticks / 226g, very cold) — This is non-negotiable. Cold butter creates steam pockets in the oven, which is what makes the crust flaky. Cube your butter and keep it in the fridge until the last second. If it’s soft, your crust will be tough. I even chill my bowl before mixing.
Buttermilk (½ cup / 120ml, cold) — This is the secret weapon. The acid in the buttermilk tenderizes the gluten, and the fat adds richness. If you don’t have buttermilk, you can make a substitute: add 1 tablespoon of lemon juice or white vinegar to a measuring cup, then fill the rest with regular milk. Let it sit for 5 minutes until it curdles slightly. It won’t be exactly the same, but it works.
Granulated sugar (1 tablespoon / 12g) — Just a little bit to balance the salt and add a hint of sweetness to the crust. Don’t skip this; it helps with browning.
Salt (1 teaspoon / 6g) — Essential for flavor. Don’t use less, or the crust will taste flat.
For the Apple Filling
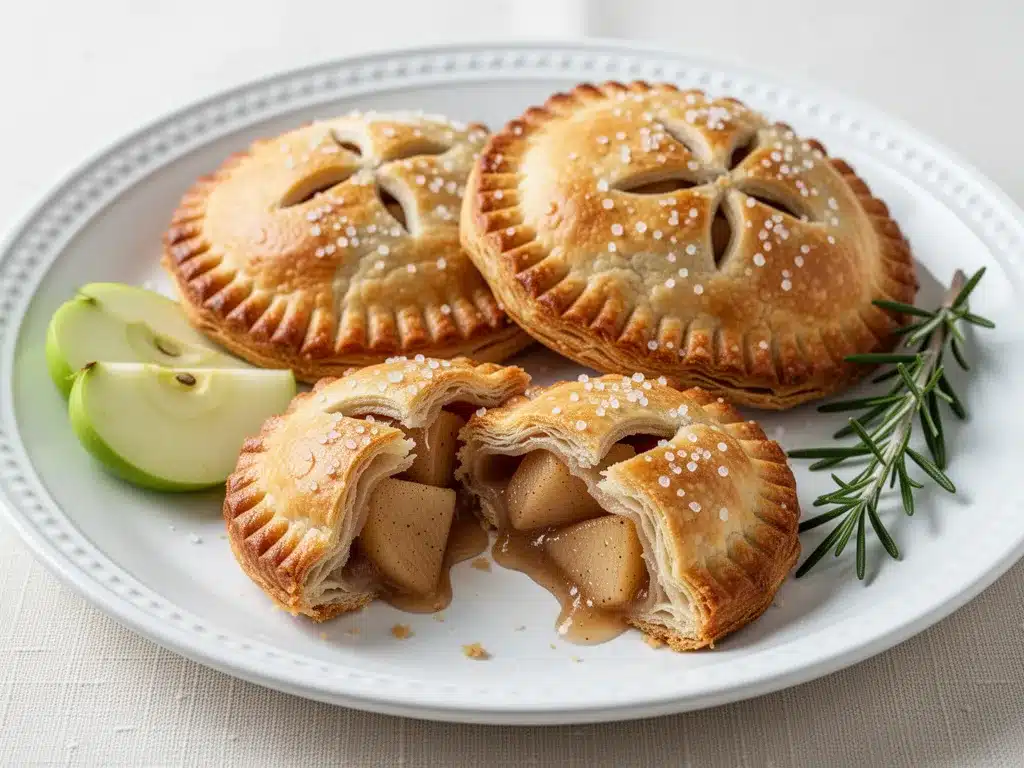
Apples (4 medium, about 1.5 lbs / 680g) — I use a mix of Granny Smith and Honeycrisp. Granny Smith holds its shape and adds tartness, while Honeycrisp adds sweetness and juiciness. Avoid Red Delicious—they turn mushy. Peel them, core them, and slice them into thin wedges.
Lemon juice (1 tablespoon / 15ml) — Prevents the apples from browning and adds brightness. Toss the sliced apples in this immediately after cutting.
Granulated sugar (½ cup / 100g) — Adjust based on how sweet your apples are. If you’re using very tart apples, you might need a bit more. If they’re super sweet, reduce to ⅓ cup.
Ground cinnamon (1 ½ teaspoons) — The classic apple flavor. Use fresh cinnamon if you can; old cinnamon loses its punch.
Ground nutmeg (¼ teaspoon) — Just a pinch adds warmth and depth. Don’t overdo it, or it’ll taste like a pumpkin spice latte.
Ground ginger (¼ teaspoon) — Optional, but I love the slight kick it adds. It pairs beautifully with the cinnamon.
Cornstarch (2 tablespoons / 16g) — This thickens the apple juices so you don’t end up with a soggy bottom. Mix it with a little cold water to make a slurry before adding it to the apples.
Vanilla extract (1 teaspoon) — Adds a subtle floral note that elevates the whole filling. Use real vanilla, not imitation.
For the Egg Wash and Topping
Egg (1 large) — Whisked with 1 tablespoon of water. This gives the crust a beautiful golden shine.
Coarse sugar (for sprinkling) — Like turbinado or sanding sugar. It adds a nice crunch and sparkle. Regular granulated sugar works too, but coarse sugar looks more professional.
Equipment Needed
You don’t need fancy equipment for this. Here’s what I actually use.
Large mixing bowl — For the dough. A glass or ceramic bowl works best because it stays cold.
Pastry cutter or food processor — I use a pastry cutter to cut the butter into the flour. It’s faster than a fork and more consistent than a food processor if you’re worried about overheating the butter. But a food processor works if you pulse carefully.
Rolling pin — Any standard rolling pin works. I prefer wood because it doesn’t stick.
Small saucepan — For cooking the apple filling. You don’t have to cook the apples first, but it helps soften them so they don’t release too much water during baking.
Parchment paper — Lining your baking sheet prevents sticking and makes cleanup easier. I never bake these directly on the pan.
Pastry brush — For applying the egg wash. A silicone one is easy to clean.
Sharp knife or pizza cutter — For trimming the edges and cutting slits for steam vents.
Cooling rack — Essential for letting the pies cool so the filling sets.
How to Make It: Step-by-Step
Alright, let’s make this! I’m walking you through exactly how I do it, including the little tricks I’ve picked up over years of trial and error.
Step 1: Make the Dough (10 minutes)
In your large bowl, whisk together the flour, sugar, and salt. Add the cold, cubed butter. Use a pastry cutter to work the butter into the flour until the mixture looks like coarse crumbs with some pea-sized pieces of butter remaining. These butter chunks are key for flakiness. Don’t overmix—you want visible bits of butter.
Pour in the cold buttermilk gradually, mixing with a fork until the dough just comes together. It will look shaggy. Turn it out onto a lightly floured surface and gently press it into a disk. Wrap it in plastic wrap and refrigerate for at least 30 minutes. This rest is crucial; it lets the gluten relax and the butter chill back down.
Step 2: Prepare the Filling (10 minutes)
While the dough chills, peel, core, and slice the apples. Toss them with lemon juice to prevent browning. In a small saucepan, combine the apples, sugar, cinnamon, nutmeg, ginger, vanilla, and cornstarch slurry. Cook over medium heat for about 5-7 minutes, stirring occasionally, until the apples are slightly softened and the mixture has thickened. Let it cool completely. If you skip this step, the raw apples will release too much water and make the crust soggy.
Step 3: Roll and Cut the Dough (15 minutes)
Preheat your oven to 375°F (190°C). Line two baking sheets with parchment paper. Take the chilled dough disk and divide it in half. On a floured surface, roll out one half into a rectangle about ⅛-inch thick. Use a cookie cutter or a glass to cut out 4-inch circles. Don’t worry about perfect circles; rustic is fine. Re-roll the scraps to get more circles—you should get about 10-12 circles total.
Step 4: Assemble the Hand Pies (15 minutes)
Place the circles on the prepared baking sheets. Spoon about 2 tablespoons of the cooled apple filling into the center of each circle, leaving a ½-inch border. Brush the edges with water (this helps seal the dough). Fold the dough over the filling to create a half-moon shape. Press the edges firmly with a fork to seal. Cut two small slits in the top of each pie to let steam escape.
Whisk the egg with water and brush the tops of the pies. Sprinkle generously with coarse sugar. This step makes all the difference in appearance and texture.
Step 5: Bake (20-25 minutes)
Bake for 20-25 minutes, or until the crust is golden brown and the filling is bubbling through the vents. Rotate the pans halfway through for even baking. Let them cool on the pan for 5 minutes, then transfer to a wire rack to cool completely. The filling will be extremely hot, so be patient. Eating them warm is delicious, but cooling them helps the filling set.
Expert Tips & Tricks
Here’s everything I’ve learned from making this dozens of times. These tips will save you from my mistakes.
Keep Everything Cold — This is the golden rule of pie crust. Cold butter, cold buttermilk, cold bowl. If your butter starts to melt before it hits the oven, you lose the flakiness. If you’re in a warm kitchen, put your dough back in the fridge for 10 minutes before rolling.
Don’t Skip the Pre-Cooking — I know it’s an extra step, but raw apples release a lot of water. By cooking the filling first, you control the moisture. The cornstarch thickens the juices, ensuring you get a gooey center, not a watery mess.
Seal Tight — Make sure you press the edges well with a fork. If you don’t, the filling will leak out during baking, making a mess in your oven and leaving you with dry crust. Water on the edges helps the dough stick to itself.
Use a Cookie Cutter — I tried using a knife to cut circles, but it was messy and uneven. A round cookie cutter gives you perfect shapes and consistent sizes. It also makes re-rolling the scraps easier.
Egg Wash Technique — Brush the egg wash on gently. Don’t soak the dough. Just a light coat for that golden shine. If you miss a spot, it’s fine; it still tastes good.
Cool Completely — I know it’s tempting to eat them hot, but the filling is like lava. Let them cool for at least 15 minutes. The filling will thicken as it cools, making them easier to handle and eat.
Variations & Substitutions
Once you’ve nailed the basic version, here’s how you can mix it up. I’ve tried all of these.
Pear Hand Pies — Substitute pears for apples. Pears are softer, so reduce the cooking time slightly. Add a pinch of cardamom for a sophisticated twist.
Cherry Almond — Use canned cherry pie filling mixed with sliced almonds. Add a splash of almond extract to the filling. This is a favorite in my house.
Maple Pecan — Swap the apple filling for a mixture of chopped pecans, maple syrup, and brown sugar. Add a little butter to the filling for richness. This tastes like a mini pecan pie.
Chocolate Chip — Skip the fruit and add chocolate chips, a dash of cinnamon, and a sprinkle of sea salt. It’s like a chocolate chip cookie in pie form.
Gluten-Free — Use a 1:1 gluten-free flour blend. The buttermilk helps tenderize the dough, so it works well. Add an extra splash of water if the dough is too dry.
Dairy-Free — Use vegan butter and coconut yogurt instead of buttermilk. The texture might be slightly different, but it still works. Use an egg wash alternative like aquafaba.
Serving & Storage
How to Serve — I usually serve these warm, straight from the oven. They’re great with a scoop of vanilla ice cream or a dollop of whipped cream. For a more elegant presentation, dust them with powdered sugar after cooling.
Side Dishes — These are perfect on their own, but if you’re serving a larger dessert course, pair them with frozen labor day sangria slushies for a refreshing contrast. Or serve them with a hot cup of coffee or tea.
Storage — Store leftovers in an airtight container at room temperature for up to 2 days. They’re best eaten fresh, but they do stay soft for a day or two. Do not refrigerate, as the crust will lose its flakiness.
Freezing — You can freeze unbaked hand pies. Place them on a baking sheet and freeze until solid, then transfer to a freezer bag. Bake from frozen, adding 5-10 minutes to the baking time. You can also freeze baked hand pies. Reheat in the oven at 350°F for 10 minutes to crisp up the crust.
Nutrition Information
I’m not a nutritionist, but here’s the breakdown if you’re tracking. Keep in mind that these are estimates.
Per Serving (based on 10 hand pies):
- Calories: 280
- Protein: 4g
- Carbs: 42g
- Fiber: 3g
- Sugar: 22g
- Fat: 12g
- Saturated Fat: 7g
- Cholesterol: 35mg
- Sodium: 220mg
These are treat-sized desserts, so enjoy them in moderation. They’re not health food, but they’re better than most store-bought pastries because you control the ingredients. You can reduce the sugar in the filling if you prefer less sweetness.
Final Thoughts
So that’s my go-to baked apple hand pies recipe! I’ve probably talked your ear off at this point, but when you make a recipe this often, you have a lot to say about it. These hand pies have saved my dessert game more times than I can count. They’re my answer to “what’s for dessert” when I’m tired, don’t want to bake a whole pie, and still want something that tastes really good. My kids are happy, my husband’s happy, and I’m happy because I’m not stressed about cooking.
Make it yours! Try different apple varieties, swap in your favorite spices, or add nuts to the filling. The best recipes are the ones you adapt to your family’s tastes. If you make this, drop a comment and let me know what you think! I love hearing how recipes turn out in your kitchen. And if something doesn’t work, tell me that too—I’m here to help troubleshoot.
Happy baking! And I hope your kitchen smells half as good as mine does right now.
Frequently Asked Questions
Can I use frozen apples?
You can, but thaw them completely and drain off the excess liquid before using. Frozen apples release more water, so you might need to increase the cornstarch slightly. I prefer fresh apples for the best texture, but frozen works in a pinch.
Why did my crust turn out tough?
This usually happens if the butter was too warm or if you overworked the dough. Remember, cold butter is key. Also, handle the dough as little as possible. Once it comes together, stop mixing. Over-kneading develops gluten, which makes the crust tough instead of tender.
Can I make these ahead for a party?
Absolutely. Make the dough and filling up to 2 days ahead. Assemble the hand pies and freeze them raw. Bake them from frozen on the day of the party. They’ll be fresh and hot, and you’ll look like a hero. This is much easier than making a whole pie ahead of time.
Do I have to cook the filling?
I highly recommend it. Raw apples release a lot of water during baking, which can make the bottom crust soggy. Pre-cooking the filling allows the cornstarch to thicken the juices, ensuring a perfect consistency. It’s an extra step, but it makes a huge difference.
Can I use store-bought pie crust?
You can, but the buttermilk crust is so much better and easier than you think. If you’re short on time, store-bought works, but you won’t get that same flaky, tender texture. I’ve tried both, and the homemade version is worth the 15 minutes of effort.
How do I store leftovers?
Store them in an airtight container at room temperature for up to 2 days. Do not refrigerate, as the crust will become soft and lose its flakiness. Reheat in the oven at 350°F for 5-10 minutes to crisp them back up.
Can I double this recipe?
Yes, double everything. Just make sure you have enough baking sheets. You might need to bake in two batches if your oven doesn’t fit two sheets at once. The cooking time stays the same.
Pin This Recipe!
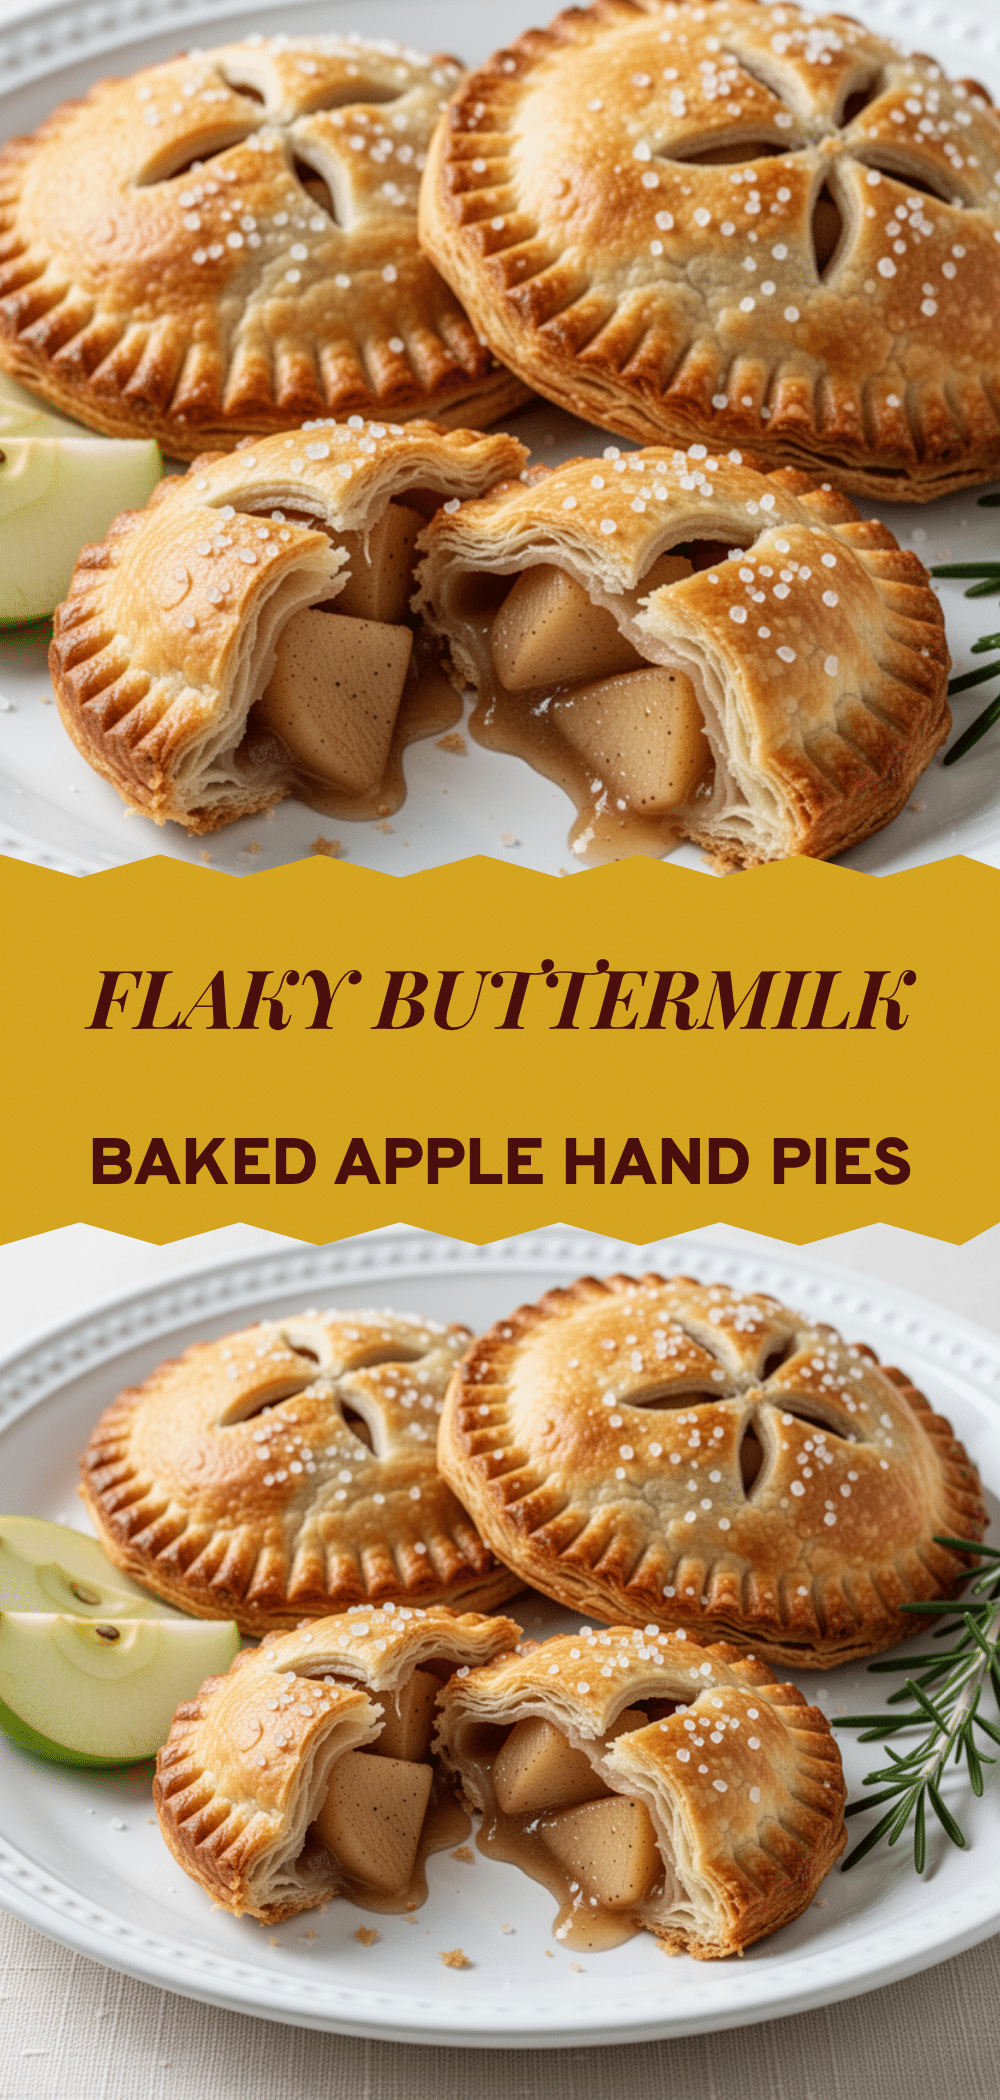
Baked Apple Hand Pies: Easy Flaky Buttermilk Crust
- Total Time: 1 hour 15 minutes
- Yield: 10 servings 1x
Description
These portable, flaky buttermilk-crusted hand pies are filled with spiced apples and are perfect for autumn gatherings or make-ahead baking. The foolproof crust and pre-cooked filling ensure a tender, non-soggy dessert.
Ingredients
- 2 ½ cups all-purpose flour
- 1 cup unsalted butter (very cold, cubed)
- ½ cup buttermilk (cold)
- 1 tablespoon granulated sugar
- 1 teaspoon salt
- 4 medium apples (peeled, cored, sliced into wedges)
- 1 tablespoon lemon juice
- ½ cup granulated sugar
- 1 ½ teaspoons ground cinnamon
- ¼ teaspoon ground nutmeg
- ¼ teaspoon ground ginger
- 2 tablespoons cornstarch mixed with cold water
- 1 teaspoon vanilla extract
- 1 large egg (whisked with 1 tablespoon water)
- Coarse sugar (for sprinkling)
Instructions
- Whisk together flour, sugar, and salt in a large bowl. Add cold cubed butter and cut it in until the mixture resembles coarse crumbs with pea-sized butter pieces.
- Gradually pour in cold buttermilk, mixing with a fork until the dough just comes together. Form into a disk, wrap in plastic, and refrigerate for at least 30 minutes.
- While dough chills, toss sliced apples with lemon juice. In a saucepan, combine apples, sugar, cinnamon, nutmeg, ginger, vanilla, and cornstarch slurry. Cook over medium heat for 5-7 minutes until softened and thickened. Let cool completely.
- Preheat oven to 375°F (190°C) and line baking sheets with parchment paper.
- Divide dough in half. Roll out one half into a rectangle and cut into 4-inch circles. Repeat with the second half to get 10-12 circles total.
- Place circles on baking sheets. Spoon 2 tablespoons of cooled filling into the center of each, leaving a border. Brush edges with water, fold over to create a half-moon, and press edges with a fork to seal.
- Cut two small slits in the top of each pie for steam vents. Brush tops with egg wash and sprinkle with coarse sugar.
- Bake for 20-25 minutes until golden brown and filling is bubbling. Rotate pans halfway through.
- Cool on the pan for 5 minutes, then transfer to a wire rack to cool completely before serving.
Notes
Keep all ingredients cold for the flakiest crust. Pre-cooking the apple filling prevents a soggy bottom by controlling moisture. The pies can be frozen raw or baked and frozen for later use. Do not refrigerate leftovers as the crust will lose its flakiness.
- Prep Time: 50 minutes
- Cook Time: 25 minutes
- Category: Dessert
- Cuisine: American
Nutrition
- Serving Size: 1 hand pie
- Calories: 280
- Sugar: 22
- Sodium: 220
- Fat: 12
- Saturated Fat: 7
- Carbohydrates: 42
- Fiber: 3
- Protein: 4
Keywords: apple hand pies, buttermilk crust, fall dessert, portable dessert, easy pie recipe, baked apples, autumn baking


