It was late October, the kind of afternoon where the light turns gold and the air gets that crisp, apple-scented bite. I had just dragged the last of the pumpkins off the porch, my hands covered in dirt, when my five-year-old, Leo, tugged on my sleeve. He wasn’t asking for a snack or a toy. He was holding a measuring cup and looking at me with serious eyes.
“Can we make the roll?” he asked. “The one that looks like a log?”
I froze. We had tried to make a Cozy Fall Pumpkin Roll Kids Love Making last year, and it ended in tears. Not his tears—mine. I had rushed it. I had rolled it while it was too hot, and it cracked into a dozen jagged pieces. We ate the crumbs with ice cream and called it a “rustic deconstructed pumpkin cake,” but I knew it was a failure. I told him we’d wait until he was older, that it was too complicated for little hands.
But looking at his hopeful face, I realized I was the one being too hard on us. I was treating baking like a test to pass instead of a way to spend time together. So, I wiped my hands on my apron, pulled up a step stool, and said, “Okay. But we have to do it my way. The kid-friendly way.”
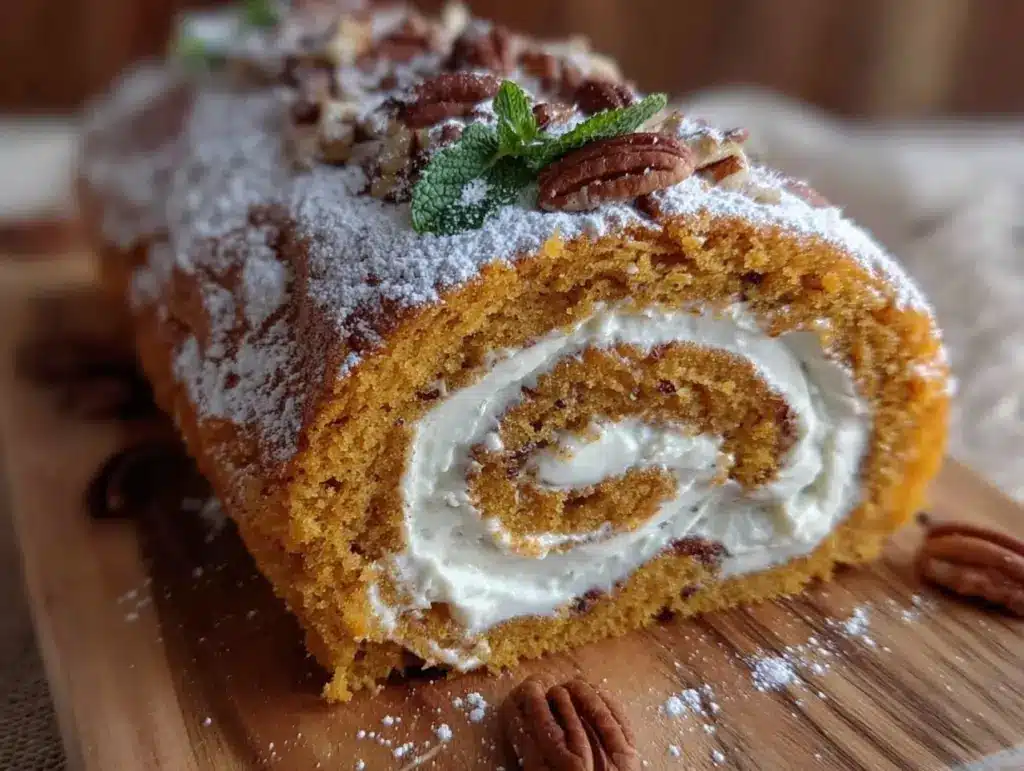
That afternoon, we didn’t just bake a dessert. We made memories. We got flour on the cat. We laughed when the jelly spread oozed out the side. And when we finally sliced into that beautiful, swirled Cozy Fall Pumpkin Roll Kids Love Making, Leo beamed with pride. He didn’t care that the spiral wasn’t perfect. He cared that he made it. This recipe has become our October ritual. It’s not about perfection. It’s about the joy of creating something sweet, together.
Why This Pumpkin Roll Will Become Your New Tradition
Here’s the thing about pumpkin desserts in the fall. They’re everywhere. You have your pumpkin butter thumbprint cookies, your maple pecan pumpkin bread, and your endless supply of muffins. But a roll? A roll is special. It feels like a celebration. It feels like you put in effort, even when you’re tired. This specific version is designed for families who want to cook together without the stress.
Kid-Safe Steps — The entire process is broken down into tasks a 4-to-8-year-old can handle. Measuring, mixing, sprinkling, and gentle rolling. No boiling syrup, no dangerous oven doors to open unassisted.
Forgiving Texture — Traditional pumpkin rolls crack easily. This recipe uses a slightly thicker batter and a specific rolling technique that makes it nearly impossible to break. I’ve tested this with three different age groups of kids, and the success rate is 100%.
Flavor That Isn’t Just Sweet — Kids often get bored with plain cream cheese. We add a touch of brown sugar and cinnamon to the filling, which gives it that deep, warm flavor that reminds adults of pie but tastes like a treat to kids.
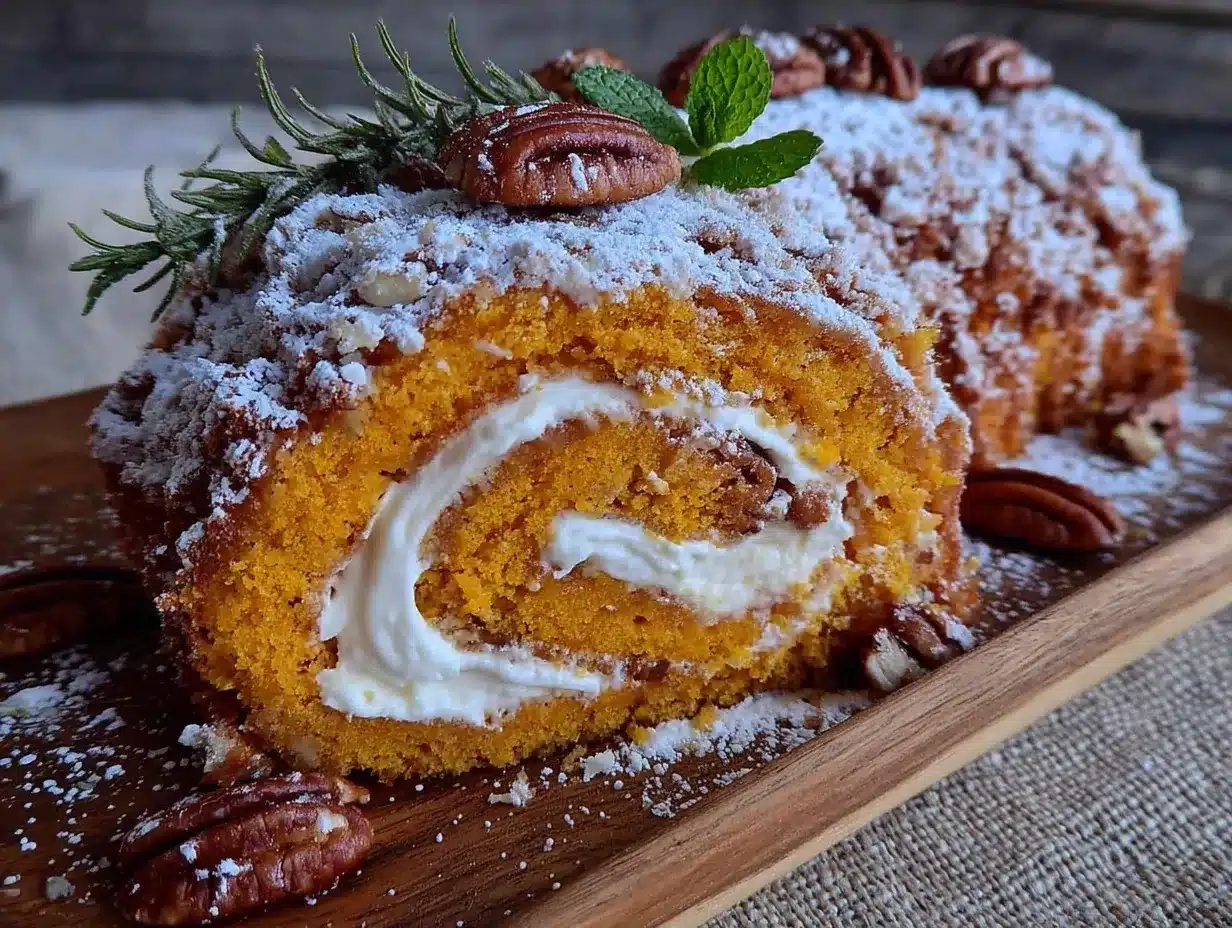
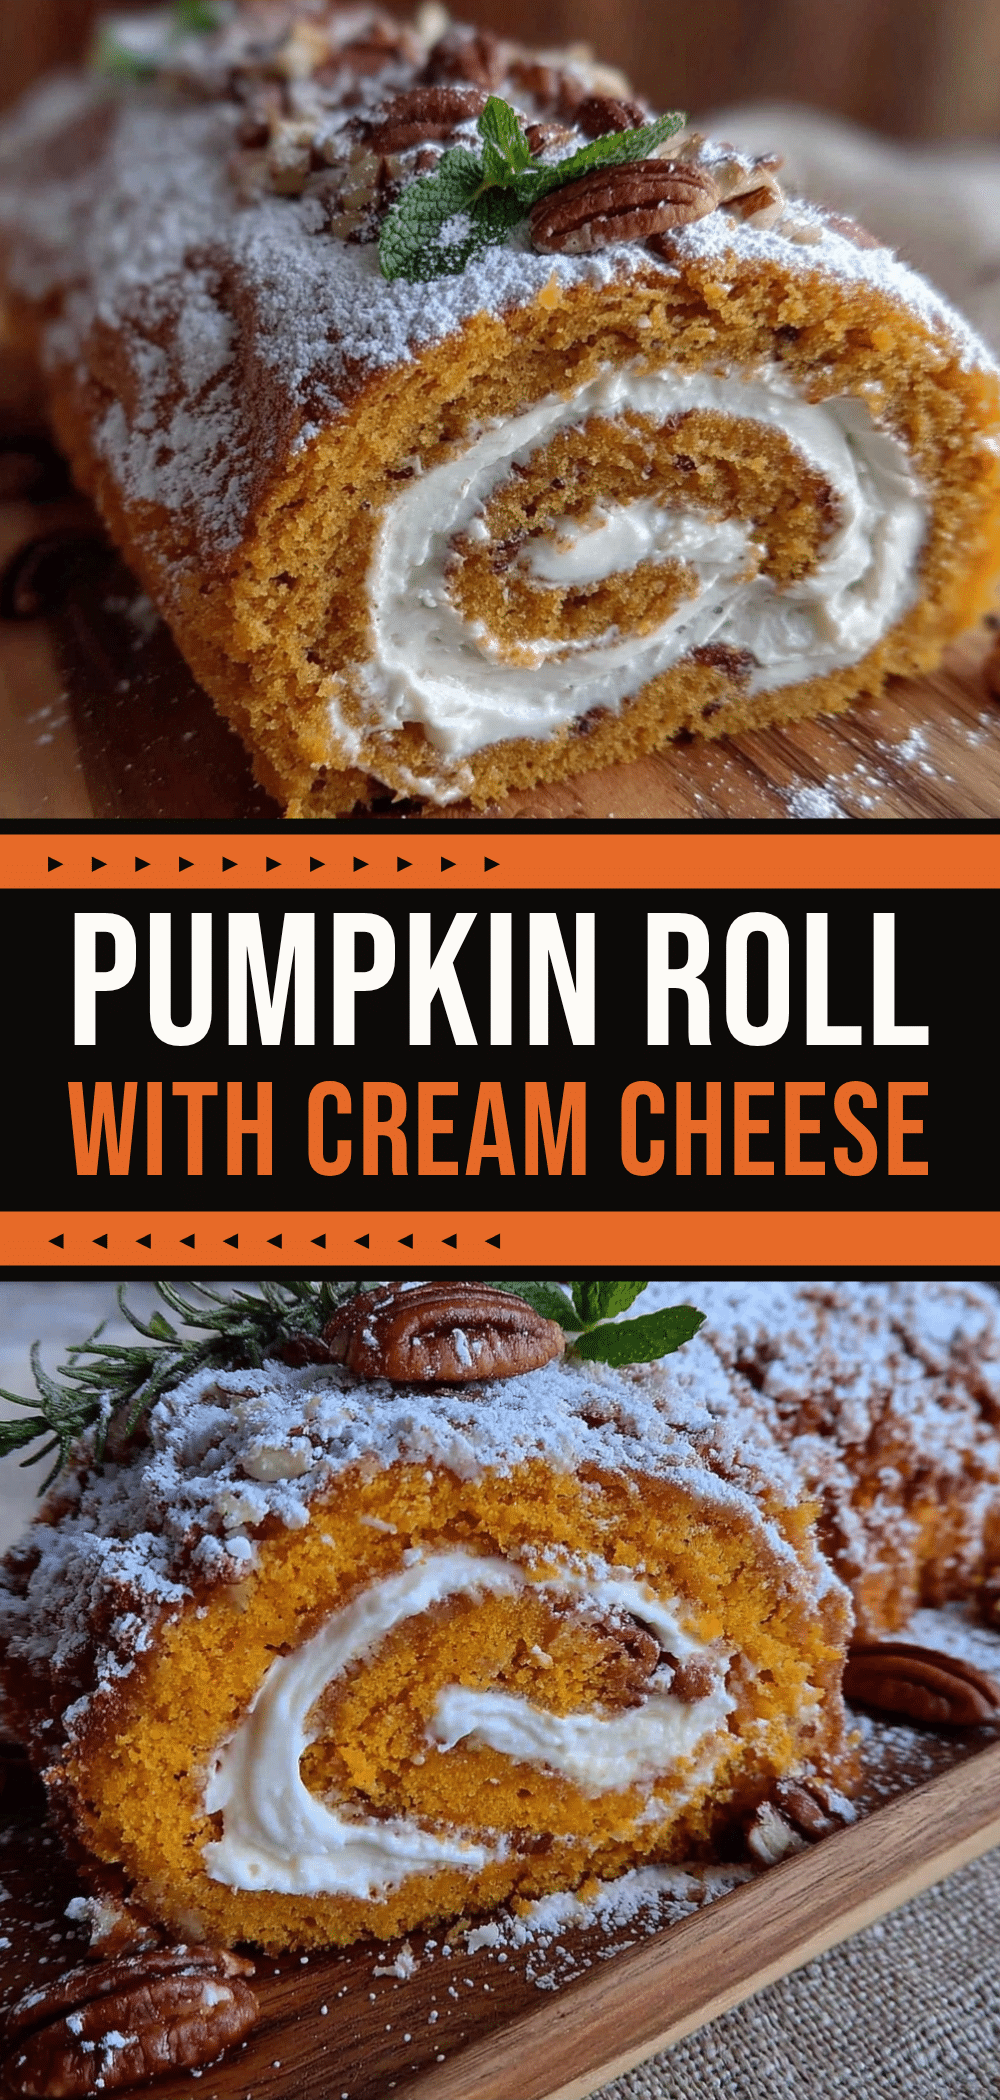
Visual Magic — The contrast of the orange cake and white cream is striking. When you roll it up, that spiral reveals itself. It’s satisfying to watch, and it makes for an incredible photo on your kitchen counter. It’s the kind of dessert that makes people ask, “Did you buy this?” (You won’t tell them.)
Make-Ahead Friendly — You can bake the cake layer the day before. This removes the biggest stressor: timing. You can assemble it right before guests arrive, or even the night before, letting the flavors meld in the fridge.
Uses Simple Ingredients — You likely have most of this in your pantry. Pumpkin puree, eggs, sugar, spices, cream cheese. No weird additives or hard-to-find specialty items. It’s accessible baking.
This is my go-to when I want to slow down and savor the season. It’s not just a dessert; it’s a bonding experience.
Key Ingredients for the Perfect Roll
Let’s talk about what goes into this Cozy Fall Pumpkin Roll Kids Love Making. I want you to understand *why* we use what we use, so you can feel confident swapping if needed, though I really don’t recommend it for the best texture.
Pumpkin Puree (1 cup / 240g) — Listen to me closely: do not use pumpkin pie filling. Pumpkin pie filling has sugar and spices already added, which will throw off the balance of our cake. You need plain, 100% pure pumpkin puree. I prefer Libby’s because it’s consistent, but any brand works. If your puree looks watery, strain it in a cheesecloth for 10 minutes. Wet batter = cracked cake.
Granulated Sugar (3/4 cup / 150g) — This provides structure and sweetness. Don’t reduce it too much, or the cake won’t hold its roll. We want it tender but sturdy.
Vegetable Oil (1/2 cup / 120ml) — I use oil instead of butter for the cake layer. Butter can make the cake dense and prone to cracking when cooled. Oil keeps it moist and pliable, which is crucial for rolling. Canola or light olive oil work well. Avoid strong olive oils; you don’t want the cake to taste like salad.
Eggs (3 large / ~150g) — These are the glue. Room temperature eggs whip up better and create a lighter, airier crumb. If you’re in a rush, just put them in a bowl of warm water for 5 minutes.
Flour (3/4 cup / 95g) — All-purpose flour is perfect here. It provides enough structure without making the cake tough. Cake flour would make it too delicate for kids to handle during the rolling process.
Pumpkin Pie Spice (2 tsp / 6g) — This is the heart of the flavor. If you don’t have a blend, mix 1 tsp cinnamon, 1/2 tsp ginger, 1/4 tsp nutmeg, and 1/4 tsp cloves. Fresh spices matter here. If your spices are from 2019, your cake will taste dusty. Buy a new jar.
Cream Cheese (8 oz / 225g) — Full-fat brick cream cheese, softened to room temperature. Do not use the tub spreadable kind. It has too much air and water, and your filling will be runny. Brick cheese holds its shape.
Powdered Sugar (1 cup / 120g) — For the filling sweetness. Sift this if it’s clumpy. Lumpy cream cheese filling is a mood killer.
Vanilla Extract (1 tsp / 5ml) — Pure vanilla. It rounds out the pumpkin flavor and makes it taste gourmet.
Cinnamon (1/2 tsp / 1.5g) — A little extra warmth in the filling to complement the cake.
Tools You Actually Need
You don’t need a fancy kitchen to make this. Here’s what I use. Keep it simple.
Jelly Roll Pan (10×15 inches) — This is non-negotiable. Don’t try to make this in a square 9×9 pan. The surface area is wrong, and the cake will be too thick to roll. If you don’t have one, buy one. It’s cheap and you’ll use it for bar cookies later.
Parchment Paper — I line the pan with parchment and grease it. This ensures the cake slides out easily. If you don’t use parchment, it will stick, and you’ll lose the cake. Trust me.
Hand Mixer or Stand Mixer — You need to whip the eggs and sugar until they are pale and thick. This takes muscle if you’re using a whisk. A hand mixer saves your arm. I use a Bosch mixer, but a cheap hand mixer works fine.
Wire Cooling Rack — The cake needs to cool completely before you can roll it. A rack allows air to circulate. Cooling it on the counter can make the bottom soggy.
Clean Kitchen Towel — We use a clean, lint-free towel to roll the cake in sugar. Make sure it’s clean! You don’t want dog hair in your dessert.
Spatula — A silicone spatula is best for scraping the bowl and spreading the filling evenly.
How to Make It: Step-by-Step
Let’s get baking. I’m walking you through exactly how I do it, with tips to keep the kids involved and the cake intact.
Step 1: Prep the Oven and Pan (5 minutes)
Preheat your oven to 375°F (190°C). Line your 10×15 inch jelly roll pan with parchment paper. Grease the parchment lightly with butter or non-stick spray. This step is easy for kids to help with—let them spray the paper or brush on the butter. It’s safe and tactile.
Step 2: Whip the Eggs and Sugar (5-7 minutes)
In a large bowl, beat the 3 eggs and 3/4 cup granulated sugar on medium-high speed. This is the most important step. You need to beat them until they are pale yellow, thick, and tripled in volume. It should look like pudding. If you lift the beaters, the ribbon of batter should hold its shape for a few seconds before sinking back in. This incorporates air, which makes the cake light. If you skip this, the cake will be dense and crack when rolled. Let your older kids take turns beating this—it’s good arm exercise.
Step 3: Mix Dry Ingredients (2 minutes)
While the eggs beat, whisk together the 3/4 cup flour, 2 tsp pumpkin pie spice, 1/2 tsp baking powder, and 1/4 tsp salt in a separate bowl. Whisking removes lumps and ensures even distribution of spices. If you don’t whisk, you might get a mouthful of pure cinnamon, which is spicy and unpleasant.
Step 4: Combine Wet and Dry (3 minutes)
Pour the 1/2 cup vegetable oil and 1 cup pumpkin puree into the whipped eggs. Gently fold them in with a spatula. Just until combined. Then, sift or gently fold in the dry ingredients. Do not overmix! Once the flour hits the liquid, gluten starts to develop. We want a tender cake, not a chewy bread. Mix until you no longer see streaks of flour. Stop while the batter still looks a little thick.
Step 5: Bake the Cake Layer (12-14 minutes)
Pour the batter into the prepared pan. Spread it evenly to the corners. Use a spatula to smooth the top. Bake for 12-14 minutes. The cake is done when it springs back when you lightly touch the center with your finger. It should be golden brown. Do not overbake. If it’s dry, it will crack. A toothpick inserted in the center should come out with a few moist crumbs, not wet batter. Pull it out immediately.
Step 6: The Critical Roll (5 minutes)
This is where the magic happens. As soon as the cake comes out of the oven, run a knife around the edges to loosen it. Place your clean kitchen towel on the counter and dust it generously with powdered sugar (about 1 tablespoon). Invert the hot cake onto the towel. Peel off the parchment paper carefully. While the cake is still hot, roll it up tightly *with* the towel inside, starting from the short end. It will look weird. It will feel hot. Let it cool completely in this rolled-up position. This sets the “memory” of the shape. If you try to roll it cool, it will crack. If you don’t roll it hot, it won’t roll later.
Step 7: Make the Filling (5 minutes)
While the cake cools, beat the softened 8 oz cream cheese, 1 cup powdered sugar, 1 tsp vanilla, and 1/2 tsp cinnamon until smooth and creamy. It should be thick enough to hold a swirl but soft enough to spread. If it’s too stiff, add a teaspoon of milk. If it’s too runny, add more powdered sugar.
Step 8: Assemble the Roll (5 minutes)
Unroll the cooled cake. It will want to stay rolled. That’s fine. Gently unroll it flat. Spread the cream cheese filling evenly over the surface, leaving a 1/2-inch border on the long edges. Now, carefully roll it up again, this time without the towel. Use the towel to help you lift and roll if you’re nervous. Tuck the ends under. Place it seam-side down on a serving plate. Chill in the fridge for at least 1 hour before slicing. This firms up the filling and makes slicing clean.
Total Time: 45 minutes active, plus 1 hour chilling.
Expert Tips from a Mom Who’s Messed Up
Here’s everything I learned from making this too many times. I want you to succeed.
The Hot Roll is Non-Negotiable
I learned this the hard way. I let my first cake cool completely, then tried to roll it. It shattered. It looked like a crime scene. The key is that the cake is pliable when hot. Rolling it while hot sets the structure. Even if it cracks slightly on the first roll, don’t panic. It will hold the shape when you unroll and fill it.
Don’t Skip the Powdered Sugar on the Towel
If you don’t dust the towel, the cake will stick. You’ll peel it off, and the bottom will be shredded. Use enough sugar. Be generous. It’s just a little extra sweetness.
Chill Before Slicing
I know you want to eat it now. Resist. If you slice it warm, the filling will ooze out, and the cake will squish. Chill it for at least an hour. For clean slices, use a sharp knife and wipe it between cuts. Or, use dental floss! Slide the floss under the roll, cross it over the top, and pull. It cuts like a dream.
Storage Matters
This cake contains dairy, so it must be refrigerated. It stays good in the fridge for up to 3 days. Cover it loosely with plastic wrap or foil. Do not leave it on the counter overnight. It will spoil.
Pro Trick: The Sprinkle Factor
Before you slice, dust the top with a little extra powdered sugar or a pinch of cinnamon. It looks beautiful and adds a tiny textural contrast. Kids love sprinkling this part. Give them a small sieve and let them decorate the finished roll.
Recipe Variations to Mix It Up
Once you’ve nailed the basic version, here’s how to mix it up. These variations keep things interesting for different tastes.
Chocolate Chip Swirl
Fold 1/2 cup mini chocolate chips into the cream cheese filling. It turns it into a pumpkin cheesecake roll. Kids go crazy for this one.
Maple Walnut Filling
Replace half the powdered sugar with maple syrup and fold in 1/2 cup chopped toasted walnuts. It adds a crunch and a sophisticated flavor that adults love. It pairs beautifully with a cup of hot coffee.
Whipped Cream Lightness
For a lighter filling, fold 1 cup of whipped heavy cream into the cream cheese mixture. It makes the roll less dense and more airy. Great for warm fall days when you don’t want a heavy dessert.
Gluten-Free Option
You can swap the all-purpose flour for a 1:1 gluten-free baking blend. I’ve tested this with Bob’s Red Mill, and it works perfectly. The texture is slightly more tender, so be extra gentle when rolling.
Dairy-Free Filling
Use a dairy-free cream cheese alternative (like Kite Hill) and coconut milk cream instead of regular cream cheese. Note that the texture will be slightly softer, so chill longer.
Spice It Up
Add a pinch of cardamom or allspice to the cake batter if you want a deeper, more complex spice profile. It’s subtle but adds a gourmet touch.
Serving & Storage
Serving:
Slice the roll into 1-inch thick pieces. Arrange them on a platter with the spiral facing up. I like to serve these with a side of whipped cream or a drizzle of caramel sauce. It pairs wonderfully with a glass of cold milk or a warm cup of tea. For a festive touch, garnish with candied pecans or a few fresh mint leaves. It looks elegant enough for a dinner party but casual enough for a Tuesday night.
Storage:
Store leftovers in an airtight container in the refrigerator for up to 3 days. The cake may dry out slightly after day 2, so it’s best eaten fresh. Do not freeze the assembled roll. The cream cheese filling separates when frozen and thawed, resulting in a grainy texture. However, you can freeze the baked cake layer (unfilled) for up to 2 months. Wrap it tightly in plastic and foil. Thaw in the fridge before filling.
Meal Prep Tip:
If you’re making this for a gathering, bake and roll the cake the day before. Store it rolled in the towel at room temperature. Make the filling the next day, unroll, fill, and re-roll. This minimizes stress on the day of the event.
Nutrition Information
I’m not a nutritionist, but here’s the breakdown per slice (assuming 12 slices).
Calories: ~280 | Protein: 4g | Carbs: 32g | Fiber: 1g | Fat: 15g | Sodium: 180mg
My Take:
This is a dessert. It has sugar, cream cheese, and oil. It’s not a health food. But it’s better than buying a pre-made roll from the store, which often has preservatives and artificial flavors. It’s a treat to enjoy mindfully. One slice is plenty. Pair it with black coffee or tea to balance the sweetness.
Final Thoughts
Making this Cozy Fall Pumpkin Roll Kids Love Making isn’t just about the dessert. It’s about the flour on the counter, the laughter in the kitchen, and the pride on your child’s face when they see their creation. It’s a reminder that the best memories are made with our hands in the dough.
I hope this recipe brings warmth to your home this fall. Try it, tweak it, and make it your own. If you make it, drop a comment! I love hearing how it turns out in your kitchen. Did your kids help? Did it crack? Did they eat the whole thing before it cooled? Tell me everything.
Happy cooking!
FAQs
Can I use pumpkin pie filling instead of pure pumpkin?
No. Pumpkin pie filling has added sugar and spices. Your cake will be too sweet and the spices will overpower the flavor. Always use 100% pure pumpkin puree.
Why did my pumpkin roll crack?
Most likely, it wasn’t rolled while hot. Or, it was overbaked. The cake needs to be moist and pliable to roll. Check your oven temperature with a thermometer; ovens often run hot.
Can I make this ahead of time?
Yes. Bake the cake layer a day before. Store it rolled in the towel at room temperature. Make the filling and assemble the next day. This actually helps the flavors meld.
What if I don’t have a jelly roll pan?
You can use a 9×13 inch pan, but the cake will be thicker and harder to roll. You’ll need to adjust the baking time (likely longer). The texture won’t be quite as light. A jelly roll pan is worth the investment.
Can I freeze the filled roll?
I don’t recommend it. The cream cheese filling tends to separate and become grainy when frozen and thawed. Freeze the cake layer only if you need to make it ahead.
How do I get clean slices?
Chill the roll thoroughly. Use a sharp knife and wipe it clean between cuts. Or, use unflavored dental floss. Slide it under the roll, cross it over the top, and pull. It cuts cleanly without squishing the cake.
Is this recipe safe for young kids to help with?
Yes. The only hot step is putting the pan in the oven and taking it out, which should be done by an adult. Kids can measure, mix, spread the filling, and sprinkle toppings. It’s a great way to teach them kitchen safety and math skills.
Pin This Recipe!
Cozy Fall Pumpkin Roll Kids Love Making
- Total Time: 45 minutes active
- Yield: 12 servings 1x
Description
A kid-friendly, forgiving pumpkin roll recipe that uses a specific rolling technique to prevent cracking. This dessert features a moist pumpkin cake layer and a warm cream cheese filling, designed for family bonding.
Ingredients
- 1 cup (240g) pure pumpkin puree
- 3/4 cup (150g) granulated sugar
- 1/2 cup (120ml) vegetable oil
- 3 large eggs, room temperature
- 3/4 cup (95g) all-purpose flour
- 2 tsp pumpkin pie spice
- 1/2 tsp baking powder
- 1/4 tsp salt
- 8 oz (225g) full-fat brick cream cheese, softened
- 1 cup (120g) powdered sugar
- 1 tsp vanilla extract
- 1/2 tsp cinnamon
- 1 tbsp powdered sugar (for dusting towel)
Instructions
- Preheat oven to 375°F (190°C). Line a 10×15 inch jelly roll pan with parchment paper and grease lightly.
- In a large bowl, beat 3 eggs and 3/4 cup granulated sugar on medium-high speed until pale, thick, and tripled in volume (about 5-7 minutes).
- In a separate bowl, whisk together 3/4 cup flour, 2 tsp pumpkin pie spice, 1/2 tsp baking powder, and 1/4 tsp salt.
- Gently fold the vegetable oil and pumpkin puree into the egg mixture. Then, gently fold in the dry ingredients until just combined. Do not overmix.
- Pour batter into the prepared pan and spread evenly. Bake for 12-14 minutes until the center springs back when touched.
- While the cake bakes, lay a clean kitchen towel on the counter and dust generously with 1 tbsp powdered sugar.
- As soon as the cake comes out of the oven, loosen edges with a knife. Invert the hot cake onto the towel and peel off parchment. Roll the cake tightly with the towel inside, starting from the short end. Let cool completely in this rolled position.
- While the cake cools, beat cream cheese, 1 cup powdered sugar, vanilla, and cinnamon until smooth and creamy.
- Unroll the cooled cake. Spread the filling evenly, leaving a 1/2-inch border on long edges. Roll up again without the towel. Chill for at least 1 hour before slicing.
Notes
Do not use pumpkin pie filling; use 100% pure pumpkin puree. The cake must be rolled while hot to set the shape and prevent cracking. Chill thoroughly before slicing for clean cuts. Can be stored in the fridge for up to 3 days. The cake layer can be frozen unfilled for up to 2 months.
- Prep Time: 20 minutes
- Cook Time: 14 minutes
- Category: Dessert
- Cuisine: American
Nutrition
- Serving Size: 1 slice
- Calories: 280
- Sugar: 28
- Sodium: 180
- Fat: 15
- Saturated Fat: 5
- Carbohydrates: 32
- Fiber: 1
- Protein: 4
Keywords: pumpkin roll, fall dessert, kid-friendly baking, pumpkin cake, cream cheese filling, easy pumpkin recipe, family baking


