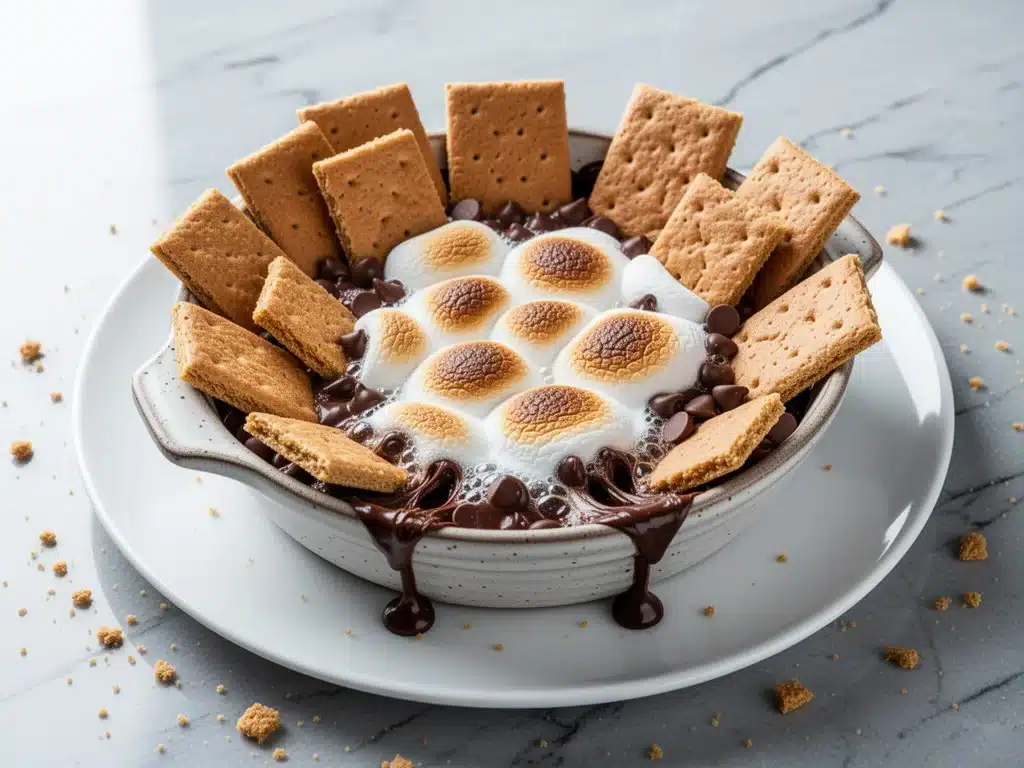
Last Labor Day, I showed up to my in-laws’ house with a store-bought pie. It was fine. It was perfectly acceptable. But as I placed it on the crowded counter next to my aunt’s famous potato salad and my cousin’s grilled corn, I felt a pang of regret. It felt like I’d brought a participation trophy to a competition. I wanted to bring something that would make people stop scrolling through their phones and actually lean in. I wanted that campfire magic, but without the bug spray, the soot on my shirt, or the three-hour drive to the nearest state park.
That’s when I decided to try Labor Day S’mores Dip. It sounded ridiculous at first—a dip version of the classic campfire treat? But I needed something that bridged the gap between a casual appetizer and a decadent dessert. Something that said, “We’re celebrating summer’s last hurrah,” without requiring a campfire pit in the backyard. The result? Pure gold. Literally. When I pulled that bubbling, golden-brown skillet out of the oven, the entire room went quiet for a second. Then came the scramble for graham crackers. It became the highlight of the evening, the dish everyone asked for the recipe for, and the reason I finally stopped bringing store-bought pies to family gatherings.
I’ve tested this Labor Day S’mores Dip recipe four times in the last month alone. Why? Because once you make it, you realize it’s not just a dip. It’s a memory-maker. It’s the taste of childhood summers, upgraded for modern kitchens. Whether you’re hosting a pre-party, a casual BBQ, or just need to satisfy a late-night craving with your kids, this is the answer. It’s easier than making actual s’mores, it’s mess-free (mostly), and it tastes like heaven dipped in chocolate. Let me show you how to make it so you can steal the show at your next gathering.
Why You’ll Love This Recipe
There are about ten reasons I keep making this Labor Day S’mores Dip over and over, but if I had to narrow it down to the things that will win you over, here they are. This isn’t just a trend; it’s a staple in my rotation now.
It’s a Showstopper (Without the Effort) — Seriously, the visual impact is huge. You put a plain skillet in the oven, and ten minutes later, you pull out a bubbling, golden, caramelized masterpiece. It looks like you spent hours working on it, but it’s basically just melting stuff. I’ve served this to picky eaters who claim they don’t like “dessert dips,” and they’re gone in seconds.
Crowd-Pleasing Nostalgia — Everyone loves s’mores. It’s a universal language. But not everyone wants to deal with the logistics of roasting marshmallows over a fire. This dip captures that smoky, sweet, gooey flavor profile without the hassle. My dad, who usually sticks to black coffee with his dessert, asks for this specifically now.
Lightning Fast — 10 minutes in the oven. That’s it. While it’s baking, you can finish setting the table, pour the wine, or help your kids with their homework. It’s the perfect last-minute dessert for unexpected guests. I’ve pulled this off the shelf of the oven while people were still tying their shoes at the door.
Customizable for Everyone — Got a chocolate lover? Add extra chips. Got a kid who hates marshmallows? Skip them or use mini ones they can easily scoop. This recipe is flexible. I’ve made it with dark chocolate for my wine-drinking friends and with peanut butter cups for my nephew. It adapts to your crowd.
Makes Amazing Leftovers (If There Are Any) — I know, it’s a dessert, so it shouldn’t have leftovers, but if it does? It tastes even better the next day as the flavors meld. I’ve eaten this cold out of the Tupperware at work, and honestly, it’s still delicious. It’s like eating a warm chocolate bar with a marshmallow center.
This is my go-to when I need a dessert that feels festive but requires zero stress. No baking skills needed, no complicated techniques, just reliable, delicious food that makes everyone happy. And let’s be real, if it makes my husband ask for seconds, it’s a winner.
Ingredients You’ll Need
Here’s the best part: you probably have most of this already in your pantry. This Labor Day S’mores Dip relies on simple, high-quality ingredients. The fewer components, the better, because you want the flavors to shine, not compete.
For the Base:
Chocolate Chips (1 ½ cups / 250g) — I use semi-sweet chocolate chips. They balance the sweetness of the marshmallows perfectly. Milk chocolate is too sweet for my taste, and dark chocolate can be too bitter unless it’s high quality. I always buy Ghirardelli or Guittard—better melting texture. Avoid baking bars unless you chop them finely; chips melt more evenly.
Marshmallmallows (10 oz / 280g) — This is the star of the show. Use large, jumbo marshmallows. You want them to hold their shape a bit before melting so you get that beautiful toasted look. Mini marshmallows melt too fast and can make the dip soupy. If you can’t find jumbo, a mix of large and medium works.
Graham Crackers (1 box / 14.4 oz) — You’ll need these for dipping. I prefer the classic honey graham crackers. They have that perfect crunch and subtle sweetness. If you’re feeling fancy, you can use cinnamon graham crackers, but stick to the original for the authentic taste. Buy a fresh box—stale crackers are a tragedy.
For the Flavor Boost:
Butter (2 tablespoons / 30g) — Unsalted butter. This adds richness and helps the chocolate melt smoothly. It prevents the dip from being too dry. Don’t skip it, even if you’re trying to be light. It makes the texture silky.
Salt (½ teaspoon / 3g) — Flaky sea salt or kosher salt. A pinch of salt on top after baking elevates the chocolate flavor immensely. It cuts the sweetness and adds a sophisticated touch. I sprinkle it on right before serving.
Optional Add-ins:
Crushed Nuts (½ cup / 50g) — Pecans or walnuts add a nice crunch and earthiness. I toast them lightly in a pan before adding for extra flavor. Great for texture lovers.
Caramel Sauce (2 tablespoons / 30ml) — Drizzle on top after baking for a salted caramel twist. It’s indulgent and pairs beautifully with the chocolate.
Mini Peanut Butter Cups (½ cup / 70g) — Crushed up and mixed in with the chocolate. For the ultimate crowd-pleaser. My kids go crazy for this version.
Personal Tips:
- Brand Matters: I always use Ghirardelli semi-sweet chips. They melt consistently without seizing. Generic brands sometimes have fillers that make them grainy.
- Marshmallow Hack: If your marshmallows are stale, toss them in the oven for 2 minutes before adding to the dip. They’ll soften up.
- Substitutions: No marshmallows? You can use marshmallow fluff, but you’ll need to adjust the baking time. It melts faster. I stick to whole marshmallows for the best texture.
Equipment Needed
You don’t need fancy equipment for this. Here’s what I actually use, and what works.
Oven-Safe Skillet — This is crucial. You need a skillet that can go from stovetop (if you’re melting chocolate first) to oven. I use a 10-inch cast iron skillet. It distributes heat evenly and creates that perfect crispy edge. If you don’t have cast iron, a stainless steel or ceramic baking dish works, but the edges won’t get as nice.
Baking Sheet — Just in case the dip bubbles over (marshmallows can be tricky), place your skillet on a baking sheet before putting it in the oven. Saves your oven floor from a sticky mess. Learned this one the hard way.
Measuring Cups and Spoons — Standard stuff. Dollar store versions work fine for this.
Spatula — A silicone spatula is best for stirring the chocolate and butter. It gets into the corners of the skillet.
Paring Knife — For crushing nuts or peanut butter cups if you’re adding them. Or just use a rolling pin and a ziplock bag.
Optional but nice:
- Torch: If you want that authentic campfire char on the marshmallows, a kitchen torch gives you control. But the oven broiler works too.
- Serving Spoon: A wooden spoon looks rustic and fits the theme. But a regular metal spoon works just as well.
How to Make It: Step-by-Step
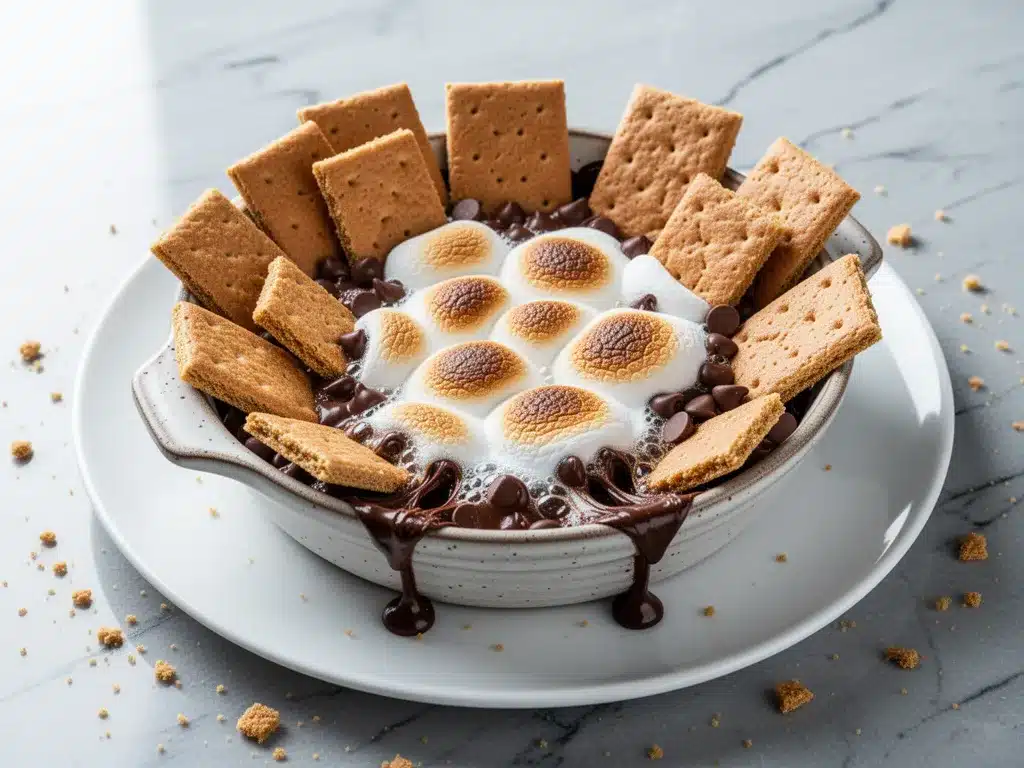
Alright, let’s make this! I’m walking you through exactly how I do it, including the little tricks I’ve picked up to ensure that perfect gooeyness.
Step 1: Preheat and Prep (2 minutes)
Preheat your oven to 350°F (175°C). This is a moderate temperature—hot enough to melt and toast, but not so hot that the chocolate burns before the marshmallows puff up. Line a baking sheet with parchment paper or foil for easy cleanup. Place your oven-safe skillet on it.
Step 2: Melt the Chocolate Base (3-4 minutes)
Add the chocolate chips and butter to the skillet. If you’re using a cast iron skillet, you can melt this on the stovetop over low heat, stirring constantly. Or, you can just put the dry chips and butter in the skillet and let the oven do the work. I prefer melting them on the stovetop first because it ensures an even melt. Stir until smooth and glossy. If you melt it in the oven, just give it a stir halfway through.
Step 3: Arrange the Marshmallows (2 minutes)
This is the fun part. Take your jumbo marshmallows and arrange them in a single layer over the melted chocolate. You want full coverage. Don’t overlap them too much, or they’ll stick together in clumps. If you have gaps, fill them in. The goal is a uniform layer of marshmallow on top. Press them down gently so they sit flat against the chocolate.
Step 4: Bake Until Golden (10-12 minutes)
Place the skillet in the preheated oven. Bake for 10-12 minutes. Watch it closely after the 8-minute mark. You’re looking for the marshmallows to puff up and turn golden brown. The chocolate underneath will be bubbling. If you want it darker, you can switch to broil for the last 1-2 minutes, but be careful—it burns fast. I usually stick to regular bake for a consistent golden color.
Step 5: Cool and Serve (5 minutes)
Remove the skillet from the oven. Let it cool for 5 minutes. This is important because the dip is molten lava hot right out of the oven. Sprinkle with flaky salt if you’re using it. Serve immediately with graham crackers. Dip, crunch, melt, repeat.
Total Time: About 20 minutes (5 minutes prep, 12 minutes bake, 5 minutes cool).
Built-in Troubleshooting:
- Marshmallows didn’t brown? Your oven might run cool. Bake for 2 more minutes, or switch to broil for 1 minute.
- Chocolate seized? If you melted it on the stovetop and it got grainy, add a teaspoon of warm milk or cream and whisk vigorously.
- Dip is too runny? Let it cool longer. It will thicken as it sets. If it’s still too thin, add a few more marshmallows next time.
Expert Tips & Tricks
Here’s everything I’ve learned from making this dozens of times. These tips will save you from my mistakes.
Don’t Overcrowd the Skillet — If you’re making a big batch, use a larger skillet. Crowding the marshmallows prevents even browning. You want air circulation around each marshmallow.
The Broiler Trick — If your oven doesn’t brown marshmallows well, finish under the broiler. Watch it like a hawk. It goes from golden to burnt in seconds. I usually bake for 10 minutes, then broil for 1-2 minutes.
Use Fresh Graham Crackers — Stale crackers won’t dip well. They’ll crumble. Buy a fresh box and keep them in an airtight container until serving.
Room Temperature Ingredients — If your chocolate chips are very cold, they might take longer to melt. Bring them to room temp for 15 minutes before starting.
Add Crunch — Toasted pecans or walnuts add a fantastic texture contrast. I sprinkle them on top after baking. It elevates the dip from “sweet” to “gourmet.”
Common Mistakes:
- Mistake: Burning the chocolate. Fix: Keep heat low when melting. Chocolate burns easily.
- Mistake: Soggy marshmallows. Fix: Don’t press them too hard into the chocolate. Let them sit on top.
- Mistake: Skipping the salt. Fix: Salt is non-negotiable. It balances the sweetness. Don’t skip it.
Variations & Substitutions
Once you’ve nailed the basic version, here’s how you can mix it up. I’ve tried all of these.
Salted Caramel S’mores — Drizzle caramel sauce over the top after baking. Add a pinch of sea salt. It’s indulgent and perfect for fall.
Peanut Butter Cup S’mores — Crush mini peanut butter cups and mix them into the chocolate layer before adding marshmallows. Or sprinkle on top after baking. My kids love this version.
Cookie Butter S’mores — Swirl in a tablespoon of Biscoff spread into the chocolate layer. Adds a spicy, cinnamon kick.
Mini S’mores Dip — Use mini marshmallows and bake in a smaller skillet. Great for parties where people want small portions.
Gluten-Free — Use gluten-free graham crackers. The dip itself is naturally gluten-free (check your chocolate chips to be sure).
Vegan — Use vegan chocolate chips and vegan marshmallows (like Dandies). The technique is the same. It melts just as well.
Serving & Storage
How to Serve:
I usually serve this straight from the skillet at the dinner table—it looks rustic and stays warm. But here are other ways I’ve enjoyed it:
- Graham Crackers: The classic choice. Break them into squares for easy dipping.
- Shortbread Cookies: For a butterier crunch.
- Pretzel Rods: For a salty-sweet combo.
- Apple Slices: For a fresher, fruitier dip option.
Toppings Bar:
When I have guests, I put out: extra marshmallows, crushed nuts, caramel drizzle, chocolate chips. Everyone customizes their bowl.
Storage Instructions:
Refrigerator: Store in an airtight container for up to 3 days. The chocolate will harden, so let it sit at room temp for 10 minutes before serving. It might lose some gooeyness, but it’s still good.
Reheating: Best method: Microwave in 15-second intervals, stirring in between. Or reheat in a skillet over low heat. It will soften back up.
Freezing: Honestly, this doesn’t freeze well. The marshmallows get weird and chewy when thawed. Make it fresh.
Nutrition Information
I’m not a nutritionist, but here’s the breakdown if you’re tracking. This is definitely a treat, so enjoy it mindfully.
Per Serving (based on 8 servings):
| Nutrient | Amount |
|---|---|
| Calories | 280 |
| Protein | 3g |
| Carbs | 38g |
| Fiber | 2g |
| Sugar | 28g |
| Fat | 14g |
| Saturated Fat | 8g |
| Cholesterol | 15mg |
| Sodium | 120mg |
What’s Good:
- Quick energy boost from carbs
- Calcium from milk products
What to Know:
- High in sugar and saturated fat
- Contains dairy and gluten
My Take: Look, this is comfort food. It’s not a diet recipe. But it’s way better than store-bought desserts, and it brings people together. When I want to make it lighter, I use dark chocolate and less marshmallow. But usually? I just enjoy a small portion and savor every bite.
Final Thoughts
So that’s my Labor Day S’mores Dip! I’ve probably talked your ear off at this point, but when you make a recipe this often, you have a lot to say about it. This has saved holiday dinners more times than I can count. It’s my answer to “what’s for dessert” when I’m tired, don’t want to bake a whole cake, and still want something that tastes really good. My kids are happy, my husband’s happy, and I’m happy because I’m not stressed about cooking.
Make it yours! Try different add-ins, swap in your favorite nuts, adjust the chocolate. The best recipes are the ones you adapt to your family’s tastes. If you make this, drop a comment and let me know what you think! I love hearing how recipes turn out in your kitchen. And if something doesn’t work, tell me that too—I’m here to help troubleshoot.
Happy cooking! And I hope your kitchen smells half as good as mine does right now.
Frequently Asked Questions
Can I make this ahead of time?
You can prep the chocolate and marshmallows in the skillet and cover it with plastic wrap. When guests arrive, pop it in the oven. It will take a minute to come to temp, but it saves last-minute stress. I do this all the time for parties.
Why did my marshmallows burn?
They probably got too close to the heating element, or the broiler was too high. Always watch them closely during the last few minutes. If your oven runs hot, lower the temperature by 25°F and bake longer.
Can I use mini marshmallows?
Yes, but they melt faster and can make the dip soupy. If you use mini marshmallows, reduce the baking time by 2-3 minutes. I prefer jumbo for the texture, but mini works in a pinch.
What’s the best chocolate to use?
Semi-sweet chocolate chips are the standard. They melt well and aren’t too sweet. Milk chocolate is too sweet for most people, and dark chocolate can be bitter. I always use Ghirardelli or Guittard.
Can I serve this warm?
Absolutely! It’s best served warm, right out of the oven. The chocolate is molten and the marshmallows are soft. Let it cool for 5 minutes so it’s not scalding hot.
Is this recipe gluten-free?
The dip itself is gluten-free, but you need to check your chocolate chips and use gluten-free graham crackers for dipping. Many chocolate chips are processed in facilities that handle wheat, so check the label.
Can I freeze leftovers?
I don’t recommend it. The marshmallows change texture when frozen and thawed—they become chewy and weird. It’s best eaten fresh or stored in the fridge for 2-3 days.
Pin This Recipe!


Labor Day Smores Dip: 5-Step Easy Holiday Recipe
- Total Time: 20 minutes
- Yield: 8 servings 1x
Description
A crowd-pleasing, easy-to-make dessert dip that captures the nostalgic taste of campfire s’mores without the hassle. This golden-brown, gooey skillet dip is ready in just 20 minutes and is perfect for holidays, parties, or last-minute cravings.
Ingredients
- 1 ½ cups (250g) semi-sweet chocolate chips
- 10 oz (280g) large jumbo marshmallows
- 1 box (14.4 oz) classic honey graham crackers
- 2 tablespoons (30g) unsalted butter
- ½ teaspoon flaky sea salt or kosher salt
- Optional: ½ cup crushed pecans or walnuts
- Optional: 2 tablespoons caramel sauce
- Optional: ½ cup crushed mini peanut butter cups
Instructions
- Preheat your oven to 350°F (175°C). Line a baking sheet with parchment paper or foil and place your oven-safe skillet on it.
- Add the chocolate chips and butter to the skillet. Melt on the stovetop over low heat, stirring constantly until smooth and glossy, or place in the oven and stir halfway through.
- Arrange the jumbo marshmallows in a single layer over the melted chocolate, ensuring full coverage without excessive overlapping. Press them down gently.
- Bake in the preheated oven for 10-12 minutes, watching closely after 8 minutes. The marshmallows should puff up and turn golden brown.
- Remove from the oven and let cool for 5 minutes. Sprinkle with flaky salt if desired.
- Serve immediately with graham crackers for dipping.
Notes
For best results, use high-quality chocolate chips like Ghirardelli or Guittard that melt evenly. Avoid stale graham crackers as they will crumble. If your marshmallows are stale, toss them in the oven for 2 minutes before adding. For a darker toast, switch to broil for the last 1-2 minutes, but watch closely to prevent burning. This dip can be made ahead by prepping the skillet and refrigerating; add 1-2 minutes to baking time if starting cold.
- Prep Time: 5 minutes
- Cook Time: 12 minutes
- Category: Dessert
- Cuisine: American
Nutrition
- Serving Size: 1 serving (approx. 1
- Calories: 280
- Sugar: 28
- Sodium: 120
- Fat: 14
- Saturated Fat: 8
- Carbohydrates: 38
- Fiber: 2
- Protein: 3
Keywords: Labor Day, s'mores dip, dessert dip, easy holiday recipe, campfire treat, chocolate dip, marshmallow dip, party dessert, quick dessert, family friendly


