It was 11:30 PM on a Tuesday, and I had made a catastrophic error. I was hosting a last-minute dinner for six friends who were passing through town, and I had completely forgotten to buy dessert. Panic set in immediately. I stared into my pantry, hoping for a miracle. There were no fancy chocolates, no fresh berries, and certainly no time to go to the store. All I had was a bag of all-purpose flour, some cocoa powder, eggs, sugar, and a bottle of vanilla extract.
I remember standing there, feeling like the worst host in history, when I decided to throw together what I thought would be a quick, mediocre emergency brownie batter. I didn’t have a square pan, so I used a standard 9×13 baking dish. I mixed it up, poured it in, and baked it. When I pulled it out of the oven, it wasn’t a brownie. It was something else entirely. It was soft, incredibly moist, and smelled like pure chocolate heaven.
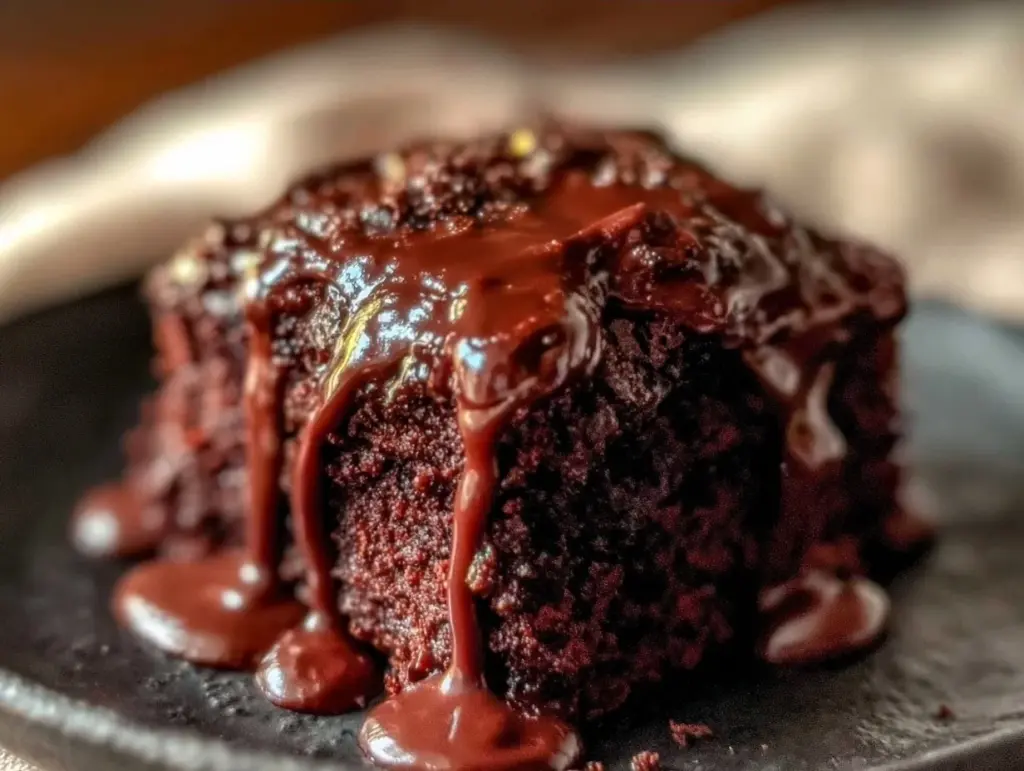
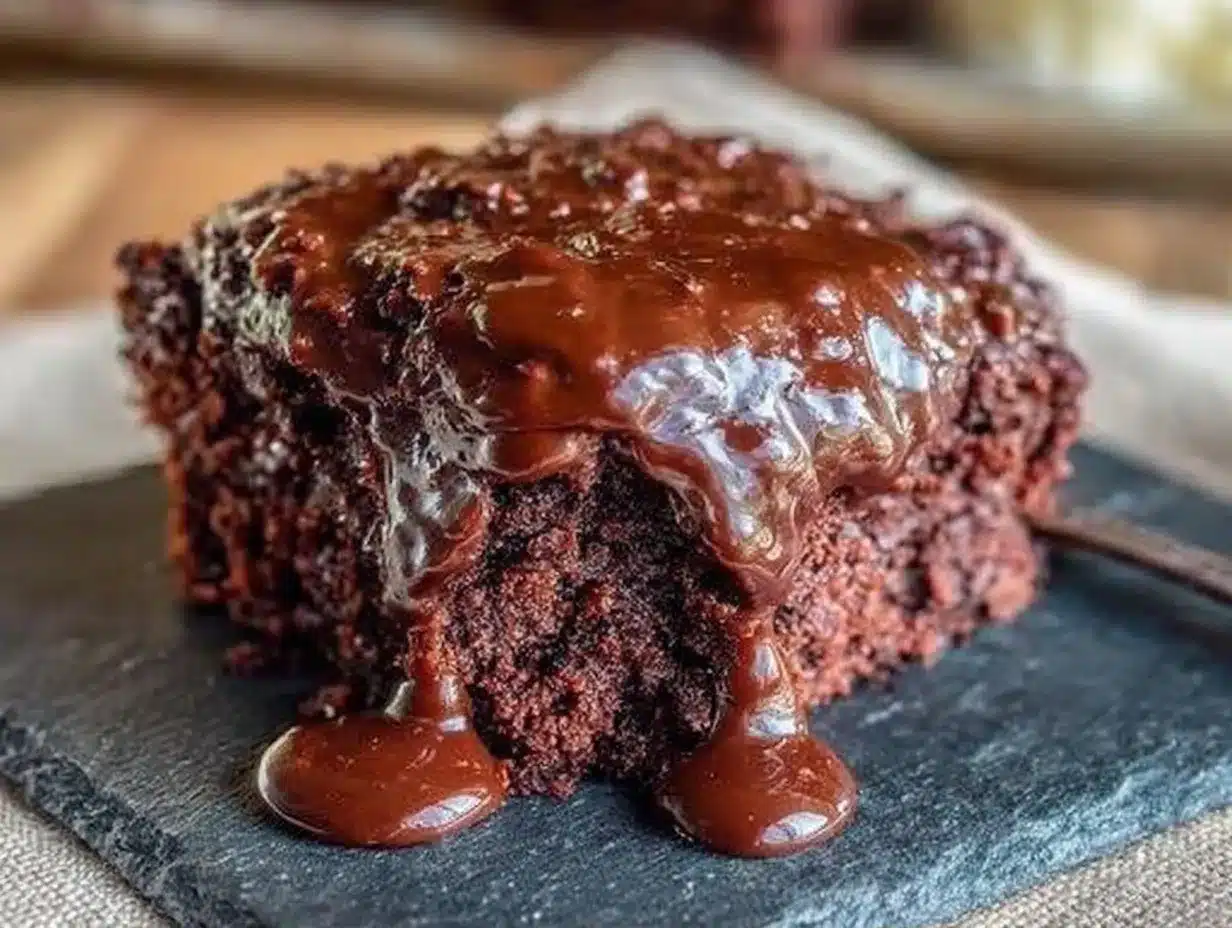
But the real magic happened when I made the frosting. I melted butter and cocoa powder with boiling water, then stirred in powdered sugar and vanilla. I didn’t let it cool. I poured it hot, straight from the pot, over the warm cake. The heat from the cake melted the frosting just enough to sink into the cracks, creating this glossy, fudgy, impossibly rich layer that seeped into every crumb. My friends walked in, saw the mess of the baking dish, and assumed I had bought something from a high-end bakery. They were wrong. They were just impressed.
That night changed how I view comfort food. I realized that the best desserts aren’t always the most complicated ones. Sometimes, they are the ones born out of necessity, using simple pantry staples to create something extraordinary. Since then, I’ve made this Ultra-Fudgy Chocolate Sheet Cake with Warm Poured Frosting at least twenty times. I’ve tweaked the ratios, tested different brands of cocoa, and learned exactly how to get that perfect fudgy texture without it being dry or dense. It has become my go-to for impressing guests, comforting myself after a long day, and satisfying any chocolate craving that hits at 10 PM. If you’re looking for a dessert that feels special but is actually effortless, this is it.
Why You’ll Love This Ultra-Fudgy Chocolate Sheet Cake
There are a million cake recipes out there, but this specific version hits a different note. It’s not about being light and airy. It’s about being dense, moist, and deeply chocolatey. Here is why this recipe has earned a permanent spot in my kitchen rotation:
It Uses Boiling Water — This is the secret weapon. The boiling water “blooms” the cocoa powder, intensifying its flavor and keeping the crumb incredibly moist. Without it, the cake tastes flat. With it, it tastes like rich, dark chocolate truffles. I learned this trick years ago, and I’ve never looked back.
The Frosting Melts Into the Cake — Unlike traditional buttercream that sits on top, this warm poured frosting creates a shiny, fudgy crust. It sinks slightly into the warm cake, creating a marbled effect that looks professional but takes zero effort. It’s visually stunning and texturally perfect.
Pantry Staples Only — You don’t need expensive ingredients. No buttermilk, no sour cream, no fancy chocolate chips. Just flour, sugar, cocoa, eggs, and butter. This makes it the perfect last-minute dessert when you’re stuck at home with limited supplies.
It Bakes in Under an Hour — From mixing to cooling, this whole process takes about 45 minutes. That’s faster than ordering takeout. I’ve made this after a busy workday when I wanted something sweet but didn’t have the energy to fuss over multiple components.
It Freezes Like a Dream — Unlike delicate layer cakes, sheet cakes hold up beautifully in the freezer. I often bake two, eat one, and freeze the other for a rainy day. It thaws out just as moist and fudgy as the fresh batch.
This is my go-to when dinner needs to just work, or when I need to feel a little extra special on a random Wednesday. It’s indulgent, reliable, and always a crowd-pleaser.
Key Ingredients for the Perfect Fudgy Texture
You might think cake is simple, but the quality of your ingredients matters more than you’d expect. Here’s what I use and why, along with some tips to ensure your cake turns out perfectly every time.
All-Purpose Flour (2 cups / 250g) — This provides the structure. I don’t use cake flour because I want a dense, fudgy crumb, not a light sponge. All-purpose flour gives that perfect chew. Make sure to spoon and level your flour, don’t scoop it directly from the bag, or you’ll end up with a dry cake.
Unsweetened Cocoa Powder (1 cup / 80g) — This is the star. I use natural unsweetened cocoa powder, like Hershey’s or Ghirgley’s. Do not use Dutch-processed cocoa unless you adjust the leavening, as it reacts differently. Natural cocoa has a sharper, more intense chocolate flavor that pairs perfectly with the boiling water.
Boiling Water (1 cup / 240ml) — This is non-negotiable. The boiling water hydrates the cocoa powder and sugar, creating a thin batter that bakes up moist. If you don’t have boiling water, boil it specifically for this step. It’s worth the wait.
Granulated Sugar (2 cups / 400g) — Yes, two full cups. Sugar isn’t just for sweetness; it’s a tenderizer. It retains moisture during baking. If you reduce the sugar, the cake will be dry and crumbly. Don’t skimp.
Vegetable Oil (1/2 cup / 120ml) — I use vegetable or canola oil instead of butter for the cake batter. Oil stays liquid at room temperature, which keeps the cake moist for days. Butter solidifies, making the cake feel heavier and drier the next day. Oil is the key to that “fudgy” texture.
Large Eggs (2 large / ~100g) — Eggs provide structure and richness. I use large eggs from the grocery store, but if you’re in a region where eggs are smaller, you might need three. Room temperature eggs blend more easily into the batter, ensuring a smooth mix.
Vanilla Extract (1 tsp / 5ml) — Pure vanilla extract enhances the chocolate flavor. I use clear vanilla because it doesn’t darken the cake batter, but dark vanilla works too. Avoid imitation vanilla; it tastes artificial and cheapens the dessert.
Butter (1/2 cup / 115g) — For the frosting, I use unsalted butter. It gives you control over the saltiness. Make sure it’s melted, not just softened, for the warm poured frosting.
Powdered Sugar (4 cups / 480g) — This creates the sweetness and thickness of the frosting. Sift it if it’s clumpy, though usually, it’s fine straight from the bag. If you don’t sift it, you’ll get little white lumps in your shiny frosting.
Tools Needed
You don’t need fancy equipment. Here’s what I use, and what you can swap out if you don’t have it.
9×13 Inch Baking Dish — A glass Pyrex dish is ideal because it distributes heat evenly. Metal pans work too, but they might brown the edges faster. I’ve used both, and the texture difference is negligible.
Wire Whisk — A simple balloon whisk is all you need to mix the batter. It incorporates air and ensures the cocoa powder doesn’t clump. Electric mixers aren’t necessary for this recipe; in fact, overmixing can make the cake tough.
Medium Saucepan — For the frosting, a small saucepan works best. It allows you to melt the butter and cocoa evenly without burning. A microwave-safe bowl works too, but you need to stir frequently to avoid hot spots.
Cooling Rack — Essential for cooling the cake evenly. If you leave it in the pan, the bottom will get soggy from the trapped heat.
How to Make Ultra-Fudgy Chocolate Sheet Cake
Let’s get into the nitty-gritty. This process is straightforward, but timing and temperature are everything. Follow these steps exactly, and you’ll get that perfect fudgy result.
Step 1: Prep Your Oven and Pan (5 minutes)
Preheat your oven to 350°F (175°C). This temperature is crucial. If it’s too hot, the cake will rise too quickly and crack. If it’s too low, it won’t set properly. Grease your 9×13 baking dish with butter or non-stick spray. I like to dust it with a little cocoa powder after greasing to prevent sticking and add a hint of chocolate flavor.
Step 2: Mix Dry Ingredients (2 minutes)
In a large mixing bowl, whisk together the flour, sugar, cocoa powder, baking powder, baking soda, and salt. Whisking them together ensures even distribution of the leavening agents. If you don’t whisk, you might get pockets of baking soda that taste bitter. Make sure there are no lumps of cocoa powder left.
Step 3: Add Wet Ingredients (3 minutes)
Add the eggs, milk, vegetable oil, and vanilla extract to the dry ingredients. Beat on medium speed with your whisk or electric mixer for about 2 minutes. The batter will be thick and dark. Scrape down the sides of the bowl to ensure everything is incorporated. This step develops just enough gluten to hold the cake together without making it tough.
Step 4: Incorporate Boiling Water (2 minutes)
Stir in the boiling water by hand. This is the moment of truth. The batter will become very thin and watery. Don’t panic! This is exactly what it should look like. The hot water blooms the cocoa and hydrates the sugar. Pour the batter evenly into your prepared baking dish.
Step 5: Bake Until Set (30-35 minutes)
Place the cake in the preheated oven. Bake for 30-35 minutes. Check it at 30 minutes. Insert a wooden toothpick into the center. It should come out with a few moist crumbs attached, but not wet batter. If it’s wet, give it 5 more minutes. The cake will pull away slightly from the edges of the pan when it’s done.
Step 6: Make the Warm Frosting (10 minutes)
While the cake bakes, make the frosting. In a medium saucepan, combine the butter, cocoa powder, and boiling water. Bring to a boil, stirring constantly. Once it boils, remove from heat and stir in the powdered sugar and vanilla. The mixture will be thick and glossy. It’s ready to pour immediately.
Step 7: Pour and Set (15 minutes)
Once the cake comes out of the oven, let it cool for 5 minutes. Then, pour the warm frosting evenly over the top. Use a spatula to spread it to the edges. The frosting will melt slightly into the warm cake, creating that beautiful fudgy layer. Let the cake cool completely in the pan before slicing. This allows the frosting to set and the cake to firm up.
Total Time: 1 hour (including cooling). Yield: 12-15 servings.
Expert Tips for the Best Results
Here’s everything I learned from making this too many times. These tips will save you from common mistakes.
Don’t Overbake — This is the #1 mistake. Chocolate cake continues to cook slightly after being removed from the oven. If you wait until the toothpick is completely clean, the cake will be dry. Aim for moist crumbs. The residual heat will finish the job.
Use Good Cocoa Powder — Since cocoa is the main flavor, cheap powder tastes like cardboard. I always buy name-brand natural cocoa. If you’re on a budget, spend your extra dollars here. It makes a huge difference.
Room Temperature Ingredients — While the water needs to be boiling, the eggs and milk should be at room temperature. Cold ingredients can shock the batter and cause it to curdle slightly, leading to an uneven texture.
Let It Cool Completely — I know it’s tempting to slice into it while it’s warm, but the frosting won’t set properly. If you cut it too soon, it will be a mess. Patience is key. The flavor actually improves as it cools.
Store Properly — This cake keeps well at room temperature for up to 3 days if covered tightly with plastic wrap. It also refrigerates well for up to a week. However, refrigeration can dry it out slightly, so let it come to room temperature before serving.
Recipe Variations to Mix It Up
Once you’ve nailed the basic version, here’s how to mix it up. These variations keep the recipe fresh and exciting.
Peanut Butter Swirl — Add dollops of peanut butter on top of the batter before baking. Use a knife to swirl it in. The salty-sweet combination is addictive. I love this version for movie nights.
Espresso Boost — Replace the boiling water with hot brewed coffee. The coffee enhances the chocolate flavor without making it taste like coffee. It adds a deeper, more complex taste.
Marshmallow Frosting — Instead of the warm poured frosting, use a marshmallow fluff frosting. It’s lighter and sweeter. This is a classic combination that reminds me of childhood.
Gluten-Free Option — Swap the all-purpose flour for a 1:1 gluten-free flour blend. The texture will be slightly more tender, but it still works beautifully. I’ve tested this with Bob’s Red Mill blend, and it holds up well.
Vegan Adaptation — Use flax eggs (1 tbsp ground flaxseed + 3 tbsp water per egg) and coconut oil instead of butter. Use plant-based milk. The cake will be slightly denser, but still delicious.
Serving & Storage
Serving: This cake is best served at room temperature. It pairs wonderfully with a cup of hot coffee or a glass of cold milk. I also like to serve it with a dollop of whipped cream or a scoop of vanilla ice cream for an extra treat. It’s perfect for dinner parties, potlucks, or just a cozy night in.
Storage: Store leftovers in an airtight container at room temperature for up to 3 days. For longer storage, wrap individual slices in plastic wrap and freeze for up to 3 months. Thaw at room temperature before serving. The cake freezes exceptionally well, which is great for meal prepping desserts.
Reheating: If you prefer warm cake, microwave a slice for 10-15 seconds. The frosting will soften, and the cake will be soft and fudgy again.
Nutrition Information
I’m not a nutritionist, but here’s the breakdown. This is a rich, indulgent dessert, so portion control is key.
Per serving (1 slice): Calories: 380, Protein: 4g, Carbs: 55g, Fiber: 2g, Fat: 16g, Sodium: 250mg.
My Take: This is comfort food with sugar and butter. Not diet food. But it’s better than store-bought cake because I know exactly what’s in it. It’s a treat to be enjoyed mindfully.
Final Thoughts
This Ultra-Fudgy Chocolate Sheet Cake with Warm Poured Frosting is more than just a dessert. It’s a reminder that the best things in life often come from simple ingredients and a little bit of patience. I’ve made this cake for birthdays, holidays, and random Tuesdays, and it has never failed to bring a smile to people’s faces. It’s versatile, reliable, and absolutely delicious.
If you make this, drop a comment! I love hearing how it turns out in your kitchen. Try adding a swirl of peanut butter or serving it with a scoop of ice cream. Let me know your favorite way to enjoy it. Happy cooking!
FAQs
Q: Can I use Dutch-processed cocoa powder?
A: You can, but you need to adjust the leavening. Dutch-processed cocoa is neutralized and doesn’t react with baking soda. If you use it, swap the baking soda for baking powder, or add 1/4 teaspoon of cream of tartar. However, natural cocoa is preferred for this recipe.
Q: Why did my cake turn out dry?
A: This usually happens if you overbake it or use too much flour. Make sure to spoon and level your flour, and check the cake 5 minutes before the timer goes off. The toothpick should have moist crumbs, not be completely clean.
Q: Can I make this ahead of time?
A: Yes! You can bake the cake and frost it up to 2 days in advance. Store it covered at room temperature. The flavors meld together nicely overnight, making it even better the next day.
Q: How do I store leftovers?
A: Cover the pan tightly with plastic wrap or transfer slices to an airtight container. Keep it at room temperature for 3 days, or in the refrigerator for up to a week. It also freezes well for up to 3 months.
Q: Can I use a different pan size?
A: You can use an 8×8 pan, but the baking time will be shorter (around 25-30 minutes). Keep a close eye on it to prevent overbaking. A 9×13 pan is ideal for the correct thickness and texture.
Q: Is there a way to make this healthier?
A: You can substitute half the sugar with applesauce, but the texture will change. For a gluten-free option, use a 1:1 gluten-free flour blend. However, the original recipe is designed for maximum fudginess, so any changes will alter the result.
Q: What if I don’t have boiling water?
A: You can use hot coffee instead. It adds a richer flavor and still blooms the cocoa powder. Just make sure it’s very hot, near boiling, to get the same effect.
Pin This Recipe!
Ultra-Fudgy Chocolate Sheet Cake with Warm Poured Frosting
- Total Time: 1 hour
- Yield: 12-15 servings 1x
Description
A dense, moist, and incredibly fudgy chocolate sheet cake made with simple pantry staples. The secret is blooming cocoa with boiling water and pouring a warm, glossy frosting directly over the warm cake for a rich, professional result.
Ingredients
- 2 cups (250g) all-purpose flour
- 1 cup (80g) unsweetened natural cocoa powder
- 2 cups (400g) granulated sugar
- 1 tsp baking powder
- 1 tsp baking soda
- 1/2 tsp salt
- 2 large eggs, room temperature
- 1 cup milk
- 1/2 cup (120ml) vegetable oil
- 1 tsp vanilla extract
- 1 cup (240ml) boiling water
- 1/2 cup (115g) unsalted butter, melted
- 1/2 cup (120ml) boiling water (for frosting)
- 4 cups (480g) powdered sugar
- 1 tsp vanilla extract (for frosting)
Instructions
- Preheat oven to 350°F (175°C). Grease a 9×13 inch baking dish with butter or non-stick spray, optionally dusting with cocoa powder.
- In a large mixing bowl, whisk together flour, sugar, cocoa powder, baking powder, baking soda, and salt until well combined and lump-free.
- Add eggs, milk, vegetable oil, and 1 tsp vanilla extract to the dry ingredients. Beat on medium speed for about 2 minutes until the batter is thick and dark. Scrape down the sides of the bowl.
- Stir in 1 cup of boiling water by hand. The batter will become very thin; this is correct. Pour evenly into the prepared baking dish.
- Bake for 30-35 minutes. Check at 30 minutes by inserting a wooden toothpick into the center; it should come out with moist crumbs attached, not wet batter. The cake will pull away slightly from the edges.
- While the cake bakes, make the frosting: In a medium saucepan, combine 1/2 cup melted butter, cocoa powder (implied from context of ‘cocoa powder’ in frosting step, though quantity not explicitly listed in ingredients list, standard ratio suggests approx 1/2 cup or similar, but sticking to text: ‘combine butter, cocoa powder, and boiling water’), and 1/2 cup boiling water. Bring to a boil, stirring constantly.
- Remove frosting mixture from heat and stir in powdered sugar and 1 tsp vanilla extract until thick and glossy.
- Let the baked cake cool for 5 minutes. Pour the warm frosting evenly over the top and spread to the edges.
- Let the cake cool completely in the pan before slicing to allow the frosting to set.
Notes
Do not overbake the cake; residual heat will continue to cook it after removal from the oven. Use natural unsweetened cocoa powder for best flavor. Room temperature eggs and milk help prevent curdling. The cake can be stored at room temperature for 3 days or frozen for up to 3 months. For a gluten-free option, swap flour for a 1:1 gluten-free blend. For a vegan version, use flax eggs and coconut oil.
- Prep Time: 15 minutes
- Cook Time: 35 minutes
- Category: Dessert
- Cuisine: American
Nutrition
- Serving Size: 1 slice
- Calories: 380
- Sugar: 45
- Sodium: 250
- Fat: 16
- Saturated Fat: 5
- Carbohydrates: 55
- Fiber: 2
- Protein: 4
Keywords: chocolate cake, sheet cake, fudgy cake, easy dessert, pantry staples, warm frosting, homemade cake, chocolate dessert


