I still remember the smell of my grandmother’s kitchen in late October. It wasn’t just the smell of baking; it was a physical presence that wrapped around you like a wool blanket. She didn’t use timers. She used her eyes, her nose, and the occasional tap on the counter. Every year, when the leaves turned that deep, rusty orange and the air got crisp enough to see your breath, she’d pull out her heavy, dented 9×13 pan. This wasn’t a fancy stand-mixer operation. It was muscle memory and love, mixed by hand until the batter was thick and creamy.
For years, I tried to replicate that flavor with quick hacks and boxed mixes, but it never tasted right. It lacked that deep, spiced warmth that clung to your fingertips. It wasn’t until I went back to her old index card—stained with coffee and vanilla—that I understood. The secret wasn’t in the technique; it was in the patience. It was in letting the crust form properly and letting the cheesecake set slowly, just like she did.
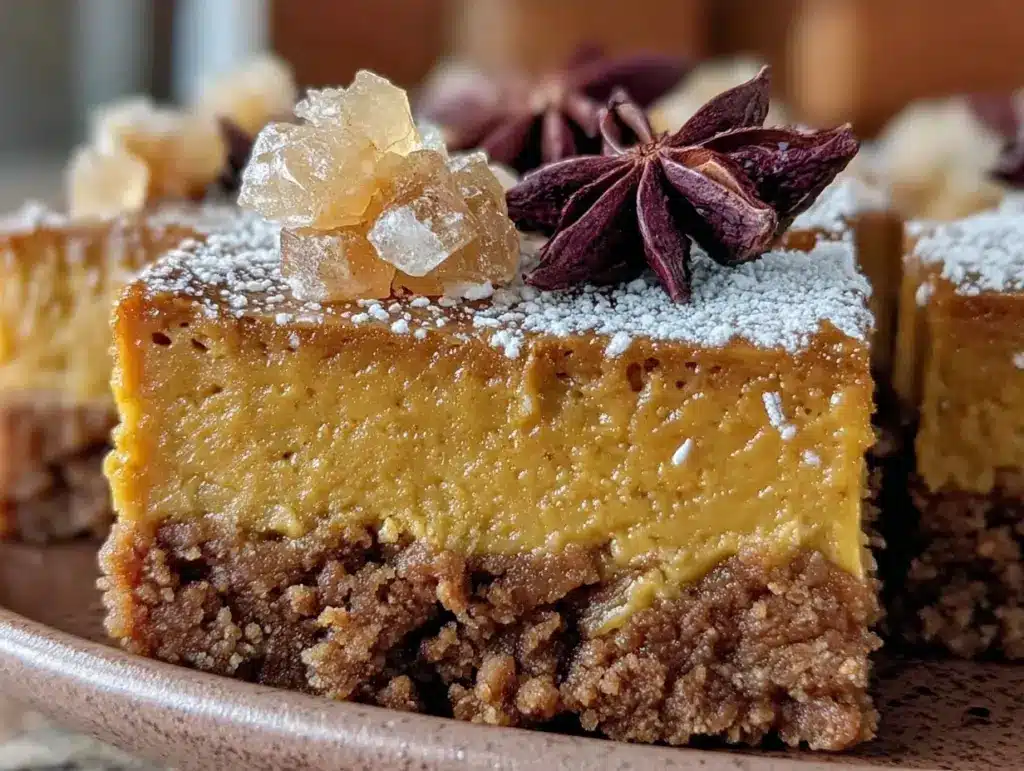
These Grandma’s Fall Pumpkin Cheesecake Bars are my tribute to that slow, autumnal magic. They’re rich, spiced, and have that perfect crunch from the gingersnap crust that I’ve been chasing for a decade. I’ve tested this Grandma’s Fall Pumpkin Cheesecake Bars with Gingersnap Crust recipe at least ten times now. I’ve tried different sugars, different pans, and even different spices. But this version? This is the one. It’s the one that makes your family ask for seconds before the first slice is even cut. It’s the one that feels like a hug on a plate.
If you’ve ever struggled with cheesecake that cracks or a crust that turns to mush, you’re in the right place. I’ve learned every trick the hard way. I’ve burned the edges, I’ve undermixed the filling, and I’ve rushed the cooling process. But this recipe is different. It’s forgiving, it’s deeply flavorful, and it captures the essence of fall without trying too hard. Let’s make something that feels like home.
Why You’ll Love This Recipe
There’s a reason this Grandma’s Fall Pumpkin Cheesecake Bars with Gingersnap Crust has become the centerpiece of every family gathering I host. It’s not just because it tastes incredible (though it does). It’s because it does the heavy lifting for you while still delivering that homemade, from-scratch quality.
- The Crust is Non-Negotiable — Most pumpkin desserts rely on a graham cracker crust, which is fine, but it’s boring. The gingersnap crust adds a spicy, molasses-rich crunch that cuts through the sweetness of the pumpkin. It’s the texture contrast that makes people close their eyes when they take a bite.
- It’s Actually Creamy — I’ve made pumpkin cheesecakes that were dense as a brick and ones that were soupy. This balance is perfect. The cream cheese provides structure, while the pumpkin puree keeps it light. It melts in your mouth without feeling heavy after dinner.
- Perfect for Batch Cooking — Because it’s baked in a 9×13 pan, you get about 24-30 bars. This is ideal for potlucks, holiday parties, or just having dessert ready in the fridge for a week. I love that I can make these on Sunday and have happiness waiting for me all week.
- Spices That Actually Taste Like Fall — We’re not using that generic “pumpkin pie spice” blend if you can help it. We’re using cinnamon, ginger, nutmeg, and cloves. Real spices. Real flavor. It tastes like October, not like a candy store aisle.
- Make-Ahead Friendly — This dessert actually gets better after sitting in the fridge overnight. The flavors meld together, the crust softens just enough, and the texture becomes incredibly cohesive. It’s the ultimate stress-free make-ahead dessert.
This is my go-to when dinner needs to just work, but you still want to impress. It’s reliable, it’s delicious, and it feels special without requiring a culinary degree.
Key Ingredients
When you’re making a dessert this simple, the quality of your ingredients matters more than you might think. You don’t need fancy imports, but you do need fresh, good stuff. Here’s what you’ll need for this Grandma’s Fall Pumpkin Cheesecake Bars with Gingersnap Crust.
Full-Fat Cream Cheese (32 oz / 900g) — I use four 8-ounce blocks. Never buy the tub “whipped” or “light” cream cheese. It has too much water and air, and your bars will be runny. Brick cream cheese is non-negotiable for that dense, creamy texture. Let it come to room temperature before you start, or you’ll end up with lumpy batter.
Granulated Sugar (1 cup / 200g) — This provides the base sweetness. I prefer granulated over brown sugar here because brown sugar can make the batter too wet. We want the pumpkin to shine, not the molasses.
Large Eggs (3 whole + 3 yolks / approx. 240g) — I use 3 whole eggs and 3 extra yolks. The extra yolks add richness and a custard-like texture. If you don’t have a use for the whites, freeze them for a smoothie or an omelet. Don’t skip the yolks; they make the difference between “okay” and “amazing.”
Pumpkin Puree (15 oz / 425g) — One standard can. And please, I beg you: do not use pumpkin pie filling. Pie filling has sugar and spices already added. You want 100% pure pumpkin. If you make your own, make sure you strain out the excess water through a cheesecloth or paper towel, or the bars will be soggy.
Gingersnap Cookies (2 cups / 200g, crushed) — These are for the crust. I buy the sturdy, crisp gingersnaps, not the soft, chewy kind. You want them to crunch. If you can’t find them, you can use ginger snaps from a bakery, but check the texture. You’ll need about 2 cups of crumbs.
Unsalted Butter (6 tbsp / 85g, melted) — For the crust. This binds the crumbs together. Use good quality butter. If your butter tastes bland, your crust will taste bland.
Ground Cinnamon (1 tsp / 2g) — Warm and sweet. This is the backbone of the flavor.
Ground Ginger (1/2 tsp / 1g) — Adds that spicy kick that pairs perfectly with the gingersnap crust.
Ground Nutmeg (1/4 tsp / 0.5g) — Just a pinch. Nutmeg is potent. Too much and it tastes like soap. Less is more here.
Ground Cloves (1/8 tsp / 0.25g) — Again, very potent. This adds depth. If you don’t have cloves, you can skip them, but they’re traditional in gingersnap cookies, so they fit perfectly.
Salt (1/2 tsp / 3g) — Even in a sweet dessert, salt is crucial. It balances the sugar and enhances the pumpkin flavor. Don’t skip it.
Tools Needed
You don’t need fancy equipment to make these bars. I keep it simple, just like my grandmother did.
9×13 Inch Baking Pan — I use a heavy-duty metal pan. Glass pans heat differently and can cause the edges to overcook. If you only have glass, lower the oven temperature by 25 degrees.
Food Processor or Ziploc Bag — For crushing the gingersnaps. A food processor is faster, but if you don’t want to dirty a dish, put the cookies in a thick Ziploc bag and crush them with a rolling pin. It’s therapeutic and effective.
Electric Hand Mixer or Stand Mixer — You can use a whisk, but it takes forever and your arm will hurt. A hand mixer is perfect for this. Just be careful not to overmix once you add the eggs (more on that in the tips).
Offset Spatula — For spreading the batter evenly. A regular spatula works, but an offset one makes it easier to get those corners smooth.
Aluminum Foil — To line the pan. This is the secret to easy removal. If you don’t have foil, parchment paper works too, but foil is easier to shape into the pan corners.
How to Make Grandma’s Fall Pumpkin Cheesecake Bars
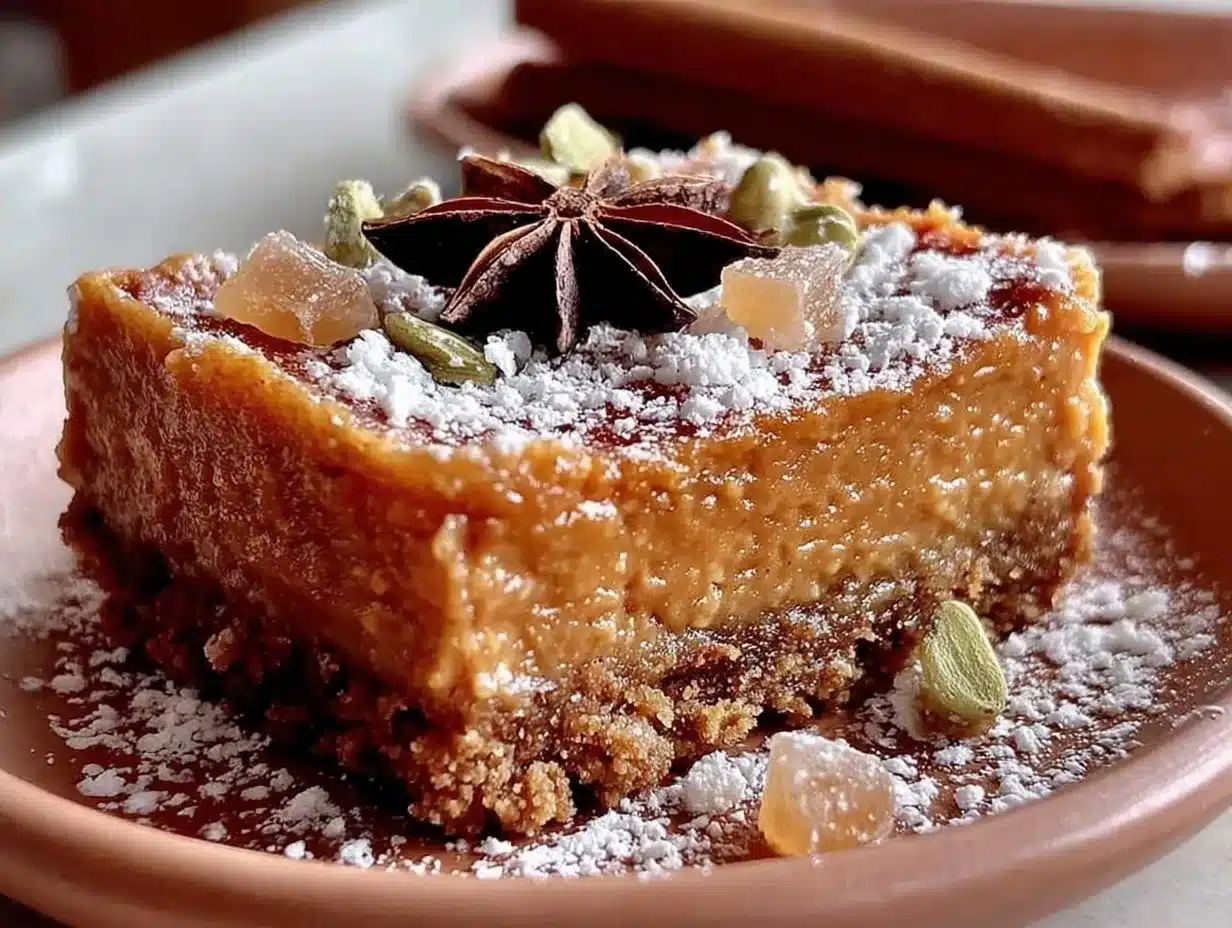
Let’s get into the kitchen. This process is straightforward, but timing is everything. Here is exactly how I make my Grandma’s Fall Pumpkin Cheesecake Bars with Gingersnap Crust.
Step 1: Prep Your Pan and Oven (5 minutes)
Preheat your oven to 325°F (165°C). This is a low and slow temperature. High heat will cause the cheesecake to crack and the edges to burn. While the oven heats, line your 9×13 pan with aluminum foil. Leave an overhang on the long sides so you can lift the bars out later. Spray the foil lightly with non-stick cooking spray.
Step 2: Make the Gingersnap Crust (5 minutes)
Crush your gingersnap cookies into fine crumbs. If you’re using a food processor, pulse until they look like wet sand. If you’re using a bag, keep pounding until there are no large chunks left. In a medium bowl, mix the crumbs with the melted butter and a pinch of salt. It should look like damp sand. If it’s too dry, add a teaspoon more butter. If it’s too wet, add a tablespoon more crumbs.
Press this mixture firmly into the bottom of your prepared pan. Use the bottom of a measuring cup to pack it down tight. You want it even. Place the pan in the oven for 5 minutes to set the crust. Remove it and let it cool while you make the filling. This pre-bake helps prevent a soggy bottom.
Step 3: Whip the Cream Cheese (3 minutes)
In a large bowl, beat the room-temperature cream cheese on medium speed until it is completely smooth and creamy. This might take 2-3 minutes. Scrape down the sides of the bowl. If you see any lumps, keep beating. Lumps in the cream cheese will show up in the final product.
Step 4: Add Sugar and Spices (2 minutes)
Add the granulated sugar, cinnamon, ginger, nutmeg, cloves, and salt to the cream cheese. Beat on low speed until just combined. Scrape the bowl again. You want the spices distributed evenly, but don’t overmix at this stage.
Step 5: Incorporate Eggs and Pumpkin (4 minutes)
Add the eggs one at a time, mixing on low speed just until the yellow disappears. Then, add the pumpkin puree. Mix on low until the batter is uniform in color. It should be a beautiful, pale orange. Stop mixing as soon as it’s combined. Overmixing at this stage incorporates too much air, which leads to cracks later.
Step 6: Bake the Bars (45-50 minutes)
Pour the batter over the cooled crust. Smooth the top with your spatula. Bake at 325°F (165°C) for 45-50 minutes. The bars are done when the edges are set and slightly jiggly, but the center is mostly firm. If you shake the pan gently, the center should jiggle like Jell-O, not slosh like water. The center will set as it cools.
Step 7: Cool Completely (2 hours minimum)
This is the hardest part. Turn off the oven and crack the door open. Let the bars sit in the cooling oven for 1 hour. This gradual cooling prevents cracks. Then, remove them and let them cool completely on a wire rack. Once cool, cover with plastic wrap and refrigerate for at least 4 hours, preferably overnight.
Total time: About 1 hour active, plus cooling/chilling time. The result is worth the wait.
Expert Tips
Here’s everything I learned from making this too many times. These tips will save you from common pitfalls.
The Game-Changers:
Room Temperature Ingredients are Key
I cannot stress this enough. Cold cream cheese and cold eggs will create a lumpy, uneven batter. Take your cream cheese out of the fridge 2 hours before you start. If you forget, you can microwave it in 10-second bursts, but be careful not to melt it. Warm eggs mix in more easily and create a smoother emulsion.
Don’t Overmix the Batter
Once you add the eggs, mix on low speed and stop as soon as it’s combined. Overmixing incorporates air bubbles. As the cheesecake bakes, those bubbles expand and then collapse, causing cracks on the surface. I learned this the hard way on my third attempt. My first batch looked like a map of Arizona. Now, I mix gently and confidently.
Use a Water Bath (Optional but Recommended)
If you want the absolute smoothest, most professional-looking bars, use a water bath. Wrap the outside of your foil-lined pan in two layers of heavy-duty foil to prevent leaks. Place the pan in a larger roasting pan and fill the roasting pan with hot water halfway up the sides of the cheesecake pan. This creates a humid environment that prevents cracking. It’s a bit of extra work, but it guarantees success.
Common Problems & Solutions:
Cracks on Top — Usually caused by overmixing or cooling too quickly. Follow the cooling instructions above. If you do get cracks, cover them with a dollop of whipped cream or a dusting of powdered sugar. Nobody will know.
Soggy Crust — Caused by too much moisture in the pumpkin puree or not pressing the crust down firmly. Always strain your pumpkin puree. And press that crust down with all your might.
Bars Fall Apart When Cut — This happens if you cut them while they’re still warm or not chilled enough. Patience! Let them chill for at least 4 hours. Use a sharp knife dipped in hot water for clean cuts.
Recipe Variations
Once you’ve nailed the basic version, here’s how to mix it up. This Grandma’s Fall Pumpkin Cheesecake Bars with Gingersnap Crust is a canvas for creativity.
White Chocolate Chip Swirl
After pouring the batter, sprinkle 1/2 cup of white chocolate chips over the top and swirl them in with a knife. The sweetness contrasts beautifully with the spiced pumpkin. This is my personal favorite variation.
Maple Glaze Topping
Mix 2 tablespoons of maple syrup with 1 cup of powdered sugar and a splash of milk. Drizzle over the chilled bars before serving. It adds a nice shine and a hint of autumnal sweetness.
Walnut or Pecan Crunch
Stir 1/2 cup of toasted chopped walnuts or pecans into the batter before baking. It adds a nice texture and nutty flavor that complements the spices. I often add this when I’m making these for a crowd.
Gluten-Free Option
Simply use gluten-free gingersnap cookies for the crust. Most major brands make a decent version. The filling is naturally gluten-free, so just double-check your spice labels for cross-contamination.
Dairy-Free Adaptation
Use vegan cream cheese and dairy-free butter for the crust. The texture might be slightly different, but the flavor will still be delicious. I’ve tried this with several brands, and Kite Hill works well.
Serving & Storage
Serving:
I serve these bars plain, letting the gingersnap crust and pumpkin filling speak for themselves. But if you want to dress it up, add a dollop of homemade whipped cream or a sprinkle of chopped pecans. They pair beautifully with a cup of hot coffee or a glass of cold milk. For a fall party, they also go well with my spiced apple cider sangria, which adds a festive touch to any gathering.
Storage:
These bars keep well in the refrigerator. Store them in an airtight container for up to 5 days. If you’re bringing them to a potluck, keep them in the pan with plastic wrap directly on the surface to prevent drying out.
Freezing:
Yes, these freeze well! Wrap individual bars tightly in plastic wrap and then in aluminum foil. They’ll last in the freezer for up to 2 months. Thaw them in the refrigerator overnight before serving. The texture holds up surprisingly well after freezing.
Nutrition Information
I’m not a nutritionist, but here’s the breakdown per bar (assuming 24 servings). These are indulgent, so enjoy them in moderation.
| Nutrient | Amount |
|---|---|
| Calories | 280 |
| Protein | 4g |
| Carbohydrates | 28g |
| Fiber | 1g |
| Sugar | 22g |
| Fat | 18g |
| Sodium | 210mg |
My Take:
This is comfort food. It’s rich, it’s sweet, and it’s packed with cream cheese. It’s not a health food, but it’s better than store-bought dessert because you control the ingredients. I make these for special occasions, not for daily snacking. That’s the mindset that keeps it special.
Final Thoughts
Making these Grandma’s Fall Pumpkin Cheesecake Bars with Gingersnap Crust is more than just baking. It’s a ritual. It’s a way to slow down and appreciate the season. I hope these bars bring a little bit of that warmth and nostalgia into your kitchen. Whether you make them for Thanksgiving, a quiet Tuesday, or just because you love pumpkin, I hope they become a new tradition for your family.
If you make this recipe, I’d love to hear how it turns out. Drop a comment below with your thoughts, or tag me on social media. I love seeing your creations. And if you’re looking for more fall inspiration, check out these pumpkin butter thumbprint cookies for a smaller bite, or try my caramel apple cheesecake bites for a no-bake option.
Happy cooking!
FAQs
Can I use pumpkin pie filling instead of pure pumpkin puree?
Absolutely not. Pumpkin pie filling already contains sugar, spices, and thickeners. If you use it, your cheesecake will be overly sweet and the texture will be wrong. You need 100% pure pumpkin puree from a can.
Why did my cheesecake crack?
Cracking is usually caused by overmixing (which adds air), baking at too high a temperature, or cooling too quickly. Make sure to mix on low speed, bake at 325°F, and let the cheesecake cool gradually in the turned-off oven.
Can I make these bars ahead of time?
Yes! In fact, they taste better the next day. You can make them 2-3 days in advance. Just keep them covered in the refrigerator. They also freeze well for up to 2 months.
What kind of gingersnap cookies should I use?
Use crisp, sturdy gingersnaps. Soft, chewy ones won’t create the right texture for the crust. Look for brands that advertise a “crunchy” or “crisp” texture.
Can I use a springform pan instead?
Yes, you can. Use a 9-inch springform pan. The baking time might be slightly longer, around 50-55 minutes. Check for doneness with the jiggle test. Just be careful when releasing the spring, as the bars are delicate when warm.
Do I need to strain the pumpkin puree?
It’s highly recommended. Pumpkin puree can be watery. Straining it through a cheesecloth or paper towel for 15-20 minutes removes excess moisture, which helps prevent a soggy crust and ensures a firm set.
Can I reduce the sugar?
You can reduce the sugar by 1/4 cup, but it may affect the texture and browning. Cream cheese desserts rely on sugar for structure and moisture. If you reduce it significantly, the bars might be too dense or not set properly. I recommend sticking to the recipe for best results.
Pin This Recipe!
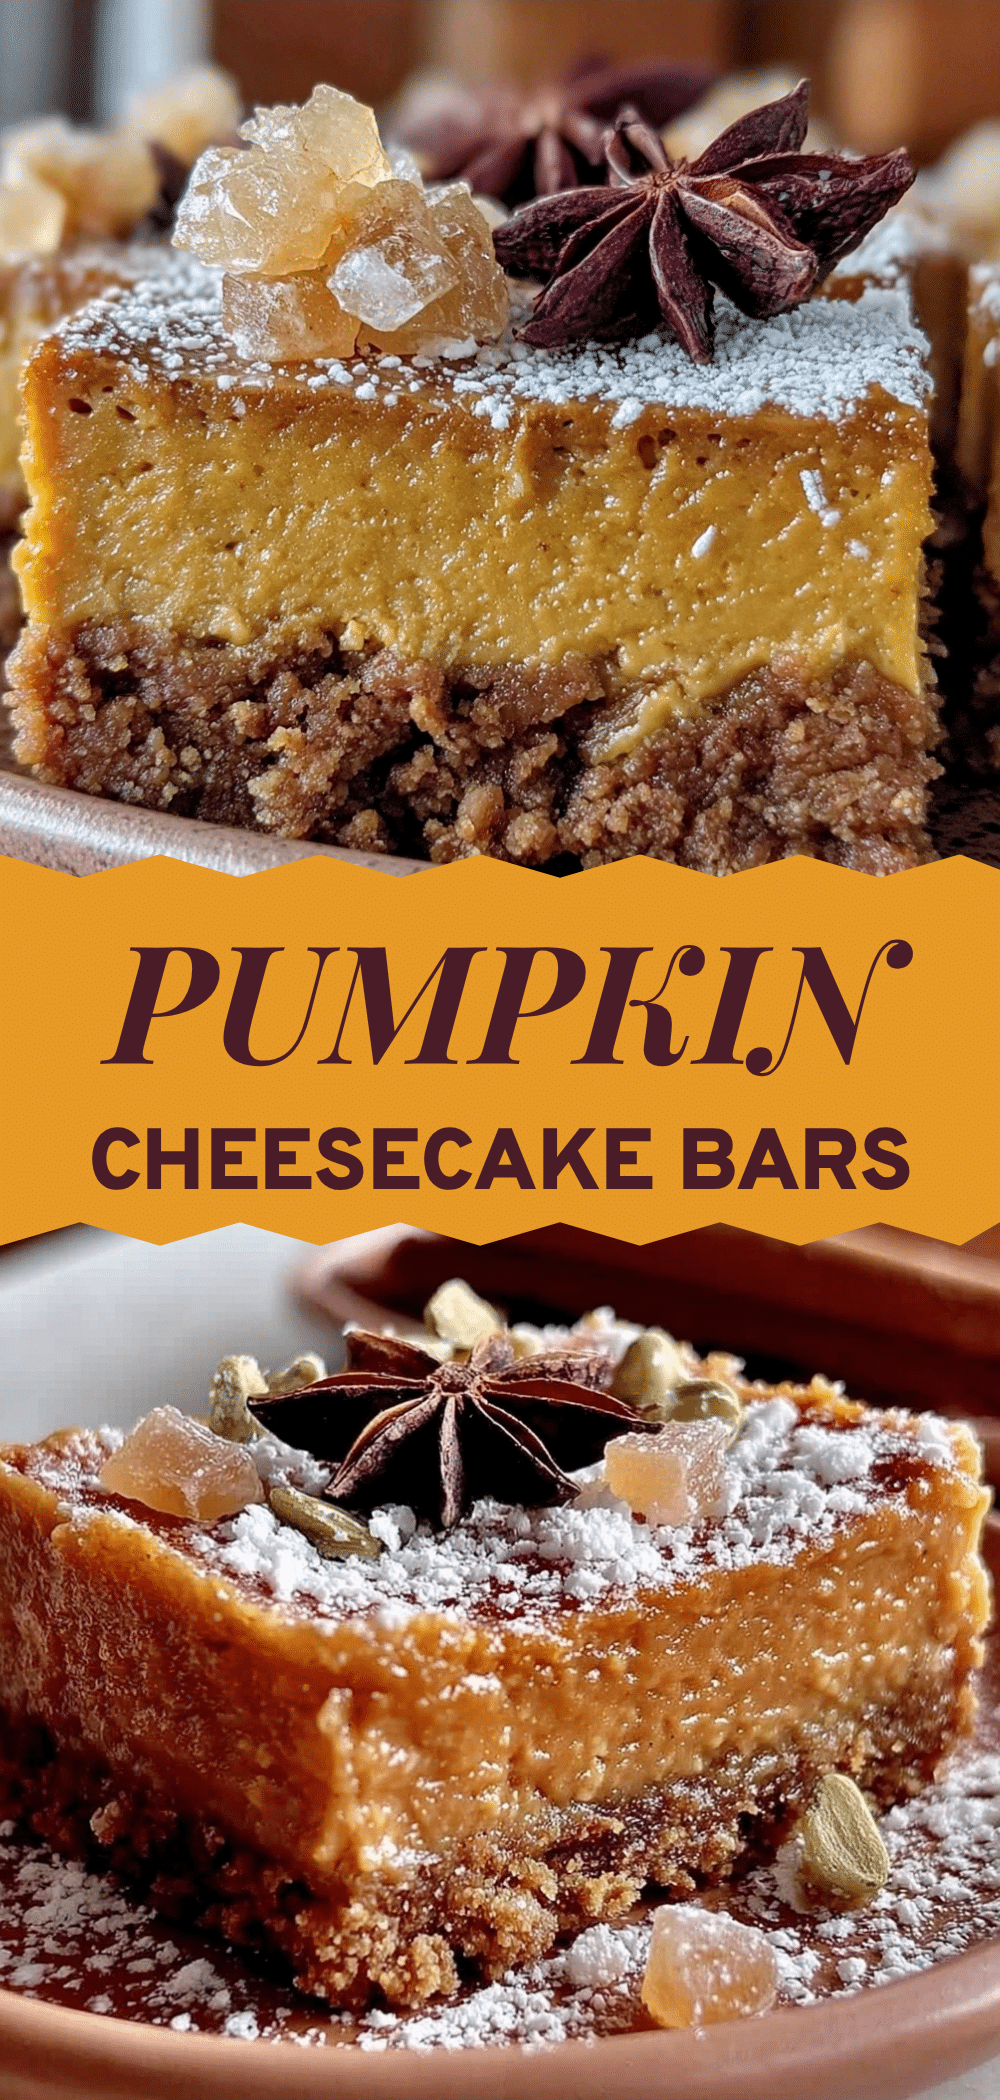
Grandma’s Fall Pumpkin Cheesecake Bars with Gingersnap Crust
- Total Time: 5 hours 5 minutes
- Yield: 24 servings 1x
Description
Rich, spiced pumpkin cheesecake bars with a crunchy gingersnap crust. This forgiving, make-ahead dessert captures the essence of autumn with real spices and a creamy texture.
Ingredients
- 32 oz (4 blocks) full-fat brick cream cheese, room temperature
- 1 cup granulated sugar
- 3 large eggs + 3 large egg yolks
- 15 oz (1 can) 100% pure pumpkin puree
- 2 cups (200g) crisp gingersnap cookies, crushed into fine crumbs
- 6 tbsp unsalted butter, melted
- 1 tsp ground cinnamon
- 1/2 tsp ground ginger
- 1/4 tsp ground nutmeg
- 1/8 tsp ground cloves
- 1/2 tsp salt
Instructions
- Preheat oven to 325°F (165°C). Line a 9×13 inch baking pan with aluminum foil, leaving an overhang on the long sides, and spray lightly with non-stick cooking spray.
- Crush gingersnap cookies into fine crumbs. In a medium bowl, mix crumbs with melted butter and a pinch of salt until it resembles damp sand.
- Press the crust mixture firmly and evenly into the bottom of the prepared pan. Bake for 5 minutes to set, then remove and let cool.
- In a large bowl, beat the room-temperature cream cheese on medium speed until completely smooth and creamy (2-3 minutes). Scrape down the sides.
- Add granulated sugar, cinnamon, ginger, nutmeg, cloves, and salt. Beat on low speed until just combined.
- Add eggs one at a time, mixing on low speed just until the yellow disappears. Add pumpkin puree and mix on low until the batter is uniform in color. Do not overmix.
- Pour batter over the cooled crust and smooth the top.
- Bake at 325°F (165°C) for 45-50 minutes. The edges should be set and slightly jiggly, while the center is mostly firm.
- Turn off the oven and crack the door open. Let bars sit in the oven for 1 hour to cool gradually.
- Remove from oven and cool completely on a wire rack. Cover and refrigerate for at least 4 hours, preferably overnight, before cutting.
Notes
Ensure cream cheese and eggs are at room temperature to avoid lumps. Do not use pumpkin pie filling; use 100% pure pumpkin puree. Strain pumpkin puree if it is watery to prevent a soggy crust. For best results, chill overnight. If cracks occur, cover with whipped cream or powdered sugar.
- Prep Time: 15 minutes
- Cook Time: 50 minutes
- Category: Dessert
- Cuisine: American
Nutrition
- Serving Size: 1 bar
- Calories: 280
- Sugar: 22
- Sodium: 210
- Fat: 18
- Saturated Fat: 10
- Carbohydrates: 28
- Fiber: 1
- Protein: 4
Keywords: pumpkin cheesecake, gingersnap crust, fall dessert, pumpkin bars, make-ahead dessert, autumn baking, cream cheese bars


