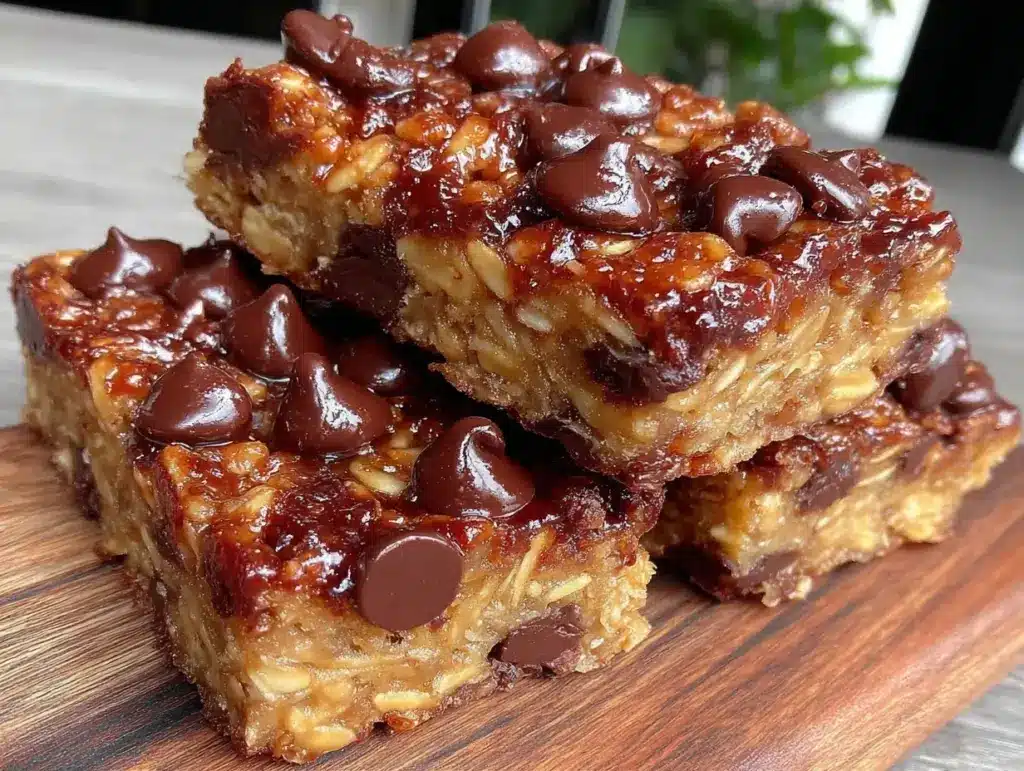
Last November, I came home from a work week that felt like it lasted three months. My brain was fried, my shoulders were up by my ears, and the thought of turning on the stove made me want to cry. I didn’t want a complex dinner. I didn’t want to clean a single pot. I just wanted to feel like I had done something good for myself. Something small, sweet, and quiet.
I opened the pantry. I had oats. I had honey. I had some dried cranberries that were slightly stale. I threw them together in a bowl, pressed them into a pan, and put them in the fridge. Thirty minutes later, I pulled out a cold, firm bar. I ate it on my couch, wrapped in a blanket, with absolutely zero expectations. It was perfect. Not because it was gourmet, but because it was gentle.
That night started a relationship with easy no bake granola bars for self care that has lasted ever since. I don’t make them for parties. I don’t make them to share (though I have, and people love them). I make them when my internal battery is at 1%. This easy no bake granola bars for self care recipe is my anchor. It’s the one to make when you need to take care of yourself, when the world feels too loud, and when you just need a moment of sweetness that doesn’t require a single minute of standing over hot oil.
There is something deeply soothing about the process. It’s tactile. You smell the toasted oats and the sticky honey. You press the mixture down with your hands, feeling the resistance of the cold pan. It’s a meditation in edible form. And the best part? You don’t need to turn on the oven. You just need a little patience and a willingness to be kind to yourself.
Why You’ll Love This Self-Care Snack
I know what you’re thinking. Granola bars? Really? But hear me out. These aren’t the dry, chalky, overly sweet bricks you find in the checkout aisle. These are chewy, rich, and deeply comforting. They are designed for the person who needs nourishment without the fuss.
Here is why this easy no bake granola bars for self care recipe has earned a permanent spot in my kitchen:
- Zero Heat Required — This is the main event. No oven, no stove, no grease splatter. If your energy is low, your kitchen tools should be too. I make these on rainy Sundays when I can’t bear the heat of the kitchen.
- Purely Tactile Comfort — Mixing and pressing these bars is strangely therapeutic. It’s a low-stakes activity that gives you something tangible to hold. It’s like kneading dough, but with less pressure and more honey.
- Customizable to Your Mood — Feeling nostalgic? Add dark chocolate. Feeling earthy? Swap in pumpkin seeds. Feeling indulgent? Add extra peanut butter. This easy no bake granola bars for self care recipe bends to your emotional needs, not the other way around.
- Make-Ahead Peace of Mind — Once they set, they’re done. You can make a batch on Sunday and have your comfort food ready for the next three weeks. It removes the decision fatigue of “what do I eat right now?”
- Wholesome Ingredients — No mystery powders. Just oats, nuts, seeds, honey, and binder. It feels good to know exactly what is fueling you, especially when you’re feeling vulnerable or run down.
- Cold and Chewy Texture — There is a specific joy in biting into a cold, firm bar. It’s refreshing and satisfying without being heavy. It’s a snack that feels like a hug.
This is my go-to when dinner needs to just work, but my spirit needs a little more than just calories. It’s about slowness. It’s about nourishment. It’s about treating yourself with the same gentleness you’d offer a friend.
Key Ingredients for Your Self-Care Bars
The beauty of this easy no bake granola bars for self care recipe lies in its simplicity. You don’t need fancy superfoods. You need staples that feel good to use. Here is what I reach for, and why.
Old-Fashioned Rolled Oats
(150g / 2.5 cups)
These are the foundation. Do not use instant oats; they turn to mush. Do not use steel-cut; they won’t bind. Old-fashioned rolled oats have the perfect chew. I buy the big canisters because they last forever, and having them on hand feels like having a safety net for my pantry. Look for organic if you can, as oats are one of the most heavily sprayed conventional crops.
Honey
(60ml / 0.25 cup)
Honey is the glue. It provides that sticky, comforting sweetness. I prefer raw, local honey because it tastes like flowers and earth, not just sugar. If you are vegan, you can substitute this with agave nectar or maple syrup, but note that maple syrup makes the bars slightly softer and more chewy, while honey gives them a firmer snap.
Nut Butter
(60g / 0.25 cup)
Peanut butter is classic, but almond butter is my personal favorite for its subtle, nutty flavor that doesn’t overpower. Creamy is better than crunchy here, as it helps bind the bars together more evenly. If your nut butter is separated, just stir it well. It’s a small act of preparation that pays off.
Dried Fruit
(50g / 0.5 cup)
Dried cranberries, cherries, or apricots add bursts of tartness and chew. I love cranberries because their tartness cuts through the sweetness of the honey and nut butter. Chop larger pieces like apricots so every bite has a little surprise. Avoid raisins; they can get too shriveled and sour in this context.
Seeds
(30g / 0.25 cup)
Chia seeds, flax seeds, or pumpkin seeds add texture and nutrition. I usually use a mix of chia and pumpkin seeds. Chia seeds absorb some of the moisture, helping the bars set firmer, while pumpkin seeds add a nice crunch. Toasting the seeds lightly in a dry pan before adding them to the mix elevates the flavor, but it’s optional if you’re tired.
Salt
(2g / 0.5 tsp)
Never skip the salt. It enhances the sweetness and balances the richness of the nut butter. I use flaky sea salt if I have it, but kosher salt works perfectly. A pinch goes a long way.
Vanilla Extract
(2ml / 0.5 tsp)
A splash of vanilla adds warmth and depth. It makes the bars smell like a bakery, even though you used no oven. Use real vanilla extract, not imitation. The scent alone is part of the self-care experience.
Tools Needed
You don’t need fancy equipment. Here’s what I use to keep things simple and low-stress.
8×8 inch Baking Pan — I use an 8×8 metal pan. Glass works too, but metal conducts heat better if you ever decide to lightly toast the mixture (though we aren’t baking). Line it with parchment paper. This is non-negotiable. It makes cleanup effortless and helps you lift the bars out later.
Large Mixing Bowl — Something wide enough to fold ingredients easily. I use a ceramic bowl because it feels nice in my hands.
Saucepan or Microwave-Safe Bowl — To melt the honey and nut butter. I prefer a small saucepan on low heat because I can watch it closely. If using a microwave, use 30-second intervals to avoid burning the honey.
Spatula — A silicone spatula is best for scraping the sticky mixture out of the bowl and pan. You’ll want to get every bit of that honey-nut goodness.
Cheese Cloth or Parchment Paper — To press the mixture down. I find pressing with my fingers works, but using parchment paper to press down evenly ensures the bars don’t crumble later.
How to Make Your Self-Care Bars
Making this easy no bake granola bars for self care recipe is about rhythm. There is no rushing. Follow these steps, and let the process ground you.
Step 1: Prep the Pan (2 minutes)
Line your 8×8 inch baking pan with parchment paper, leaving an overhang on the sides. This overhang is your handle for lifting the bars out later. Lightly grease the parchment with a tiny bit of oil or cooking spray. This ensures nothing sticks, even though the honey is sticky enough on its own.
Step 2: Combine Dry Ingredients (3 minutes)
In your large mixing bowl, combine the rolled oats, seeds, dried fruit, and salt. Mix them with a spoon until they are evenly distributed. If you are using large pieces of dried fruit, chop them now. I like to take this time to smell the oats and seeds. It’s a grounding moment. Set this bowl aside.
Step 3: Warm the Binders (3 minutes)
In a small saucepan over low heat, combine the honey and nut butter. Stir gently and constantly. You want them to melt and blend into a smooth, glossy mixture. This should take about 2-3 minutes. Do not let it boil. You just want it warm and fluid. If you are using a microwave, heat in 30-second bursts, stirring in between, until smooth. Add the vanilla extract and stir it in off the heat. The aroma will fill the room.
Step 4: Mix Everything Together (2 minutes)
Pour the warm honey-nut mixture over the dry ingredients. Use your spatula to fold everything together. You want every oat and seed coated. This might look messy at first, but keep folding. It will come together into a sticky, cohesive mass. If it feels too dry, add a teaspoon more honey. If it’s too wet, add a tablespoon more oats.
Step 5: Press and Chill (30+ minutes)
Transfer the mixture to your prepared pan. Use the parchment paper or the back of a spoon to press it down firmly. This is crucial. The tighter you press, the less likely the bars are to crumble. Aim for an even layer. Place the pan in the refrigerator for at least 30 minutes, or until firm. I usually leave them in for an hour. While they chill, you can clean your bowls. The cleanup is easy because everything is non-stick.
Step 6: Cut and Enjoy
Once firm, lift the bars out of the pan using the parchment overhang. Place them on a cutting board. Use a sharp knife to cut into squares or rectangles. Wipe the knife clean between cuts for neat edges. Store them in an airtight container in the fridge.
Total time: About 15 minutes of active work, plus 30 minutes of chilling. It’s a small investment for a big reward.
Expert Tips for Perfect Bars
I’ve made these dozens of times. Here’s everything I learned from making this too many times.
The Press Matters
This is the #1 mistake people make. If you don’t press firmly, the bars will fall apart. Use the bottom of a measuring cup or your hands (with parchment paper) to pack them down tightly. It should feel like packing sand at the beach.
Temperature Control
Don’t overheat the honey and nut butter. If it gets too hot, it can seize or become grainy. Low and slow is the way to go. You want a smooth, pourable liquid, not a bubbling mess.
Storage Reality
These bars are best kept in the refrigerator. They soften at room temperature. If you try to take them to work without a cooler, they might get messy. Keep them cold for the best texture.
Flavor Variations
Don’t be afraid to swap ingredients. If you don’t like cranberries, use raisins or chopped dates. If you hate peanut butter, use sunflower seed butter. The recipe is a framework, not a law.
Recipe Variations
Once you’ve nailed the basic version, here’s how to mix it up based on your mood or dietary needs.
Chocolate Chip Bliss
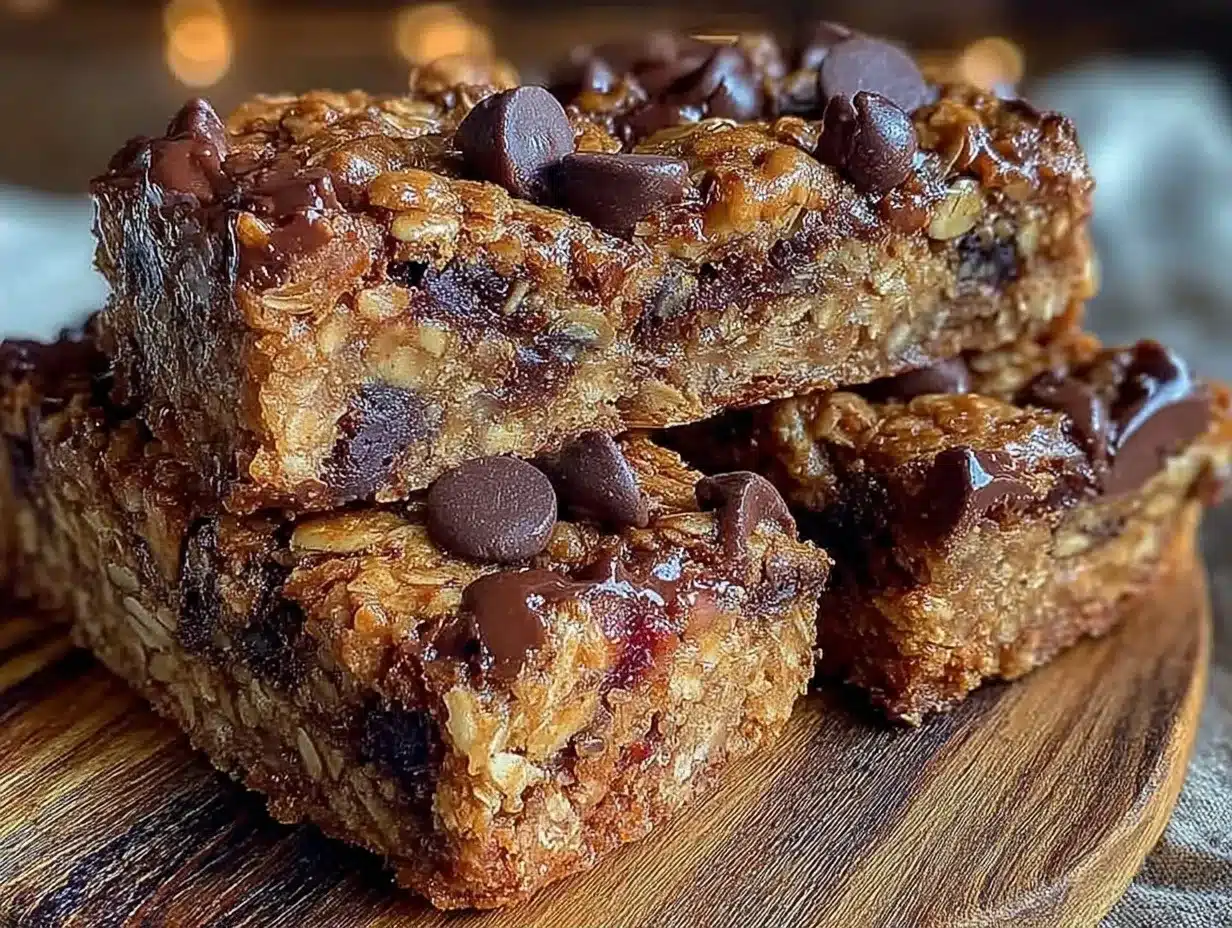
Add 0.5 cup of dark chocolate chips to the dry mix. The chocolate melts slightly in your mouth, making it feel like a dessert bar. I love this when I need a mood boost.
Coconut Love
Replace half the seeds with shredded coconut (unsweetened). It adds a tropical vibe and a nice chew. It pairs beautifully with the dried mango or pineapple.
Protein Power
Stir in 0.5 scoop of vanilla protein powder into the dry mix. You may need to add an extra tablespoon of nut butter or honey to compensate for the dryness. Great for post-workout recovery.
Vegan Option
Swap honey for agave nectar and ensure your nut butter is vegan. The texture will be slightly softer, so chill for a longer period, maybe 2 hours.
Serving & Storage
Serving: These are best eaten cold. I often pair them with a cup of herbal tea or black coffee. They make a perfect afternoon snack to combat the 3pm slump. They also travel well in a lunchbox, provided they stay cool.
Storage: Keep them in an airtight container in the refrigerator for up to 2 weeks. They freeze beautifully for up to 3 months. I often freeze individual bars for quick grab-and-go snacks. Thaw them in the fridge for 15 minutes before eating.
Do not store them at room temperature for more than a few hours, as the nut butter and honey can make them too soft or sticky.
Nutrition Information
I’m not a nutritionist, but here’s the breakdown per bar (makes 12 bars).
| Nutrient | Amount |
|---|---|
| Calories | 180 |
| Protein | 5g |
| Carbs | 22g |
| Fiber | 3g |
| Fat | 9g |
| Sodium | 60mg |
My Take: This is a wholesome snack. It’s not low-calorie, but it’s nutrient-dense. The oats provide sustained energy, the nuts provide healthy fats, and the honey gives a quick sugar boost. It’s better than processed granola bars and you know exactly what’s in it. It’s fuel for your body and comfort for your soul.
Final Thoughts
Making these easy no bake granola bars for self care is more than just cooking. It’s a small ritual of kindness. In a world that demands we always be productive, taking 15 minutes to make something gentle for yourself is a radical act.
If you make this, drop a comment! I love hearing how it turns out in your kitchen. Did you add chocolate? Did you eat one on the couch immediately? I want to know. Share your variations and your stories. Let’s create a community of slow, mindful eating.
Happy cooking!
FAQs
Can I use instant oats instead of rolled oats?
I don’t recommend it. Instant oats are too fine and will make the bars mushy and dense. Rolled oats provide the necessary chew and structure. If you only have quick oats, you can use them, but the texture will be different. Stick to old-fashioned for the best results.
Why did my bars fall apart?
This usually happens if you didn’t press them down firmly enough, or if you didn’t let them chill long enough. Make sure you pack them tightly into the pan and refrigerate for at least 30 minutes, preferably longer. Also, check that your honey and nut butter mixture was warm enough to bind everything together.
Can I make these ahead of time?
Yes! In fact, they taste better after a day or two in the fridge as the flavors meld. You can make them up to 2 weeks in advance. Just keep them in the fridge.
Are these gluten-free?
Yes, as long as you use certified gluten-free oats. Oats are naturally gluten-free, but they are often processed in facilities that handle wheat. Check your oat package for a gluten-free label if you have celiac disease or sensitivity.
Can I substitute the honey?
Yes, you can use maple syrup or agave nectar. Keep in mind that these liquids are thinner than honey, so you might need to add a bit more oats or chill the bars for a longer time to ensure they set properly.
What if I don’t have a mixing bowl?
You can mix everything directly in the pan if you’re feeling lazy. Warm the honey and nut butter in the pan itself (if it’s metal or microwave-safe), then stir in the dry ingredients. It’s less elegant, but it works.
Pin This Recipe!
Easy No Bake Granola Bars: Best Self Care Snack
- Total Time: 45 minutes
- Yield: 12 servings 1x
Description
A gentle, no-bake granola bar recipe designed for self-care, featuring chewy oats, honey, and nut butter that requires zero oven time and offers customizable comfort.
Ingredients
- 150g (2.5 cups) Old-Fashioned Rolled Oats
- 60ml (0.25 cup) Honey
- 60g (0.25 cup) Nut Butter (Peanut or Almond)
- 50g (0.5 cup) Dried Fruit (Cranberries, Cherries, or Apricots)
- 30g (0.25 cup) Seeds (Chia, Flax, or Pumpkin)
- 2g (0.5 tsp) Salt
- 2ml (0.5 tsp) Vanilla Extract
Instructions
- Line an 8×8 inch baking pan with parchment paper, leaving an overhang on the sides, and lightly grease the parchment.
- In a large mixing bowl, combine the rolled oats, seeds, dried fruit, and salt; mix until evenly distributed.
- In a small saucepan over low heat (or microwave in 30-second intervals), warm the honey and nut butter until smooth and fluid; stir in vanilla extract off the heat.
- Pour the warm honey-nut mixture over the dry ingredients and fold with a spatula until every oat and seed is coated.
- Transfer the mixture to the prepared pan and press down firmly and evenly using parchment paper or the back of a spoon.
- Refrigerate for at least 30 minutes, or until firm.
- Lift the bars out of the pan using the parchment overhang and cut into squares or rectangles with a sharp knife.
Notes
Press the mixture firmly to prevent crumbling. Store in the refrigerator for up to 2 weeks or freeze for up to 3 months. Do not store at room temperature for long periods as they may become too soft. For vegan option, substitute honey with agave nectar or maple syrup.
- Prep Time: 15 minutes
- Cook Time: 0 minutes
- Category: Snack
- Cuisine: American
Nutrition
- Serving Size: 1 bar
- Calories: 180
- Sodium: 60
- Fat: 9
- Carbohydrates: 22
- Fiber: 3
- Protein: 5
Keywords: no bake granola bars, self care snack, healthy snack, easy recipe, gluten free option, oat bars, honey granola


